Brief Description: Fixing the door strips. - Part 3.
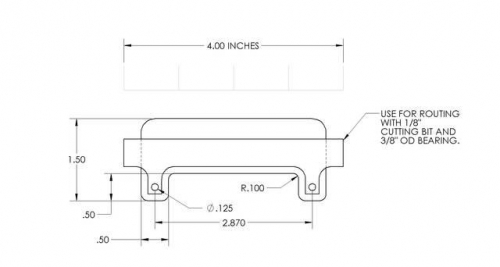
Using the origninal strips supplied with the kit, I copied the pattern of the tabs. After drawing this on my copmputer at work I offset the edges 3/16" and made a set of 3D prints to be used as a template. One had the original geomoetry, and the other with the offset shape. This could easily be made of wood or alumimnum and it would be more durable than my 3D print, which started to show pretty good wear towards the end of the process.
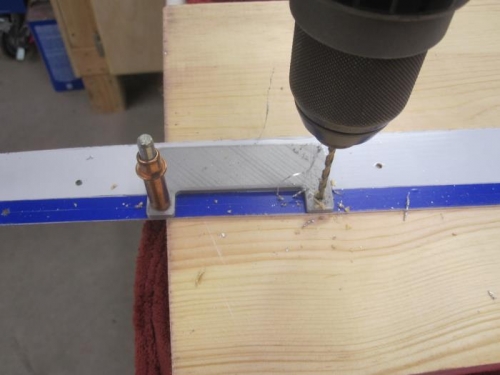
I used the first 3D print as a template to drill the new holes at the bottom of the strip. I located the first hole using the kit supplied strip. Then I lined the inner edge of the template with the mark I made at the top of the cross member and drilled the holes moving the template one hole at a time.
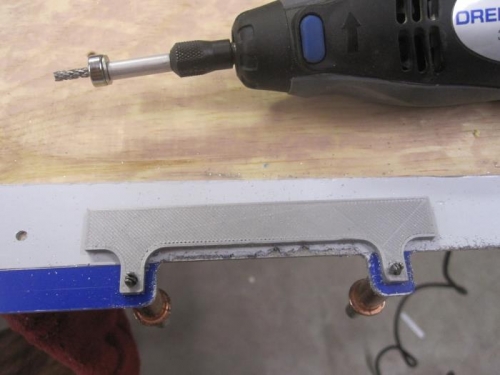
Then I made a router set up with a dremel, 1/8" cutting bit, and a 3/8" bearing. Using the offset template I routed the shape to create the bottom edge of the new strip.