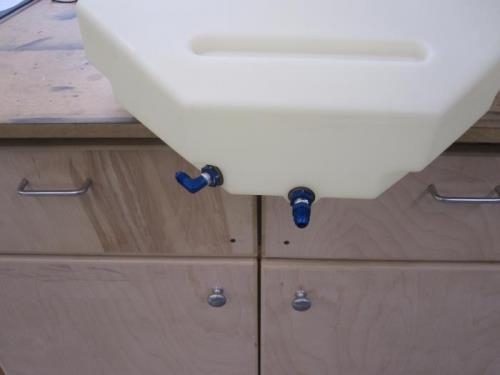
* I drilled the holes following the instructions using a small drill for a pilot, and a step drill to create nice round holes. My step drill was not long enough for the upper hole, so I put a 1/4" socket in the drill, and then inserted the hex shaft of the step drill in the socket for an extended reach.
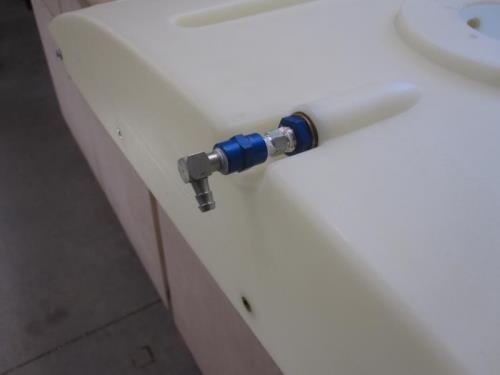
* It took me a while to become comfortable with tightening the second set of fittings without letting the first set turn and possibly ruin the rubber washers. After some fiddling, I got them all where I wanted them. Some of the tricks I used were - An extended reach socket clamped in a vice grip with an allen wrench through the middle (Idea stolen from Glenn Mathis...) -- Clamping the visible threads of the fitting inserted through the tank with a needle nose vise grips to keep it from turning, and using the thin 3/4" wrench that came with my grinder to eliminate interference with the needle nose vise grip clamped on the 1/2" washer.
* I tightened one of the 3/4" nuts enough to break one of the internal fittings, so know that it is easily done.
* Once everything was in I let it sit for a day for the loctite and Dow 730 to set up, and then plugged the fittings and filled with water to make sure nothing leaked -- Success!!
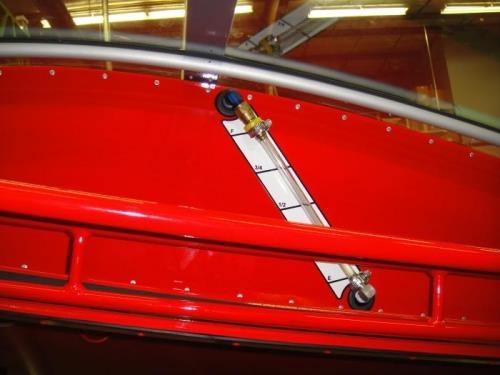
* I chose to use a barbed 90 degree fitting at the top of the fuel gauge instead of the AN threaded elbow with a straight adapter. I wanted to see the fuel level all the way to the top, and I was able to eliminate a fitting which sounded like a good thing. The elbow is the same as supplied for the bottom of the gauge, and I simply ordered an extra set from Rans.