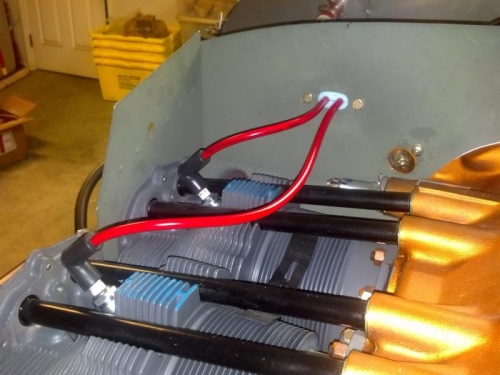
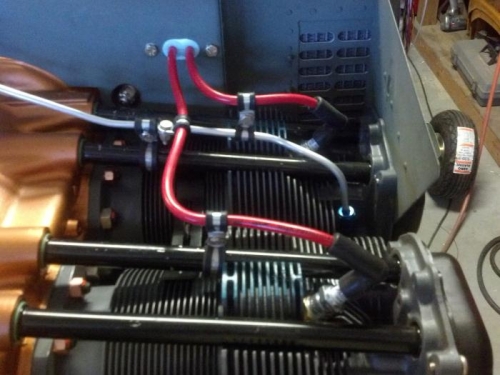
Cut the access through the baffles for the plug wires. Installed the pass thru and bolted in place. Installed the spark plugs. Terminated the wires for the left EMAG-P to the switched panel / grounding block. Installed the vacuum line. Powered the system up, and timed the mag per EMAG Manual. Everything worked as planned. I still need to secure the plug wires as I did on the left side
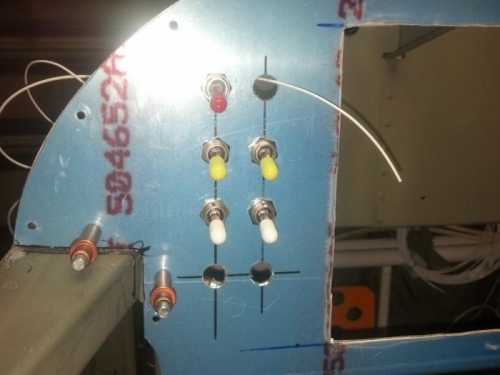
I know things look a little rough, but they usually do at this stage... Switch layout is as described: Red: Master Upper Right: Switch for ALT 1 (Up) and ALT 2 (Down) Yellow: 12v to EMAGs Left / Right White: P-Leads to EMAGs Left / Right Lower left: Avionics Master Lower Right: Pilot Heat
I have not decide where I will install the Starter switch yet... Possibly, Centered below the Avionics / Pitot Switches? Maybe on the stick? The VP-X Pro disables the starter when it senses 600rpm, so the stick is an option... We will see...