FITTING THE TANK SKINS TO THE RIBS AND REAR BAFFLE Complete any remaining rib preparation details. Bend flanges 900 and flute ribs. Use a square to check the flanges anda straight edge and/or skin to check the ribs for rivet hole alignment. Make all T-711 A through D stiffeners as shown on DWG 16A. Round all stiffener corners, deburr edges, then cleco and final drill them to the T-701 skin.
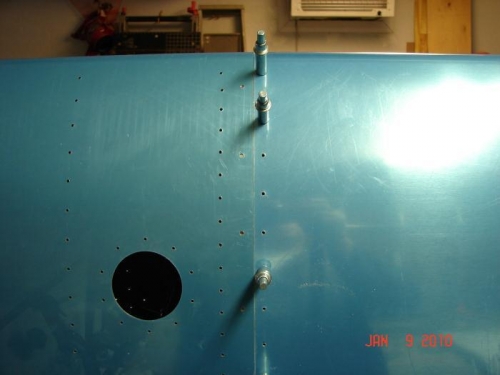
Cleco the tank skin to the baffle (still fastened to the spar and the wing spar. The fit between the spar, baffle, tank skin and leading edge should be perfect. If not, elongate the holes in the baffle inboard or outboard as necessary to allow the baffle holes to align with the T-701 holes when T-701 is clecoed to the spar.
Remove the T-701 skin and cleco all the tank ribs to the baffle. Drill the rib/baffle/attach bracket holes full size. Use a drill stop to prevent damaging the spar. Remove the vinyl from the inside of the tank skin and cleco the skin to the ribs, baffle and spar. Match drill T-701 to W-423.
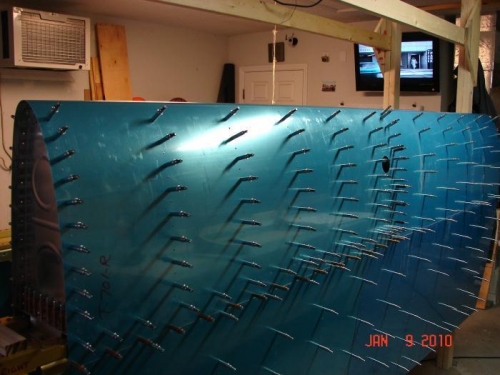
Remove the clecoed tank assembly from the wing, and drill all rivet holes to final size. Doing so off the wing prevents accidentally drilling into the spar.
I had no issues fitting the tank skin after the prep from last evening. Fitting the ribs to the skin was not as easy as what I would have liked. I tweaked and straightened and clecoed all the ribs to skin. The fit to the wing spar was really nice. I matched drilled the T-701 tank skin to W-423 and then matched drilled the skin to the ribs.