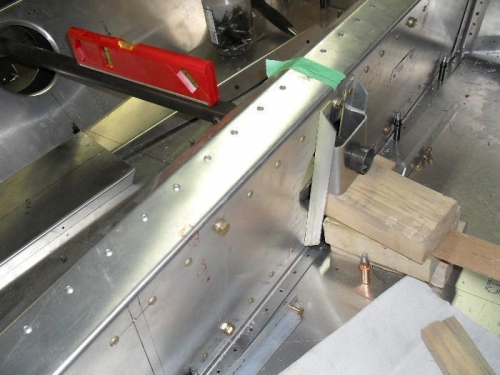
This is one of those dog jobs that takes longer than it should.
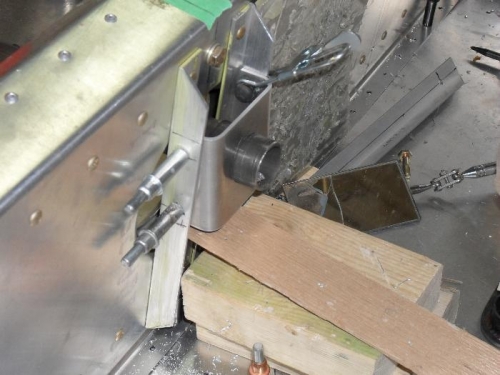
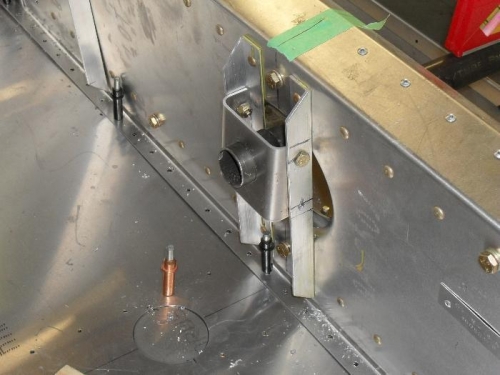
1. Located center of face in part 6B17-6. 2. Punched center, and pilot drilled on press with #40 bit. 3. Opened center hole with 1" hole saw. 4. Worked opening to 1-1/8" with circular sander. 5. Slipped over torque tube 6B17-4, and positioned on front of carry-through spar. 6. Moved 6B17-6 up and down until it 6B17-4 was level, then marked location. 7. Marked angle on side of 6B17-6. 8. Removed 6B17-6 from aircraft, and marked area to be removed. 9. Made rough cut on bandsaw. 10. Cleaned up edge on belt sander. 11. Replaced 6B17-6 over torque tube, and chedked torque tube level. 12. Clamped 6B17-6 in position. 13. Marked position of bolt holes mating 6B17-6 to wing carry through spar. 14. Punched holes, and pilot drilled with #40 bit. 15. Opened pilot holes with 3/16" bit. 16. Temporarily installed two AN3-4A bolts and lock nuts to hold 6B17-6 in position.