Date
|
Hours
|
Work Log Summary

|
Details

|
08-13-2014
|
3.00
|
Installed nut plates for battery cage
|
Details
|
   |
|
08-02-2014
|
0.70
|
Patched old battery vent hole
|
Details
|


|
|
07-26-2014
|
2.30
|
Set rudder deflection & tensioned cables
|
Details
|
   |
|
07-22-2014
|
3.50
|
Adjusted elevator deflection & cable tension
|
Details
|


|
|
06-18-2013
|
0.10
|
Installed document holder
|
Details
|

  |
|
06-18-2013
|
2.10
|
Created interior canoy handles
|
Details
|


 |
|
06-15-2013
|
1.20
|
Installed shim under striker plates
|
Details
|


 |
|
06-15-2013
|
1.80
|
Installed canopy guides
|
Details
|


 |
|
06-06-2013
|
0.90
|
Installed aircraft data p[ate
|
Details
|

  |
|
04-16-2013
|
3.00
|
Troubleshot & repaired door latch
|
Details
|

  |
|
02-16-2013
|
10.10
|
Finished co-pilot seat
|
Details
|


|
|
02-04-2013
|
7.90
|
Installed new canopy
|
Details
|


|
|
11-13-2012
|
10.50
|
Reinstalled canopy frame
|
Details
|


 |
|
10-06-2012
|
2.90
|
Connected fuel line and fuel senders
|
Details
|


|
|
08-21-2012
|
4.30
|
Installed rudder
|
Details
|


 |
|
06-25-2012
|
4.50
|
Installed new canopy
|
Details
|


|
|
06-19-2012
|
1.90
|
Worked on fiberglassing cowling
|
Details
|


 |
|
06-11-2012
|
3.20
|
Routed fuel line and passed through firewall
|
Details
|
   |
|
05-17-2012
|
2.10
|
Began installation of seat surface.
|
Details
|


|
|
05-16-2012
|
1.70
|
Installed fropnt and side panels on seat
|
Details
|


|
|
05-16-2012
|
0.90
|
Attached velcro strips to canvas back and seat sli
|
Details
|


 |
|
05-15-2012
|
1.10
|
More interior upholstry
|
Details
|


 |
|
05-14-2012
|
2.80
|
Began upholstry of interior
|
Details
|


 |
|
05-13-2012
|
1.70
|
Fit check of upholstry parts
|
Details
|


|
|
05-07-2012
|
1.80
|
Worked on finish interior
|
Details
|


 |
|
05-06-2012
|
2.10
|
Started cutting pattern for seat covers
|
Details
|

  |
|
05-03-2012
|
2.10
|
Added mount for Lightspeed control
|
Details
|
   |
|
04-20-2012
|
2.70
|
Built foam seat cushions on passenger side
|
Details
|


|
|
04-17-2012
|
5.00
|
Worked on upholstry
|
Details
|


|
|
04-16-2012
|
3.00
|
Began cutting foam for seat cushions
|
Details
|


 |
|
03-16-2012
|
0.50
|
Fit check cowling
|
Details
|


 |
|
02-14-2012
|
2.50
|
Updated seat drawings & cut seat backs
|
Details
|
   |
|
02-14-2012
|
2.50
|
Fabricated and installed seat back clips
|
Details
|


|
|
02-09-2012
|
3.50
|
Started drawings of seat upholstry
|
Details
|


|
|
09-16-2011
|
8.00
|
Shot clear coat on aircraft
|
Details
|
   |
|
09-09-2011
|
6.00
|
Painted lower cowl
|
Details
|


 |
|
09-02-2011
|
6.00
|
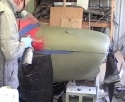
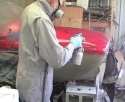
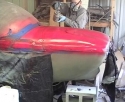
Primed and painted upper cowl
|
Details
|
|
|
08-19-2011
|
16.00
|
Added oil filler access door
|
Details
|


|
|
08-12-2011
|
80.00
|
Fine fit engine cowlings
|
Details
|


|
|
07-15-2011
|
8.10
|
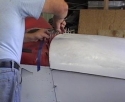
Designed and fabbed cowling attachments
|
Details
|


|
|
07-09-2011
|
3.90
|
Prepared for installation of upper cowl
|
Details
|


|
|
07-06-2011
|
8.00
|
Installed lower cowl attachments
|
Details
|


|
|
07-02-2011
|
6.50
|
engine cowling preparation
|
Details
|


|
|
07-01-2011
|
1.00
|
Installed "N" number markings
|
Details
|


|
|
06-25-2011
|
1.00
|
Installed seat belts and shoulder harnesses
|
Details
|


|
|
06-20-2011
|
0.50
|
Put protective strip along top of instrument panel
|
Details
|


 |
|
06-20-2011
|
0.30
|
Installed rubber strip on aouminum closeout
|
Details
|


 |
|
06-20-2011
|
1.00
|
Forced canopy to conform to side closeout
|
Details
|


|
|
06-18-2011
|
2.50
|
Installed weather seal and experimental logo
|
Details
|


|
|
06-17-2011
|
2.90
|
Applied more paint, secured canopy hinge
|
Details
|

  |
|
06-16-2011
|
1.50
|
Painted bottom; removed masking
|
Details
|


|
|
06-15-2011
|
3.10
|
Primed under fuselage, painted sides white
|
Details
|


 |
|
06-13-2011
|
3.00
|
Cleanup, taping for primer on bottom and white on
|
Details
|
   |
|
06-11-2011
|
1.75
|
painted upper half of fuselage red
|
Details
|


|
|
06-10-2011
|
2.50
|
Primed upper fuselage
|
Details
|
   |
|
06-09-2011
|
2.00
|
Touched up cockpit trim
|
Details
|
   |
|
06-08-2011
|
1.00
|
Add door handles
|
Details
|


 |
|
06-02-2011
|
0.50
|
Painted top of instrument panel
|
Details
|


 |
|
06-01-2011
|
0.50
|
Rivet outside flashing
|
Details
|


|
|
06-01-2011
|
5.30
|
Install canopy
|
Details
|


|
|
05-30-2011
|
0.50
|
Dimple outside flashing
|
Details
|


 |
|
05-28-2011
|
2.10
|
Mount canopy rail
|
Details
|


|
|
05-27-2011
|
2.10
|
Corrected rear canopy frame installation
|
Details
|


|
|
05-26-2011
|
2.50
|
Built replacement 6C3s
|
Details
|


|
|
10-01-2010
|
2.50
|
Installed saddle 6B21-5
|
Details
|


|
|
09-28-2010
|
1.00
|
Riveted fwd top skin in place
|
Details
|


|
|
09-24-2010
|
1.10
|
Riveted support channel in place
|
Details
|


 |
|
09-15-2010
|
4.00
|
Added access to top of instrument panel.
|
Details
|


|
|
09-10-2010
|
8.00
|
Installed fuel lines and tank sensor line to cente
|
Details
|


 |
|
09-08-2010
|
2.20
|
Painted interior canopy frame
|
Details
|


|
|
09-07-2010
|
1.00
|
Installed scat between air vent and eyeball outlet
|
Details
|


 |
|
08-25-2010
|
1.20
|
Mounted fresh air vents in panel
|
Details
|


 |
|
08-20-2010
|
4.00
|
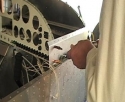
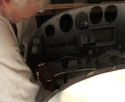
Riveted control panel in place, began integrating
|
Details
|
 |
|
08-04-2010
|
1.50
|
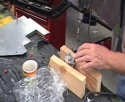
Mounted gascolator
|
Details
|

 |
|
07-27-2010
|
0.50
|
Installed inside canopy flashing
|
Details
|

  |
|
07-24-2010
|
1.50
|
Install inside angle
|
Details
|


 |
|
07-22-2010
|
1.70
|
Prepare outside falshing for installation
|
Details
|

  |
|
07-20-2010
|
2.80
|
Cut inside flashing to fit
|
|


|
|
07-17-2010
|
1.50
|
Installed the rear canopy frame
|
Details
|


 |
|
06-22-2010
|
2.90
|
Installed nut plates to fasten bottom fuselage acc
|
Details
|


 |
|
06-21-2010
|
20.50
|
Fabricating the rear canopy frame
|
Details
|


|
|
06-08-2010
|
1.30
|
Route canopy lock cable
|
Details
|


|
|
06-08-2010
|
2.50
|
Position and install front canopy frame
|
Details
|


|
|
06-08-2010
|
0.60
|
Install canopy lock
|
Details
|


|
|
05-13-2010
|
0.80
|
Added engine mount
|
Details
|


|
|
05-13-2010
|
2.50
|
Added canopy mount arm
|
Details
|


|
|
05-05-2010
|
5.30
|
Added nutplates to mount center console
|
Details
|


 |
|
05-04-2010
|
6.10
|
Added front top skin
|
Details
|


|
|
05-02-2010
|
4.20
|
Riveted rear top skins in place
|
Details
|


|
|
04-30-2010
|
3.10
|
Clecoed middle top skin in place
|
Details
|


|
|
04-29-2010
|
2.10
|
Added stiffners and provisions for ELT antenna; mo
|
Details
|


|
|
04-28-2010
|
0.80
|
Clecoed tube frames in place
|
Details
|


|
|
04-27-2010
|
2.30
|
Started installation of lower fuselage access door
|
Details
|


 |
|
04-27-2010
|
5.30
|
Installed baggage floor
|
Details
|


|
|
04-26-2010
|
1.90
|
Built & installed ELT access panel
|
Details
|


|
|
04-01-2010
|
2.50
|
Fit and clecoed support channel
|
Details
|


|
|
03-30-2010
|
1.00
|
Trimmed, cut, fit, clecoed Center Console
|
Details
|


 |
|
03-30-2010
|
2.50
|
Cut, fit, & clecoed port side fairing
|
Details
|


 |
|
03-29-2010
|
4.30
|
Cut & clecoed stbd side fairing
|
Details
|


|
|
02-20-2010
|
0.40
|
Add vent lines to battery box
|
Details
|


 |
|
01-30-2010
|
1.30
|
installed lower rudder fairing
|
Details
|


|
|
01-29-2010
|
2.50
|
Install upper rudder bearing
|
Details
|

  |
|
01-03-2010
|
0.50
|
Deburr, clean, prime rear top skin
|
Details
|


 |
|
01-03-2010
|
0.80
|
Cut rear top skin to mate with horizontal stabiliz
|
Details
|


|
|
12-31-2009
|
0.80
|
clean and prime stiffners, fwd aft skin
|
Details
|

  |
|
12-30-2009
|
1.50
|
Install comm and gps antenna stiffners
|
Details
|


|
|
12-28-2009
|
1.50
|
Install fwd aft skin stringers
|
Details
|
 

|
|
12-26-2009
|
11.50
|
Install aft fwd skin
|
Details
|


|
|
12-25-2009
|
9.10
|
Install second tube frame
|
Details
|


 |
|
12-12-2009
|
5.30
|
Drilled and installed first tube frame
|
Details
|


|
|
12-10-2009
|
2.50
|
Drilled and clecoed top rear to fuselage side
|
Details
|


|
|
12-09-2009
|
1.70
|
installed rear top skin
|
Details
|


 |
|
12-09-2009
|
2.10
|
drilled upper tail section
|
Details
|


|
|
11-03-2009
|
1.00
|
Riveted port fwd side skin in place
|
Details
|


|
|
11-03-2009
|
1.40
|
Riveted pilot's front seat panel and seat bottom i
|
Details
|


|
|
11-02-2009
|
6.00
|
Trim and hang forward side skins
|
Details
|


|
|
11-02-2009
|
0.90
|
Fab & Install lower elevator fairlead
|
Details
|


|
|
10-31-2009
|
2.20
|
Riveted seat back assembly in place
|
Details
|
   |
|
10-31-2009
|
0.50
|
Riveted rudder cable fair leads in place
|
Details
|

  |
|
10-31-2009
|
0.30
|
Reinstalled firewall assembly
|
Details
|

  |
|
10-30-2009
|
1.20
|
Riveted rear frame channel in place
|
Details
|


|
|
10-30-2009
|
1.10
|
Riveted arm rest sides in place
|
Details
|


|
|
10-30-2009
|
0.60
|
Riveted 6B19-9 to 6B16-3 and rear seat panel
|
Details
|


|
|
10-30-2009
|
0.50
|
Riveted 6B16-5, 6B19-10, and 6B17-1 to rear seat p
|
Details
|


 |
|
10-29-2009
|
2.50
|
Riveted rudder pedals and brakes in place.
|
Details
|


|
|
10-29-2009
|
0.60
|
Join front and rear floors with gear channel
|
Details
|


 |
|
10-29-2009
|
1.60
|
Cut fairleads 6B23-2, -3, and -4
|
Details
|


|
|
10-28-2009
|
1.10
|
Riveted lower forward longerons in place
|
Details
|
   |
|
10-28-2009
|
0.80
|
Riveted floor channels in place
|
Details
|


 |
|
10-27-2009
|
19.70
|
Disassaembled parts in front area, deburred, clean
|
Details
|


|
|
10-18-2009
|
3.60
|
installed control connection on center spar.
|
Details
|


|
|
10-17-2009
|
0.00
|
Milestone
|
Details
|


 |
|
10-17-2009
|
0.70
|
Installed closeout/brace at lower port end of pilo
|
Details
|


|
|
10-17-2009
|
2.50
|
Install upper fuselage longeron doublers
|
Details
|


|
|
10-16-2009
|
2.40
|
Install flap actuator mount
|
Details
|


 |
|
10-15-2009
|
1.30
|
Install seat bottoms
|
Details
|


|
|
10-15-2009
|
1.35
|
Install outboard seat belt attach
|
Details
|


 |
|
10-15-2009
|
0.70
|
Install arm rest cover
|
Details
|


 |
|
10-14-2009
|
0.90
|
Inboard seat belt reinforcement
|
Details
|


|
|
10-13-2009
|
2.10
|
Lower engine mount
|
Details
|


|
|
10-12-2009
|
0.90
|
Installed rolled gussets
|
Details
|


|
|
10-12-2009
|
2.30
|
Installed gussets 6B15
|
Details
|


 |
|
10-11-2009
|
3.20
|
Added vertical and side stiffners to forward fusel
|
Details
|


|
|
10-10-2009
|
2.70
|
Clecoed upper edges of 6B10-1 to lower edge of sid
|
Details
|


|
|
10-07-2009
|
2.00
|
Prepare to attach 6B10-2 to side skins
|
Details
|


 |
|
10-05-2009
|
2.00
|
Install front seat panels
|
Details
|


 |
|
10-04-2009
|
3.00
|
Fabricate front seat panel stiffners
|
Details
|


|
|
10-02-2009
|
2.00
|
Installed 6B17-6
|
Details
|


|
|
10-02-2009
|
0.50
|
Install aileron control horn
|
Details
|

  |
|
10-01-2009
|
1.50
|
Installed 6B17-1 and 6B17-3
|
Details
|


|
|
09-30-2009
|
0.50
|
Drilled holes in bulkhead for aft skin
|
Details
|


|
|
09-26-2009
|
0.70
|
Secure back baggage floor to fwd bulkhead
|
Details
|


|
|
09-26-2009
|
0.90
|
Opened baggage side support rivets to A4
|
Details
|


 |
|
09-26-2009
|
0.80
|
Make aft upper longeron splices
|
Details
|


 |
|
09-26-2009
|
1.10
|
Attach forward baggage floor to baggage floor sup
|
Details
|


 |
|
09-26-2009
|
0.90
|
Add fwd baggage floor closeouts
|
Details
|


|
|
09-25-2009
|
2.00
|
Replaced upright channels and installed upper chan
|
Details
|
   |
|
09-25-2009
|
2.00
|
Attached baggage floor to upper channel
|
Details
|
   |
|
09-25-2009
|
1.50
|
Attached baggage floor to fore-aft stiffners
|
Details
|

  |
|
09-24-2009
|
2.00
|
Connected baggage side supports to baggage floors
|
Details
|

  |
|
09-21-2009
|
2.00
|
Worked on baggage floor support installation
|
Details
|


 |
|
09-19-2009
|
1.50
|
Preparation of baggage floor for installation
|
Details
|


|
|
09-19-2009
|
1.10
|
Catching up on lost rivets, part 2
|
Details
|

  |
|
09-19-2009
|
1.20
|
Added fairlead to Middle bulkhead
|
Details
|


|
|
09-17-2009
|
1.50
|
Installed aft fuselage bulkhead and marked locatio
|
Details
|


|
|
09-17-2009
|
1.50
|
Clecoed remaining bulkheads in place
|
Details
|


 |
|
09-17-2009
|
1.50
|
Added stiffners to bulkhead 6B12-2.
|
Details
|


|
|
09-15-2009
|
1.30
|
Catching up on lost rivets, part 1
|
Details
|


 |
|
09-15-2009
|
2.20
|
Added stiffner to seat back, and center seat back
|
Details
|


|
|
09-14-2009
|
1.50
|
Opened holes around Gear attach, port and stbd
|
Details
|


|
|
09-14-2009
|
1.20
|
Install vertical channels
|
Details
|


|
|
09-14-2009
|
1.00
|
Drill 5/16" bolt holes in wing uprights
|
Details
|


|
|
09-12-2009
|
0.50
|
Open upper port longeron and gear upright holes to
|
Details
|

  |
|
09-12-2009
|
1.50
|
install stbd wing attachment uprights
|
Details
|


|
|
09-12-2009
|
0.50
|
Install port gussets
|
Details
|


|
|
09-12-2009
|
1.00
|
Install lower gusset
|
Details
|


|
|
09-12-2009
|
0.50
|
fabricate and install wing jig port side
|
Details
|


 |
|
09-12-2009
|
1.50
|
Drill additional holes in main gear mount
|
Details
|


 |
|
09-11-2009
|
0.80
|
installed gear uprights
|
Details
|


|

