
|

|
|
|
Jims Web Site
|
Date: 8-12-2011
|
Number of Hours: 80.00
|
Manual Reference: (none)
|
Brief Description: Fine fit engine cowlings
|
|
Once I had a concept for mounting the engine cowl, I spent days getting the cowl to fit. I'd trim a little off one side, then need to fiberglass a bit more somewhere else. Next to the canopy, this was the most tedious part of the building.
When I finally had a fit:
1. Drilled #40 holes to mount the lower half of the cowl to the fuselage, and clecoed in place.
2. Opened holes, one by one, with a #30 bit, then removed lower cowling.
3. Clecoed anchor nuts into mounting holes.
4. Drilled rivet holes, using anchor nuts as templates, using #40 bit.
5. Deburred holes, and primed.
6. RIveted anchor nuts in place with A3 flush Avex rivets.
7. Opened screw hole for anchor nuts in mounting surface with #20 bit.
8. Mounted lower engine cowl in place with #10 machine screws.
9. Positioned upper cowling, and repeated the trim/fiberglass process experienced on the lower cowling.
10. Installed .040 aluminum rail inside the upper part of the lower cowl to install the DZUS fasterers. Riveted in place with A4 Avex rivets.
11. With the upper cowling in place, drilled mounting holes for DZUS fasteners. Drilled each with #40 bit and clecoed in place.
12. Iteratively installed DZUS fasteners at each location. IE, install one, DZUS in place, and do the next:
A. Open #40 hole with bit to clear DZUS body.
B. Using a DZUS fastener in the hole, position the retaining spring.
C. Drill #40 holes in the retaining spring mounting holes.
D. Remove spring and fastener.
E. Open the fasten hole with a bit 3 steps larger than that used to drill the hole.
F. Debur and prime.
G. Rivet the spring in place.
H. Replace the upper cowl, and check the fit.
|
|
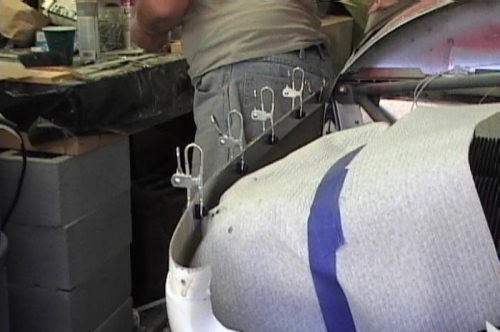
Mounting the aluminum mouting rail
|
|
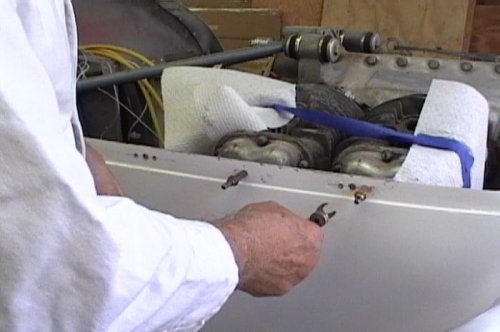
Installing the springs
|
|
Installing the springs
|
|
|
|
|
|
|
|
|
Copyright © 2001-2024 Matronics. All Rights Reserved.
|