
|

|
|
|
Jims Web Site
|
Date: 8-19-2011
|
Number of Hours: 16.00
|
Manual Reference: none
|
Brief Description: Added oil filler access door
|
|
I feel that an oil filler access door is a must, although none was shown in the plans. I measured the size of my hand, and reasoned that the opening must be just large enough to allow my hand through, and no larger. The door itself would need to be slightly lareger than this, so it would fully cover the opening.
1. Created drawings of assembly.
2. Cut door template from .024 aluminum.
3. Cut backing plate from .024 aluminum.
4. Cleaned, deburred, and primed.
5. Located door position on cowling.
6. Traced, and removed fiberglass with dremel.
7. Cut removed fiberglass to allow for hinge.
8. Cleaned removed fiberglass.
9. Drilled hinge and riveted to fiberglass door with A4 Avex rivets.
10. Fitted door to backing plate. Drilled hinge to mounting plate with #40 bit.
11. Slipped backing plate into position, and clecoed using hinge mounting holes.
12. Marked location of rivets to hold mounting plate.
13. Punched and drilled with #40 bit.
14. Removed backing plate and door; cleaned and primed.
15. Clecoed backing plate in plate, and slipped door into position.
16. Opened holes with #30 bit. clecoing as holes were enlarged.
17. Added rubber edging to opening, so door seals better to opening.
18. Riveted door and backing plate with A4 Avex rivets.
|
|
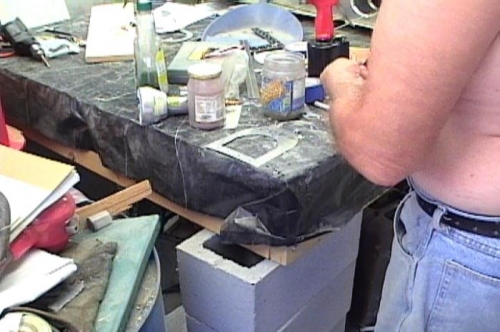
Preparing the backing plate
|
|
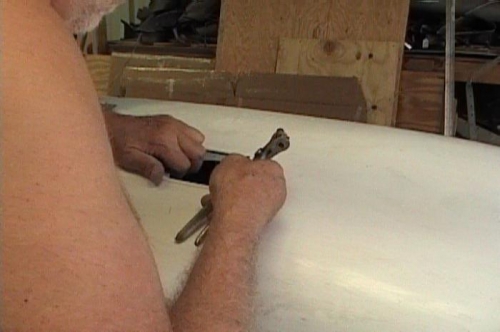
Positioning the backing plate
|
|
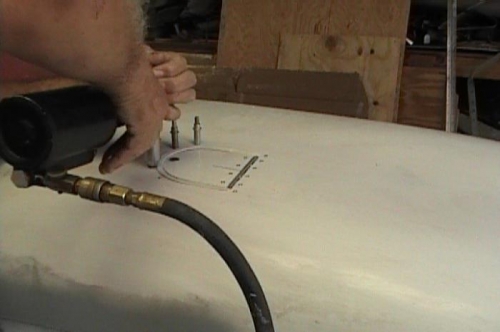
Clecoing and riveting the backing plate and door
|
|
|
|
|
|
|
|
|
Copyright © 2001-2024 Matronics. All Rights Reserved.
|