Brief Description: Servo bracket install continued
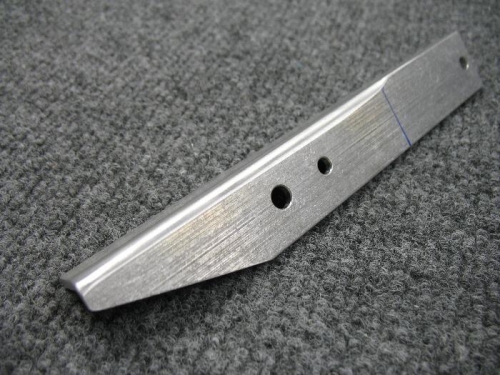
The next step was to radius the back of the Dynon bracket so that it would match the radius of the rib/bracket. I did this a little at a time until I had a tight fit in both planes of the Dynon bracket to the rib/bracket. You can see in Photo 1, I marked where the radius was needed; the part that overhangs does not need a radius. With the bracket clamped in place I checked the alignment of the holes that the bell crank mounting bolt goes through and the alignment was perfect. I repeated the above procedure for the other bracket.
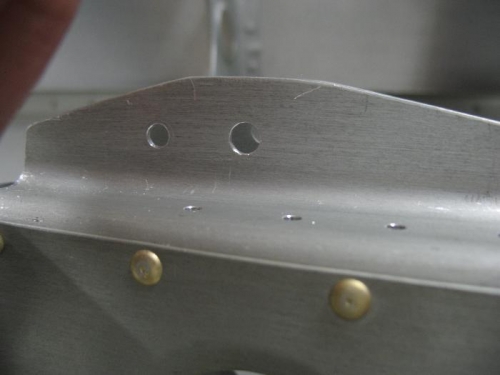
Next I laid out a rivet pattern onto the Dynon bracket and drilled #40 holes using a drill press. I laid out 4 holes 7/8” apart, starting 12/32nd from the forward end. The rib narrows towards the aft end and edge distance becomes an issue with the radius in the outboard edge of the formed rib. The 4 rivets should be more than ample to hold the bracket. I do know of one builder who when mounting a similar bracket for another autopilot only held the bracket in place with the AN5 bolt that goes through the bell crank and the AN3 bolt that mounts the servo; he did not rivet the bracket at all.
After drilling the #40 holes into the bracket, I clamped the brackets in place with the AN5 bolt run though both sides. I then match drilled the holes to the rib to #30. Next I drilled the hole for the AN3 bolt that will bolt to the servo; I drilled a matching hole on the side opposite the servo as well. The brackets are mirror images I guess to give you the option of putting the servo on either side of the bell crank. I will put a bolt on the opposite side just to help hold the upper part of the bracket.
Note: Radius on portion of bracket that nests into existing rib/bracket
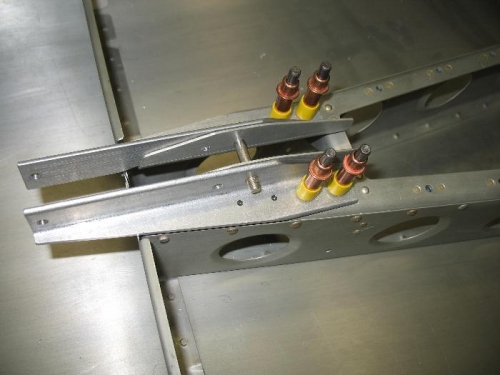
Brackets match drilled to rib, you can see holes in the ribs in photo 3 from previous log entry.
Match drilled AN3 holes on the Dynon bracket to the rib/bracket.