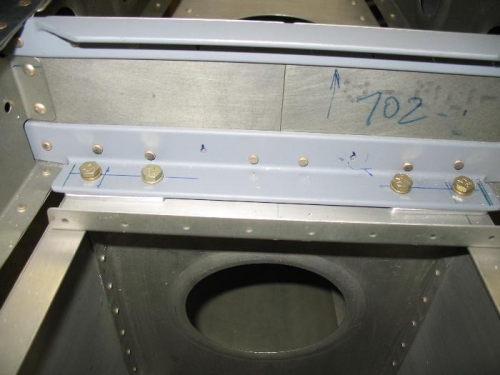
Well after all of my measurements yesterday I had to do it all over again because I had not marked the front spar with the location of the holes I had to drill. I did not have the room to mark the holes while the HS was in place. After resetting the HS in place it was time to drill. You first drill the holes that go through the two attach bars at the aft end. The critical thing here it to have the HS centered and a 3/16 spacer under the aft edge (I used a drill bit). The next step is to square the HS to the fuselage. It just took a slight nudge to get the measurement to be within 1/16th of an inch, which is square enough for me. Now it was time to drill the critical hole down through the forward spar and the longeron. If this is not done correctly you can end up with edge distance issues with the longeron and or bottom angle. I replaced the bottom angle earlier because my QB kit had one side of the bottom angle that I felt was trimmed too short.
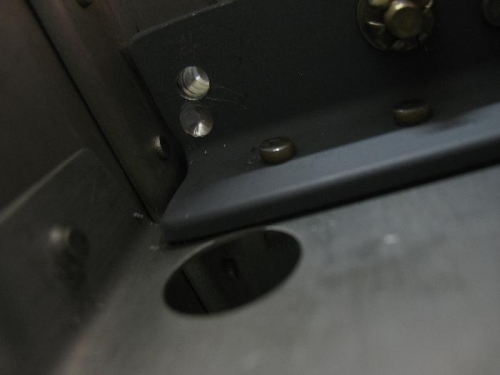
I drilled the 4 holes to #30 with my angle drill and the holes all looked good. The upper HS forward spar angle gets in the way unless you have a very short bit, I did not have a short bit in the #12 size so I drilled the holes to #12 from the bottom side. This is when I goofed up. I set the drill onto the hole but did not realize it has slipped off, I started to drill but stopped because it did not fee correct. Well I was drilling a new hole totally offset from the one I was supposed to drill. I finished drilling the holes correctly and they are perfect. I called Van’s about my partial hole and they said it will be fine, I thought I might need a doubler there but I had not drilled that deep and the experts at Van’s said just smooth what amounts to a dimple in the angle and touch it up with primer. Disaster averted!