Brief Description: Elevator bell crank and push rods
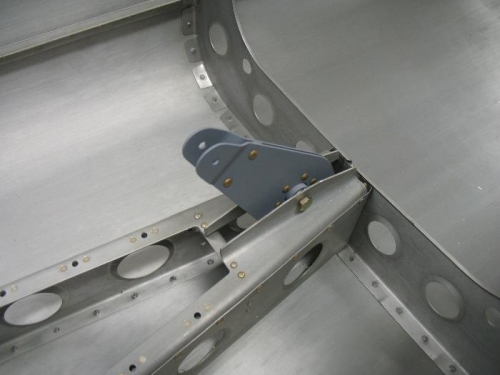
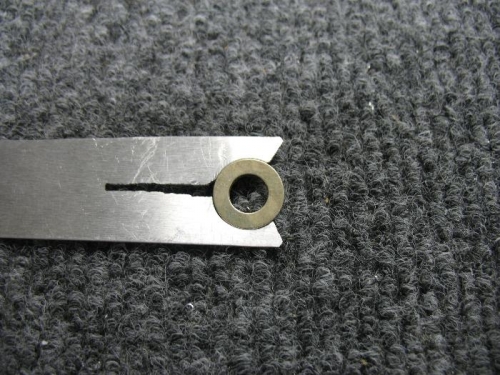
I started the day pulling all of the elevator bell crank parts and smoothing the edges. After drilling the VA-146 bearing to the bell crank halves I set up for priming. After letting things dry I came back in the afternoon and riveted together the bell crank and then temporarily installed the bell crank. I had to fabricate a washer holder because there just is no way to insert the last washer without one.
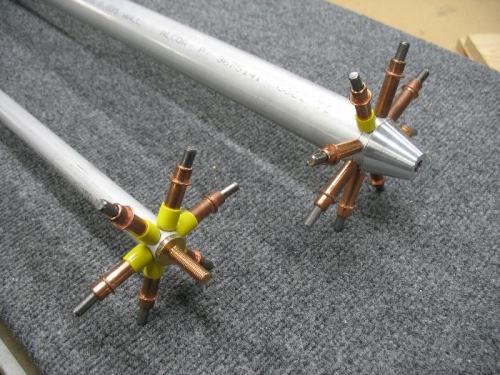
I moved onto the pitch control rods (F-840/841). After double and triple checking the length on the plans I cut the two tubes to length and deburred the ends. Using the paper template method from the plans I marked the holes for the rivets into the ends of the tubes. Using the drill press I drilled the holes through the tubes and bearings to #33 then used a ream to bring the holes up to #30. It was time for dinner at this point so I called it a day.