Last night I realized I must have measured wrong because the 45.5” cable is just a bit too short. I called first thing this morning to order the 48”, if they ship it out this afternoon I should get it tomorrow or Friday.
After fixing a leaky pipe I spent the afternoon on the project. I need to work more efficiently so I have come up with a list little jobs I can do when stalled from my main task, I have a bad habit of just laying off the project if I have to wait for a part. I started by installing the autopilot roll servo. I thought it would be better to install it now before the wings are on the plane.
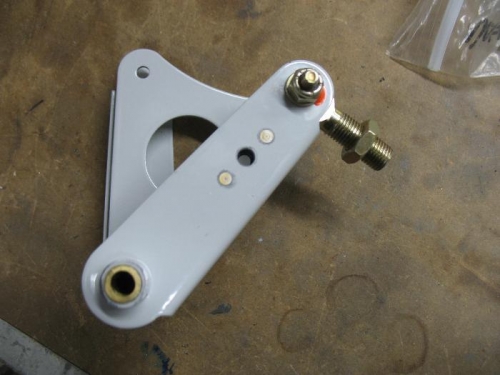
I removed the servo and bracket, I had not yet drilled the hole in the aileron bell crank, and this should have been done before the bottom skin was riveted on but the access is still good. I noticed in looking at another builder’s kit that they now supply the bell crank with a pre-drilled hole, with holes to attach a nut plate. The instructions I have tell you to drill a single hole and use a lock nut but I drilled for a nut plate, just one less end that might work loose the way I see it.
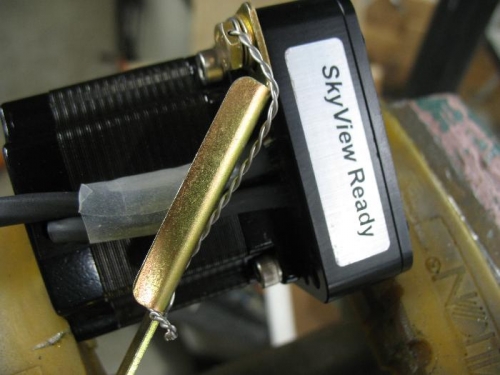
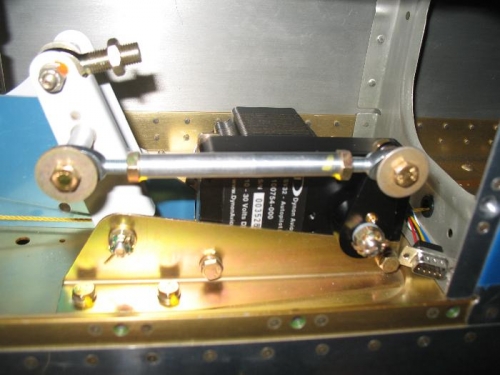
After installing the bearings on the servo arm push tube, I test fit the servo and tightened up the upper brace bolt, then I removed the assembly and did the safety wiring of the upper brace bolt on the bench as well as setting the torque on the servo arm bearing bolt. I then re-installed the servo and connected everything up and no interference. I set the torque on all the bolts and marked with torque seal I still have to safety wire the two bolts that hold the servo to the bracket.
Using nut plate to attach servo push tube
Samll recess for wires I rapped with some Rescue tape for more protection