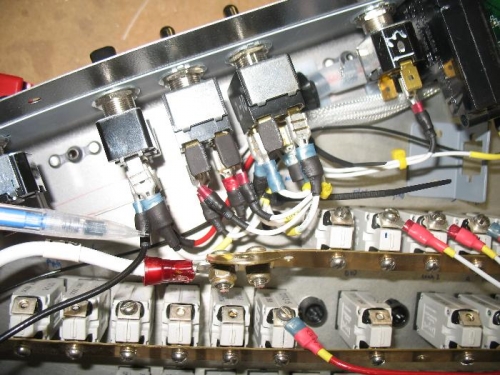
Best laid plans of mice and men. I picked up the connector I needed then started to attach wires from the switches to one side of the connector. I made a bracket to hold the connectors so I gave it a test fit and ran into a road block. It seems when I designed the circuit breaker layout I did not take into account how much the spade terminals extend out from the switches. There are 3 switches that interfere too much with one of the CBs. I removed this breaker and you can see things fit better. This means a redesign of the breaker layout and how the fat wire ties into the main bus. Not horrible but it will be pain to redo all of the labels but this will allow me to consolidate some things and reduce my CB count, for one thing I think I am going to combine the led flood lights and my map light onto one CB, there really is no need for them to have separate power sources and the wire size I have run will be fine with this.
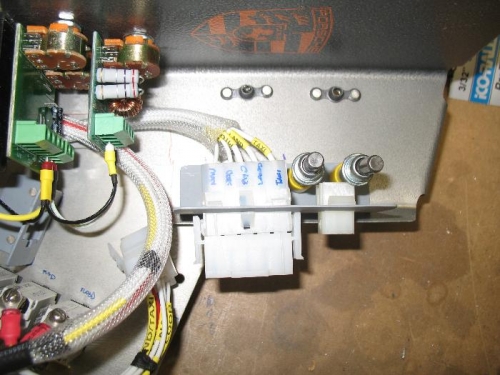
Since I have to make these changes and sand and re-paint the CB panel I am going to move the original connector I made that connects the wires from the CBs to the right console switches. The bracket I will make will accommodate 3 connectors all in one bracket oriented like you see in the photo. With this method the right console will be totally removable; it is a matter of connecting the wires coming from the CB and plane to the connectors in the brackets and then dropping the console in place. This will also make any work on the CB panel easier because removing the right console will be much easier than pulling numerous spade connectors. I will get to work on this and wait for the next road block. One day at a time.
You can see the Tab with the nuts, I will have to move this main power feed location.
I will make a new bracket, there will be two fat connectors like you see here and the small one