Brief Description: Clamp Plywood Jig to Right Wing; UHMV Tape
There were still a couple of prep items to be done before connecting the pushrods for the flaps. The first thing I did was clamp the plywood jig to the right wing to lock the ailerons in their neutral positions. With all the aileron pushrods installed, this locks both ailerons at once. I needed to do this so I could make sure that the flaps were perfectly aligned with the ailerons when in the up position.
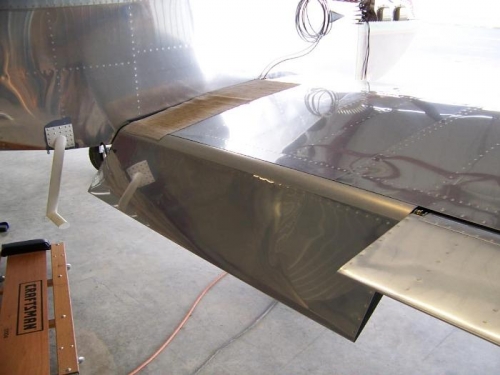
Next I installed UHMV low friction tape that I bought at Avery Tool on the curved leading edges of the flaps. This should prevent any scratching of the flap and wing as the flaps are lowered and raised.
After installing the tape on the flaps there were several posts on the Matronics RV-list about installing the tape to the underside of the top wing skins rather than on the flaps themselves. I decided to take everyone's recommendation and peel the tape off the flaps and install it on the wings instead. Easier said than done though. That stuff sticks like you wouldn't believe. I was eventually able to peel everything off and fortunately I had another roll that I could install to the underside of the top wing skin.
Plywood jig clamped to right wing - locks both ailerons in their neutral positions to align flaps
UHMV low friction tape added to flap - I removed this later and installed it on the wings instead