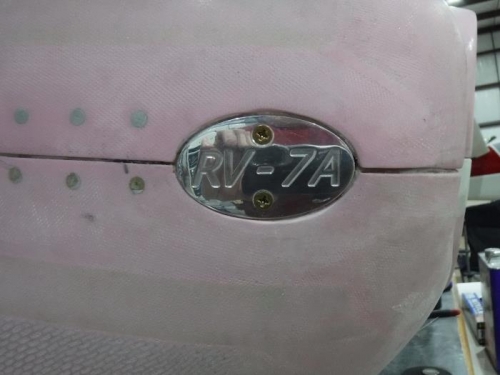
Brief Description: Decorative RV-7A Cowling Hinge Pin Covers
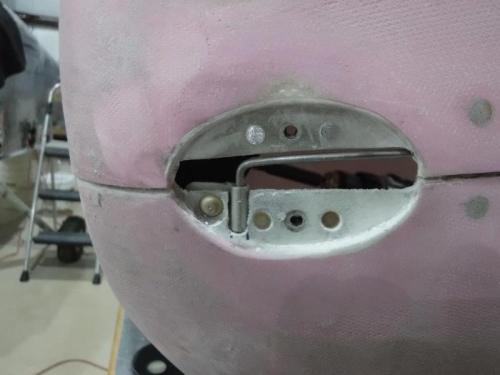
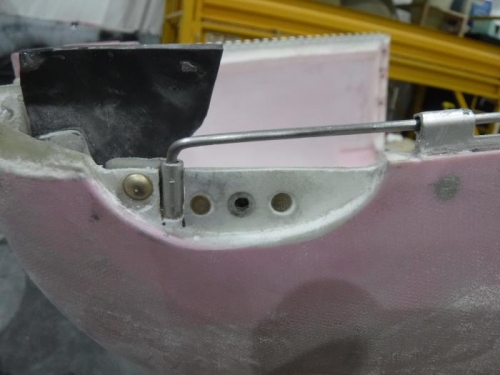
After allowing the fiberglass to cure, I wrapped the Aerosport Template with plastic-wrap and smeared-on a thin layer of petroleum jelly; then mixed up a batch of epoxy flox (epoxy, hardener, & finely chopped cotton) and applied all of this into the hole(s) which are backed with hardened fiberglass cloth. I let that cure overnight and removed the template and cut a pin access slit into the filled-in hole(s). The trick to all of this was to ensure I didn’t epoxy the upper and lower cowlings and/or the hinge pin together. However, I didn’t do as well as I’d hoped; and in fact, did epoxy the upper and lower cowls together as well as one of the hinge pins. After about 45 minutes of struggling to separate the upper and lower cowling, I was able to carefully sand and fit the insets to fit the covers while allowing for future paint. After I was satisfied with the inset holes, I cut slits for the hinge pins, riveted nutplates for the screws that attach the covers, and riveted a section of piano hinge to accept the 90-degree bend at the end of the hinge pin. One more thick layer of epoxy flox to the back side of the inset for structural support; a final sanding and I’m nearly done with the cowl-pin covers!