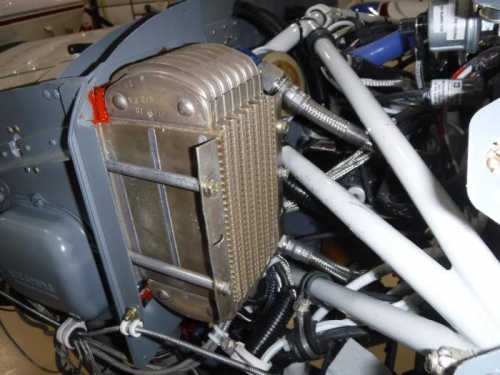
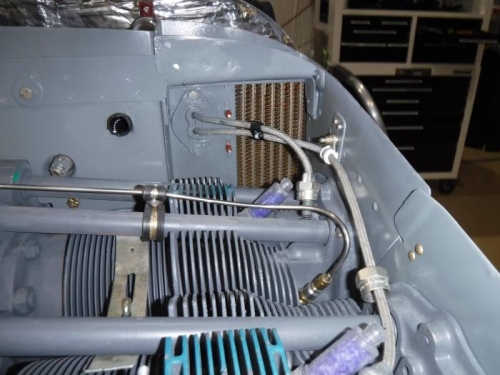
Now that I have all the EGT and CHT sensor wiring complete, I can install the Engine Oil Cooler. This time I connected the oil “Input” and “Output” connectors and hoses to the Oil Cooler, prior to mounting the cooler onto the baffling. This kept me from stripping the threads on the fittings. Even with the cooler disconnected from the baffles, the oil cooler hoses were not easy to connect. The hoses are none-too-long and the steel sheathing on the hoses makes them very stiff. Surprisingly, it took me a couple hours to get them connected without damaging the fitting threads. It was even more difficult to get the spacers and AN3-21bolts connected to the baffles. I could get three of the four bolts started into the installed nutplates, but the last one was a bugger. Thankfully, I installed the back ones (most difficult to get to) prior to the front ones because true-to-form I messed up the threads slightly on the last nutplate. I was able to get a tap-and-dye “thread chaser” into the nutplate to clean up the threads; and finally got the oil cooler installed. Prior to getting it in place, I put a 1” x 3” self-sealing strip of rubber and high-heat resistant RTV over the upper and lower Oil Cooler fins as they insert into the baffle mounting flanges. This is to help seal the oil cooler from air leaks around the mounting flanges. My instructions didn’t require this, but my friend with a completed RV-14A had this step in his instructions. In any case, it won’t hurt to have this seal in-place.