
|

|
|
|
Marlins Web Site
|
Date: 4-19-2021
|
Number of Hours: 13.00
|
Manual Reference: Sec 9, DWG 41
|
Brief Description: Making Cardboard Templates, Cutting Cloth, Laying
|
|
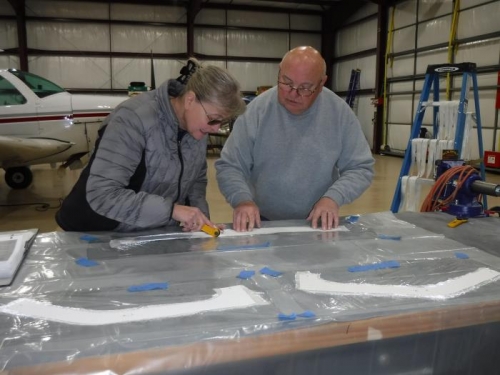
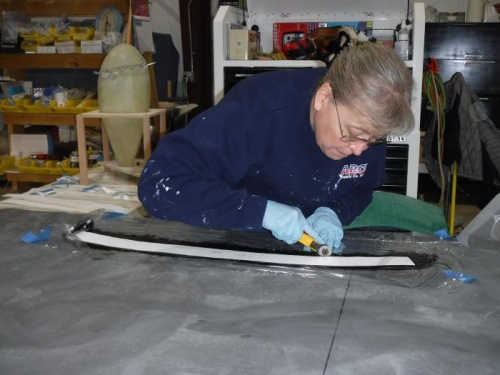
After we got all the paper templates cut out, we transferred these to carboard so the templates would be more durable when cutting the fiberglass cloth. Next, I put a layer of painter’s tape over the electrician’s tape to be sacrificed (pulled-up) as the fiberglass sets up to create a perfectly straight line on the windscreen. We used the carboard templates to cut the cloth, oversized, on the bias using rotary cutters. I mixed up a batch of black-dyed epoxy resin and hardener, laid the oversized cut-out cloth pieces on a smooth layer of static cling-wrap we typically use to wrap food in the kitchen, used a paintbrush to apply the dyed resin, then covered the saturated cloth with another layer of cling-wrap. Next, we used the cardboard templates to cut out the “sandwiched” saturated cloth to exact size of the template. We brushed a layer of dyed resin onto a small area of the windscreen and fuselage-top roughly the size of the template, removed the back layer of cling-wrap of the piece we had just cut to exact size, and laid the fiberglass onto the respective areas of the windscreen, removing the top piece of cling wrap. We repeated this process over and over until all the templated pieces were in place. I allowed the laid-out pieces to slightly set up, then applied slightly narrower pieces saturated with resin to get a multilayered “tapered” lay-up. Finally, I stippled-on a final layer of epoxy resin and applied Peel-Ply. This was a seriously long day and we were both glad to go home. (More pics on next page)
|
|
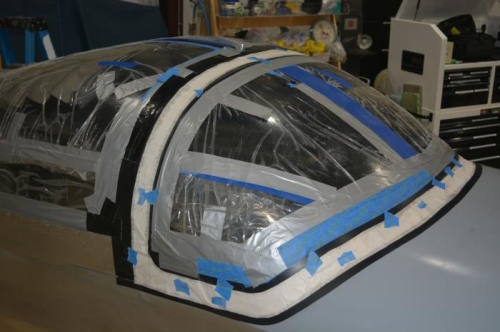
Cardboard Templates Fitted
|
|
Cut Pieces "Oversized"
|
|
Cut 'Sandwiched Cloth' to Size
|
|
|
|
|
|
|
|
|
Copyright © 2001-2024 Matronics. All Rights Reserved.
|