Brief Description: Started installing flap actuator assembly.
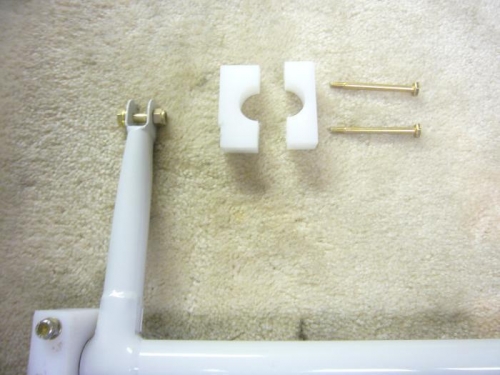
We started on the flap actuator assembly today. I drilled out the clevis ends of the actuator tube weldment that attaches to the flap motor and the connecting rods for flap movement. No problem other than deburring the holes between the bolt prongs. I used a hand file and rat tail to remove the steel burrs. Charlotte rounded up the AN4 bolts, washers, and nuts for these holes. We then fabricated the center plastic block that holds the torque tube to the floor behind the seats. Part F-680 was cut to proper size with the band saw and then drilled with the drill press for the bolt holes. It was then cut in half with the band saw. The nut plates beneath the baggage floor into the floor rib are yet to be installed.
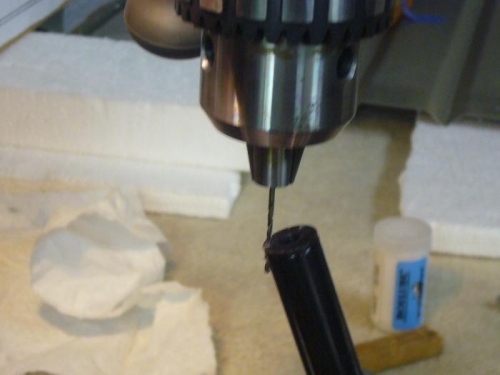
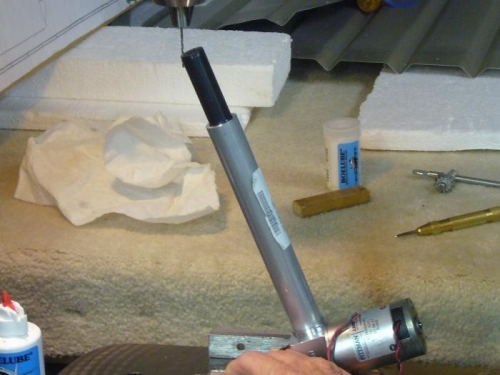
We then attempted to drill the safety wire hole into the screw jack of the flap motor assembly. Setting up on the drill press with a small bit at the correct angle proved to be difficult. We broke the tiny #60 bit, therefore, we finally moved up to a 1/16" bit. After much cursing and trying to keep the screw jack from rotating while drilling, we finally had acceptable results (I hope).
Side note: Our Oregon Aero unupholstered cushions came in by UPS today. We're supposed to sit in them and read a magazine to check the dimensions and then send them back for alterations and upholstery. No wonder they cost so much even with the Oshkosh discount!