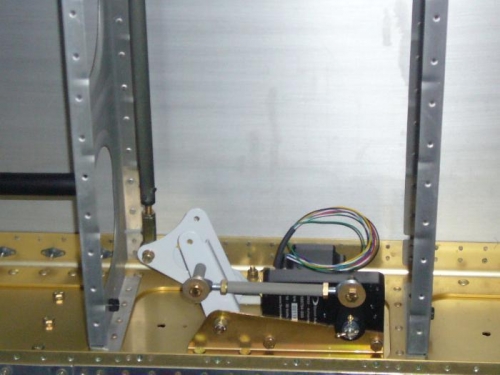
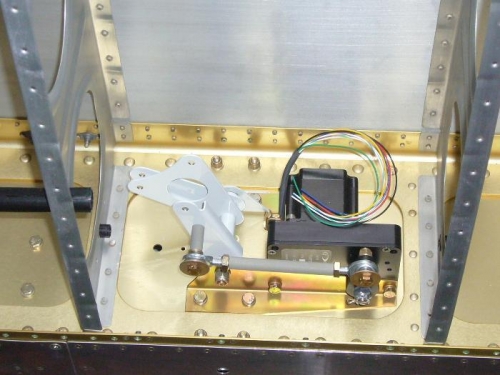
Brief Description: Installed Dynon AP servo in right wing.
The replacement bell crank for the right wing came in the mail on Monday. I cleaned the holes in the bell crank to accept the bolt and then installed it with the Dynon roll servo. The installation is relatively easy. You just remove the lower bell crank bracket and replace it with the Dynon supplied bracket. All the parts (two brackets, the pushrod tube, spacer, bolts, washers, nuts, and good instructions with drawings) come with the kit. Now all I have to do is get my electrical system together and start wiring. I also received the pitch servo and parts and will install it soon.
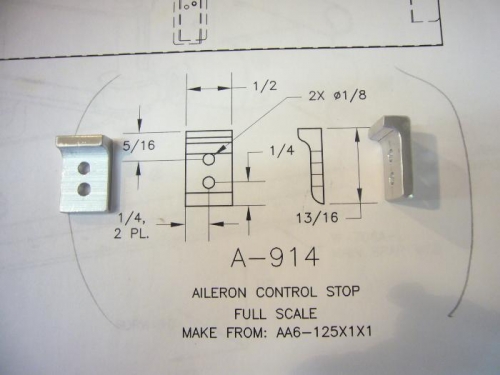
I will install aileron stops tommorrow that I fabricated today out of aluminum angle. They must be riveted to the inboard aileron hinge bracket. That means I will temporarily install the ailerons on the wings to find the maximum 32 degree up limit. This also will be a good time to temporarily install the aileron pushrod and connect it to the bell crank. All to be done tommorrow, hopefully.