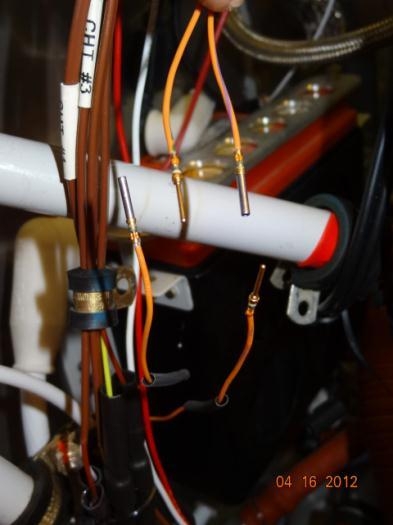
Before Fred and I riveted the right side of the top skin, we worked on extending the Amps Hi and Amps Lo wires that go thru the firewall to the ammeter shunt. I cut apart the lacing and unscrewed the clamps that were holding the wire bundles together. The amps wires were cut and the Dynon EMS connector was pulled out farther. Two lengths of previously-cut amp wire were cut to insert as extensions to the existing amp wires. We attempted to first tin the wires and then solder them together. My soldering iron developed a short in the wires and would not heat up. We attempted to tin the wires by using the heat gun to heat up the wires and melt the solder. The heat gun melted the solder, but the wires would not accept the solder. Fred saw the Dsub pins and suggested that we use them with heat-shrink to keep the pins connected. The wires had the ends cut off for better connections and I crimped the pins to the wires with the DMC crimper. Heat-shrink was applied over each of the four connections and then a larger piece of heat shrink was used over the two sets of wires at each connection.
I also noticed that the oil transducer lines that had the solder crimps in place came apart from the data and power wires. We decided to use the Dsub pins again in connecting both pairs of wires.