Date
|
Hours
|
Work Log Summary

|
Details

|
05-27-2014
|
1.00
|
Trimmed Plenum
|
Details
|


 |
|
05-27-2014
|
2.00
|
Tied Baffles Together under Cylinders
|
Details
|
   |
|
05-27-2014
|
1.00
|
Riveted Data Plate/Applied Experimental Sticker
|
Details
|


|
|
05-27-2014
|
3.00
|
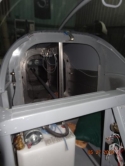
Cowl/Scat Tube/ELT
|
Details
|


|
|
05-27-2014
|
3.50
|
Buffed Left Wing
|
Details
|
   |
|
05-25-2014
|
3.00
|
Repainted Leading Edge of Left Wing
|
Details
|

  |
|
05-25-2014
|
1.00
|
Clearcoated Data Plate
|
Details
|

  |
|
05-22-2014
|
0.50
|
Sealant added to Brake Line and Fuel Pump Vent
|
Details
|

  |
|
05-22-2014
|
1.00
|
Riveted Nutplates to Front Plenum Brackets
|
Details
|


 |
|
05-22-2014
|
2.00
|
Pitot-Static Check
|
Details
|
   |
|
05-22-2014
|
2.00
|
Modified Doublers for Nutplates on Plenum
|
Details
|

  |
|
05-22-2014
|
2.00
|
Glassed Corner of Plenum
|
Details
|


|
|
05-21-2014
|
4.00
|
Riveted Nutplates to Plenum
|
Details
|


 |
|
05-21-2014
|
0.50
|
Positioned Data Plate on Fuselage
|
Details
|


 |
|
05-21-2014
|
1.00
|
Made Aluminum Tube for Fuel Pump Vent Line
|
Details
|


 |
|
05-21-2014
|
1.00
|
Installed Trim Cable Access Panel
|
Details
|


 |
|
05-21-2014
|
0.10
|
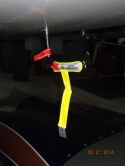
Installed Pitot Tube Cover
|
Details
|
  |
|
05-21-2014
|
0.50
|
Installed Heat Shields on Exhaust Pipes
|
Details
|
   |
|
05-18-2014
|
1.00
|
Painted Elevator Trim Access Panel
|
Details
|

  |
|
05-17-2014
|
3.00
|
Touched Up Right Wing
|
Details
|

  |
|
05-13-2014
|
3.00
|
Painted Seat Pieces
|
Details
|
   |
|
05-11-2014
|
0.20
|
Gave Seat Pieces to Walt for Painting
|
Details
|
   |
|
05-10-2014
|
4.00
|
Worked on Plenum
|
Details
|
   |
|
05-10-2014
|
3.00
|
Spiral-wrapped Wires/Removed Aileron Trim Springs
|
Details
|


|
|
05-10-2014
|
2.00
|
Paint Touch-Up
|
Details
|


 |
|
05-10-2014
|
3.00
|
Modified the Front Brackets for Plenum
|
Details
|


|
|
05-10-2014
|
3.00
|
Made Doublers for Plenum Nutplates
|
Details
|

  |
|
05-10-2014
|
1.00
|
Interference of Control Rod and Roll Servo
|
Details
|


 |
|
05-10-2014
|
2.00
|
Inspected Aircraft and Offered Suggestions
|
Details
|
   |
|
05-10-2014
|
2.00
|
Assisted with Fuselage Work
|
Details
|
   |
|
05-09-2014
|
3.00
|
Spiral-wrapped Wires under Seats
|
Details
|
   |
|
05-09-2014
|
1.50
|
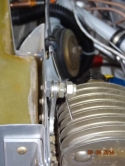
Made a Cable-End Fastener for Oil Cooler Cable
|
Details
|

 |
|
05-09-2014
|
2.00
|
Enlarged Left Control Stick Opening/#1 Comm Coax
|
Details
|


|
|
05-09-2014
|
0.50
|
Checked Aileron Bellcrank for Neutral Position
|
Details
|
   |
|
05-08-2014
|
1.00
|
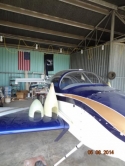
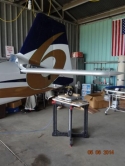
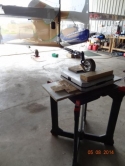
Weighed Aircraft-1,118 pounds!
|
Details
|


|
|
05-08-2014
|
0.20
|
Scheduled FAA Inspection
|
Details
|
   |
|
05-08-2014
|
4.00
|
Removed Cowling/Worked on Moving Wires
|
Details
|
   |
|
05-08-2014
|
0.50
|
Photos-Aircraft Weighing
|
|


|
|
05-08-2014
|
0.10
|
Photos 2-Aircraft Weighing
|
|


|
|
05-08-2014
|
1.00
|
Helped with Weighing of Aircraft
|
Details
|
   |
|
05-08-2014
|
2.00
|
Helped Defuel and Weigh Aircraft
|
Details
|


|
|
05-08-2014
|
2.00
|
Defueled/Installed Equipment for Weighing
|
Details
|


|
|
05-07-2014
|
7.00
|
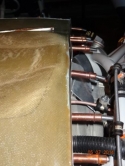
Moved Wires/Adjusted Plenum Flange/Visitor
|
Details
|

 |
|
05-07-2014
|
1.00
|
Looked over Engine Compartment
|
Details
|
   |
|
05-07-2014
|
2.00
|
Helped with Plenum
|
Details
|
   |
|
05-07-2014
|
1.50
|
Enlarged Control Stick Openings in Seat Pans
|
Details
|
   |
|
05-06-2014
|
3.50
|
Tech Counselor Visit
|
Details
|


|
|
05-06-2014
|
1.50
|
Installed Bolt in Elevator/HS Bearing
|
Details
|

  |
|
05-06-2014
|
6.50
|
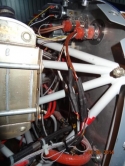
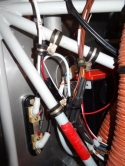
Firewall Forward Adjustments
|
Details
|

|
|
05-05-2014
|
1.50
|
Trimmed Fuel Selector Valve Cover/Painted
|
Details
|


|
|
05-05-2014
|
2.00
|
Taped Control Stick Limits for Seat Pan Trimming
|
Details
|


|
|
05-05-2014
|
0.10
|
Photo-Template for Left Seat Pan Control Stick
|
|

  |
|
05-05-2014
|
0.20
|
Photo-Fuel Selector Valve Cover Painted
|
|

  |
|
05-05-2014
|
0.30
|
??Talked with Jason-Aerotronics re Fuel Guardian
|
Details
|
   |
|
05-04-2014
|
1.60
|
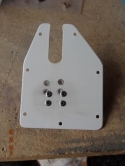
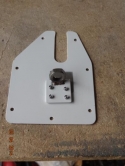
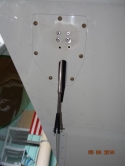
Riveted Trim Cable Nut onto Access Panel
|
Details
|
|
|
05-04-2014
|
0.40
|
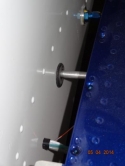
Pushed Rubber Grommets thru Fuselage Holes
|
Details
|


|
|
05-04-2014
|
0.30
|
Pulled Fuel Level Sensor Wires from Under Panel
|
Details
|
   |
|
05-04-2014
|
0.20
|
Labeled Oil Cooler Cable
|
Details
|

  |
|
05-03-2014
|
1.70
|
Determined New Position of Trim Cable Nut
|
Details
|


 |
|
05-03-2014
|
0.30
|
Changed out Dynon D-100 EFIS Battery
|
Details
|

  |
|
05-03-2014
|
1.00
|
Assisted with Locating Trim Cable Nut
|
Details
|
   |
|
05-02-2014
|
0.50
|
Put Away Tools after Engine Start
|
Details
|
   |
|
04-29-2014
|
0.10
|
First Engine Run!! Continued
|
Details
|
   |
|
04-29-2014
|
6.00
|
First Engine Run!!
|
Details
|


|
|
04-29-2014
|
4.00
|
Assisted with Engine Start/Swapped Ignition Leads
|
Details
|


|
|
04-29-2014
|
5.00
|
Assisted with Engine Start
|
Details
|


 |
|
04-29-2014
|
3.00
|
Assisted with Engine Start
|
Details
|
   |
|
04-29-2014
|
1.00
|
Assisted with Engine Start
|
Details
|
   |
|
04-28-2014
|
1.50
|
Safety-Wired Brake Pad Bolts
|
Details
|
   |
|
04-28-2014
|
1.00
|
Engaged Starter to Build up Oil Pressure
|
Details
|


 |
|
04-28-2014
|
2.00
|
Assisted with Preoiling Engine
|
Details
|

  |
|
04-28-2014
|
1.00
|
Assisted with Preoiling Engine
|
Details
|
   |
|
04-28-2014
|
0.50
|
Applied Tie Wraps to Terminal Nipples
|
Details
|


|
|
04-24-2014
|
0.50
|
Drilled out Rivets on Elevator Access Panel
|
Details
|

  |
|
04-23-2014
|
1.00
|
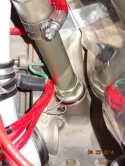
Tightened Oil Dipstick/Oiled Galleys
|
Details
|

 |
|
04-23-2014
|
0.50
|
Pulled Wire off Starter/Added Jumper
|
Details
|

  |
|
04-23-2014
|
5.00
|
Conducted Fuel Flow Tests/Unusable Fuel Calc
|
Details
|

  |
|
04-23-2014
|
2.00
|
Completed Preoiling Engine Except for Galleys
|
Details
|

  |
|
04-23-2014
|
2.00
|
Checked Low Fuel Warning Lights
|
Details
|

  |
|
04-23-2014
|
4.50
|
Assisted in Fuel Flow Test/Unusable Fuel
|
Details
|

  |
|
04-23-2014
|
2.00
|
Added Fuel to Tanks/Checked Fuel Guardian Lts
|
Details
|

  |
|
04-22-2014
|
0.50
|
Tightened Aileron Jam Nut/Pitot Heat Control Box
|
Details
|


 |
|
04-22-2014
|
1.00
|
Preoiling the Engine-Pumped Oil into Oil Cooler
|
Details
|


 |
|
04-22-2014
|
1.50
|
Completed Attaching Elevators to Control System
|
Details
|


|
|
04-18-2014
|
1.00
|
Tightened and Torqued Final Four Spar Bolts
|
Details
|


 |
|
04-18-2014
|
1.00
|
Installed Bolts into Elevator Hinge Brackets
|
Details
|

  |
|
04-18-2014
|
1.50
|
All Cockpit Fuel Lines Installed
|
Details
|


|
|
04-17-2014
|
2.50
|
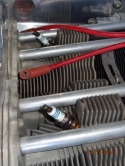
Torqued Spark Plugs in Top and Bottom of Cylinders
|
Details
|

 |
|
04-17-2014
|
1.00
|
Tied Wires behind Panel to Fuel Line Air Vent Tubi
|
Details
|


 |
|
04-17-2014
|
0.50
|
Installed Aluminum Tube over Rod
|
Details
|

  |
|
04-17-2014
|
2.50
|
Assisted with Installing Spark Plugs
|
Details
|
   |
|
04-16-2014
|
0.50
|
Ran ELT and Push-to-Talk Wires along Rt Sidewall
|
Details
|

  |
|
04-13-2014
|
3.50
|
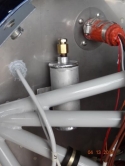
Got Both Brakes Working!
|
Details
|


|
|
04-13-2014
|
3.50
|
Assisted with Bleeding Brakes
|
Details
|
   |
|
04-12-2014
|
0.50
|
Drilled Spar Bolt Hole in Right Fuel Side Cover
|
Details
|
   |
|
04-12-2014
|
3.00
|
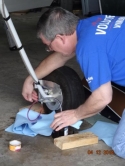
Bled Brakes-Got the Right Brake Working
|
Details
|


|
|
04-12-2014
|
2.00
|
Assisted with Bleeding Brakes
|
Details
|
   |
|
04-11-2014
|
2.00
|
Installed Elevators and Worked on Trim Cable
|
Details
|


|
|
04-11-2014
|
1.00
|
Filled Brake Reservoir with Brake Fluid
|
Details
|

  |
|
04-11-2014
|
0.50
|
Drilled Left Fuel Side for Spar Hole
|
Details
|
   |
|
04-11-2014
|
2.00
|
Assisted with Installing Elevators and Trim Cable
|
Details
|
   |
|
04-11-2014
|
1.00
|
Assisted with Filling Brake Reservoir
|
Details
|
   |
|
04-11-2014
|
0.50
|
Assisted with Adding Brake Fluid
|
Details
|
   |
|
04-10-2014
|
4.00
|
Sanded, Filled, Primed and Painted Elevator Tips
|
Details
|


 |
|
04-10-2014
|
2.00
|
Drilled Left Side Cover for Spar Bolt
|
Details
|

  |
|
04-09-2014
|
0.50
|
Had Firesleeve Applied to Fuel Line
|
Details
|


|
|
04-08-2014
|
1.00
|
Trimmed Right Seat Pan/Attached Trim Cable
|
Details
|


|
|
04-08-2014
|
1.00
|
Removed and Flared Fuel Line-Firewall-Gascolator
|
Details
|

  |
|
04-08-2014
|
1.00
|
Photos-Fuel Selector and Top Cover
|
Details
|


 |
|
04-08-2014
|
2.00
|
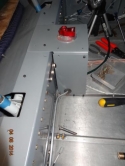
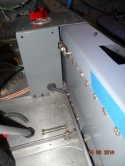
Modified Fuel Selector Cover Pieces
|
Details
|

|
|
04-08-2014
|
1.00
|
Fuel Lines on Brackets/Photo-Trim Cable
|
Details
|


|
|
04-07-2014
|
0.50
|
Trimmed Front Corners of the Seat Pieces
|
Details
|


 |
|
04-07-2014
|
2.00
|
Removed Side Covers/Trimmed Seat Cover Corners
|
Details
|


|
|
04-06-2014
|
0.50
|
Trimmed Aft End of Longerons
|
Details
|
 |
|
04-06-2014
|
3.00
|
Installed Fuel Selector Side Covers-Have to Redo!
|
Details
|


 |
|
04-06-2014
|
1.00
|
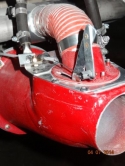
Carb Heat Cable Clamped to Bracket
|
Details
|

 |
|
04-01-2014
|
3.30
|
Safetied Alternator and Prop Bolts/Visitors
|
Details
|


 |
|
03-31-2014
|
1.50
|
Helped with Tightening Alternator and Prop Hub
|
Details
|

  |
|
03-31-2014
|
4.00
|
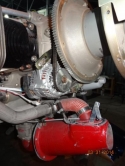
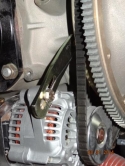
Cotter Pin in Left Rudder Cable/Alternator Belt
|
Details
|

|
|
03-30-2014
|
1.50
|
Applied Cotter Pins to Right Rudder Cable Screws
|
Details
|

 |
|
03-29-2014
|
2.00
|
Roll Servo Control Rod Bolted to Control Stick
|
Details
|


 |
|
03-28-2014
|
3.00
|
Control Stick Bolts Tightened and Torqued
|
Details
|


 |
|
03-26-2014
|
2.00
|
Installed Moveable Center Seat Rib
|
Details
|


|
|
03-25-2014
|
2.50
|
Made Fuel Vent Lines-Tank to Fuselage
|
Details
|

|
|
03-24-2014
|
0.10
|
Evaluated Control Stick Movement-Visitor
|
Details
|
   |
|
03-20-2014
|
0.10
|
Removed Right Elevator
|
Details
|
   |
|
03-20-2014
|
0.50
|
Bolted Flap Control Rods
|
Details
|


 |
|
03-20-2014
|
0.40
|
Applied Torque Seal
|
Details
|


|
|
03-19-2014
|
1.00
|
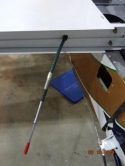
Trim Cable Run
|
Details
|
  |
|
03-19-2014
|
2.00
|
Installed Flaps/Adjusted Control Rods
|
Details
|


 |
|
03-19-2014
|
1.50
|
Helped Install Flaps
|
Details
|

  |
|
03-19-2014
|
3.00
|
Enlarged Lightening Holes/Torque Seal
|
Details
|


 |
|
03-19-2014
|
1.50
|
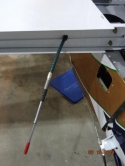
Attached Elevators to Push-Pull Tube/Movement
|
Details
|

 |
|
03-18-2014
|
0.10
|
Photos-Right Aileron Control Stop
|
|


 |
|
03-18-2014
|
0.10
|
Photos-Left Aileron Control Stop
|
|


 |
|
03-18-2014
|
1.00
|
Enlarged Hole in Left Rear Spar/Cleaned up Edges
|
Details
|


|
|
03-18-2014
|
1.00
|
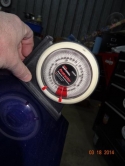
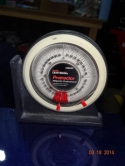
Checked Right Aileron Movement
|
Details
|

|
|
03-18-2014
|
1.00
|
Checked Left Aileron Movement
|
|


|
|
03-17-2014
|
0.50
|
Began to Enlarge Hole in Left Rear Spar
|
Details
|
   |
|
03-16-2014
|
1.00
|
Enlarged Hole in Rt Rear Spar
|
Details
|


|
|
03-15-2014
|
1.00
|
Checked Lt Aileron Control Rod Movement
|
Details
|
   |
|
03-14-2014
|
1.00
|
Installed Aileron Control Stop in Left Bolt
|
Details
|
   |
|
03-13-2014
|
1.00
|
4th Attempt's a Charm-Aileron Control Stop
|
Details
|
   |
|
03-12-2014
|
0.50
|
Made Another Aileron Control Stop-Also Unusable
|
Details
|

  |
|
03-11-2014
|
0.50
|
Made a Second Aileron Control Stop-Unusable
|
Details
|

  |
|
03-10-2014
|
1.00
|
Helped with Taking Flaps Off
|
Details
|


 |
|
03-10-2014
|
0.50
|
Assisted with Taking Flaps off
|
Details
|

  |
|
03-10-2014
|
3.00
|
Aileron Spacer
|
Details
|


|
|
03-08-2014
|
1.50
|
Left Wing Nav Light Power Wire Redone
|
Details
|


|
|
03-08-2014
|
2.50
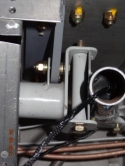
|
Bolted Center Control Rod to Spar Brackets
|
Details
|

 |
|
03-08-2014
|
1.50
|
Assisted with Bolting Control Rod to Brackets
|
Details
|
   |
|
03-07-2014
|
2.00
|
Connected Nav Light Power Wires/Left Doesn't Work
|
Details
|
   |
|
02-20-2014
|
1.00
|
Nav Light Power Wires in Fuselage
|
Details
|
   |
|
02-19-2014
|
0.20
|
Temporarily Installed Left Elevator
|
Details
|

  |
|
02-19-2014
|
1.80
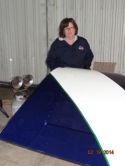
|
Left Wing Wires/Wing Tips Screwed in Place
|
Details
|


|
|
02-19-2014
|
0.70
|
Helped with Left Wing Wires/Wing Tips
|
Details
|
  |
|
02-13-2014
|
1.00
|
Spiral-Wrapped Wires in Each Wing Tip
|
Details
|


 |
|
02-12-2014
|
1.50
|
Completed Nav Archer Antenna Installation
|
Details
|


|
|
02-06-2014
|
0.50
|
Left Landing Light/Right Ground Wire Nav Light
|
Details
|


 |
|
02-06-2014
|
1.00
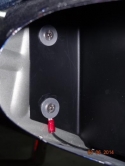
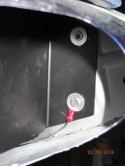
|
Left Landing Light/Nav-Strobe Light Installed
|
Details
|

|
|
02-04-2014
|
1.50
|
Right Nav/Strobe Lights/Right Landing Light
|
Details
|


|
|
01-28-2014
|
0.50
|
Screwed Landing Lights into Brackets
|
Details
|
   |
|
01-27-2014
|
1.00
|
Painted Landing Light Brackets Matte Black
|
Details
|

  |
|
01-22-2014
|
0.50
|
Ground Wire Crimped to Nav Light Wire/Frozen!
|
Details
|
   |
|
01-20-2014
|
1.50
|
Riveted Nutplates to Light Brackets
|
Details
|


|
|
01-20-2014
|
1.50
|
Modified Light Brackets for AeroLed Lights
|
Details
|


|
|
01-15-2014
|
1.00
|
Helped Mix Epoxy-flox Slurry
|
Details
|
   |
|
01-15-2014
|
5.00
|
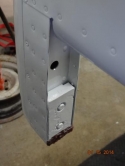
Added Epoxy-Flox Slurry/BB's to Left Elevator
|
Details
|
  |
|
01-14-2014
|
2.00
|
Screwed Wing Tips in Place for Ailerons
|
Details
|

  |
|
01-14-2014
|
1.00
|
Mounted Ailerons
|
Details
|

  |
|
01-14-2014
|
0.50
|
Left Nav/Strobe Light
|
Details
|


|
|
01-14-2014
|
1.00
|
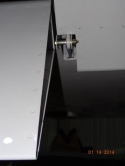
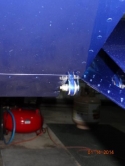
Installed Right Aileron
|
Details
|

|
|
01-14-2014
|
1.50
|
Installed Left Nav/Strobe Light in Wing Tip
|
Details
|


|
|
01-14-2014
|
2.00
|
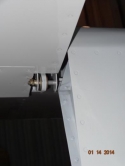
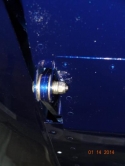
Bolted Left Aileron to Wing
|
Details
|

|
|
01-13-2014
|
1.00
|
Right Nav/Strobe Light Wiring
|
Details
|


|
|
01-13-2014
|
2.50
|
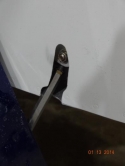
Enlarged Left Flap Control Rod Hole
|
Details
|
  |
|
01-13-2014
|
0.50
|
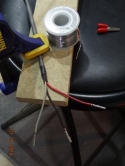
Crimped Molex Pins on Right Strobe Wire
|
Details
|
  |
|
01-13-2014
|
2.00
|
Assisted with Enlarging Flap Control Rod Hole
|
Details
|
   |
|
01-12-2014
|
2.00
|
Landing Lights Work!
|
Details
|


|
|
01-12-2014
|
0.50
|
Assisted with Landing Light Installation
|
Details
|

  |
|
01-11-2014
|
0.30
|
Molex Pins on Right Landing Light Wires
|
Details
|
   |
|
01-10-2014
|
0.50
|
Crimped Right Landing Light Wires
|
Details
|

  |
|
01-02-2014
|
2.50
|
Ran Nav Power Wire thru Left Wing
|
Details
|

  |
|
01-02-2014
|
1.50
|
Helped Run Nav Power Wire thru Left Wing
|
Details
|
   |
|
12-27-2013
|
1.00
|
Ran Nav Power Wire thru Right Wing Loom
|
Details
|
   |
|
12-27-2013
|
0.50
|
Assisted with Running Right Nav Power Wire
|
Details
|
   |
|
12-27-2013
|
1.00
|
Assisted with Running Nav Power Wire
|
Details
|
   |
|
12-21-2013
|
0.10
|
Photo-Left Wing Overhang Attached to Fuselage
|
|

  |
|
12-21-2013
|
3.00
|
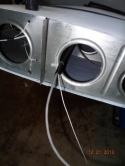
Nav Wires in Wings/Screwed Rt Wing to Fuselage
|
Details
|


|
|
12-20-2013
|
3.00
|
Nav/Tail Light Wiring and Fuselage Overhangs
|
Details
|
   |
|
12-14-2013
|
0.10
|
Collected Tools and Supplies from MX Hangar
|
Details
|
   |
|
12-13-2013
|
1.00
|
Taxi Light Wires in Right Wing
|
Details
|

  |
|
12-13-2013
|
0.10
|
Moved RV from MX Hangar to My Hangar
|
Details
|
   |
|
12-13-2013
|
2.00
|
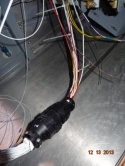
Attached P-1-0 Connector/Light Power Wires
|
Details
|

 |
|
12-12-2013
|
1.00
|
Plotos-Reinforcing Strips under Plenum
|
|


 |
|
12-12-2013
|
1.00
|
Plenum Popped off Engine/Added Glass Under Plenum
|
Details
|


|
|
12-12-2013
|
1.00
|
Added BB's and Epoxy-Flox Slurry to Left Elevator
|
Details
|


|
|
12-11-2013
|
1.00
|
Retaped Engine for Glassing Plenum
|
Details
|


|
|
12-11-2013
|
1.00
|
Photos-Left Side of Plenum after Adding Glass
|
|
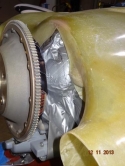
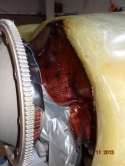
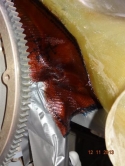
|
|
12-11-2013
|
2.00
|
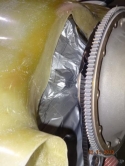
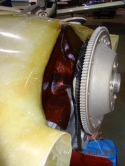
Glassed Front of Plenum over Engine
|
Details
|
 |
|
12-11-2013
|
1.00
|
Completed P-1-0 Connector
|
Details
|

  |
|
12-10-2013
|
2.00
|
Work on Plenum/Trimmed Right Front Bracket
|
Details
|


|
|
12-10-2013
|
1.50
|
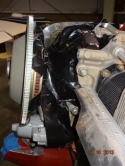
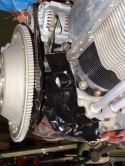
Taped Engine for Fiberglassing Plenum
|
Details
|

|
|
12-09-2013
|
3.00
|
AeroLed Wiring/Master-Slave Wires Connected
|
Details
|


 |
|
12-06-2013
|
2.00
|
Spiral-wrapped and Labeled Wires
|
Details
|


|
|
12-05-2013
|
3.00
|
Wire Labels/Light Wires
|
Details
|


|
|
12-04-2013
|
2.00
|
WigWag Power Wiring
|
Details
|


|
|
12-04-2013
|
1.00
|
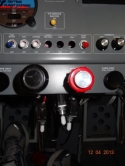
Replaced Light Switches in Panel
|
Details
|

  |
|
12-04-2013
|
1.00
|
Removed Light Switches
|
Details
|


|
|
12-03-2013
|
3.00
|
Swapped CB's/Pitot Heat Wire/Panel Put Together
|
Details
|


 |
|
12-02-2013
|
4.00
|
Removed CB's from Panel/Removed Wig-Wag
|
Details
|


|
|
12-01-2013
|
1.80
|
Connected Left Fuel Sending Unit Wire
|
Details
|
  |
|
11-30-2013
|
1.00
|
Completed Fuel Guardian Wiring
|
Details
|


|
|
11-30-2013
|
1.00
|
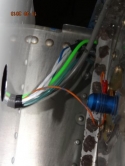
AOA Tubing/Fuel Tank Sending Wire
|
Details
|


|
|
11-29-2013
|
3.00
|
Fuel Guardian Wiring
|
Details
|


|
|
11-27-2013
|
3.50
|
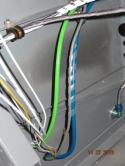
Moved RV to MX Hangar/Fuel Guardian Wires
|
Details
|


|
|
11-26-2013
|
2.00
|
Removed Dynon D-100/Routed AOA Tubing
|
Details
|


 |
|
11-22-2013
|
0.20
|
Talked to Aerotronics re WigWag Light Change
|
Details
|
   |
|
11-21-2013
|
2.00
|
AOA Tees/Fuel Guardian Controller
|
Details
|

  |
|
11-20-2013
|
2.00
|
Trimmed Fuselage Opening for Flap Control Rod
|
Details
|

  |
|
11-20-2013
|
2.00
|
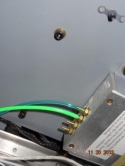
AOA Tubing/Moved Pitot and Static Lines
|
Details
|


|
|
11-19-2013
|
0.10
|
Photos-Flaps in Down Position
|
Details
|


|
|
11-19-2013
|
1.00
|
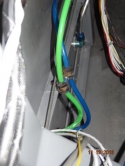
Attaching Pitot/Static Tubing to Fuselage Stringer
|
Details
|

 |
|
11-19-2013
|
1.00
|
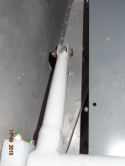
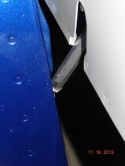
Attached Flap Control Rods to Actuators
|
Details
|

|
|
11-18-2013
|
1.50
|
Helped Install Flap Control Rods and Flaps
|
Details
|


|
|
11-18-2013
|
4.50
|
Drilled Right Side Fuel Cover/Pitot Tubing
|
Details
|


|
|
11-17-2013
|
2.00
|
Trimmed Right Fuel Line Side Cover
|
Details
|


 |
|
11-16-2013
|
1.00
|
Fuel Lines and Side Supports
|
Details
|

  |
|
11-16-2013
|
5.00
|
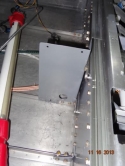
Enlarged Fuselage Holes/Fuel Line Supports
|
Details
|


|
|
11-12-2013
|
2.50
|
Bolted Outboard Floor Brackets
|
Details
|


|
|
11-08-2013
|
3.50
|
Two Outboard Floor Brackets
|
Details
|


|
|
11-07-2013
|
2.00
|
Floor Bracket
|
Details
|
   |
|
11-01-2013
|
0.50
|
Marked Spar Bolts with Torque Seal
|
Details
|

  |
|
11-01-2013
|
1.50
|
Drilled and Bolted Two Floor Brackets to Spar
|
Details
|


|
|
10-26-2013
|
3.00
|
Spar Bolts/Fuel Lines-Had to be Redone
|
Details
|


|
|
10-26-2013
|
1.00
|
Floor Brackets/Visitors
|
Details
|

  |
|
10-25-2013
|
0.50
|
Sanded Resin on Right Elevator
|
Details
|

  |
|
10-25-2013
|
0.50
|
Enlarged Fuel Line Holes/Spar Bolt Torque Value
|
Details
|

  |
|
10-20-2013
|
4.00
|
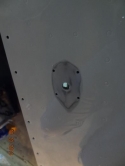
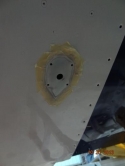
Sanded Fuselage Area for Antennas
|
Details
|

|
|
10-20-2013
|
2.00
|
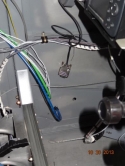
Fuel Tank Line/Spar Bolts Torque
|
Details
|

|
|
10-20-2013
|
2.00
|
Attached Comm and Transponder Antennas
|
Details
|

  |
|
10-20-2013
|
1.00
|
Added Epoxy Resin, Flox and BB's to Rt Elevator
|
Details
|


 |
|
10-19-2013
|
0.10
|
Photo-Left Rear Spar Bolt
|
|
  |
|
10-19-2013
|
6.00
|
Installed Rear Spar Bolts/Bolt Holder
|
Details
|

|
|
10-14-2013
|
1.00
|
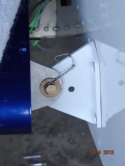
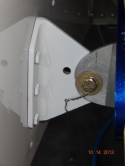
Safetied Bolts in Fuselage-Fuel Tank Brackets
|
Details
|
 |
|
10-13-2013
|
2.50
|
Nuts/Washers on 3/16'' Bolts/Bottom Spar Doubler
|
Details
|


|
|
10-12-2013
|
7.00
|
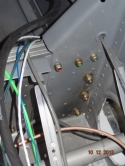
Installed Close Tolerance Spar Bolts
|
Details
|


|
|
10-12-2013
|
2.00
|
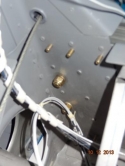
Assisted with Inserting Wing Spar Bolts
|
Details
|
  |
|
10-12-2013
|
2.00
|
Assisted with Inserting Spar Bolts
|
Details
|

  |
|
10-11-2013
|
7.00
|
Installed Most of the Spar Bolts
|
Details
|


|
|
10-11-2013
|
4.00
|
Helped Install Wing Spar Bolts
|
Details
|


 |
|
10-10-2013
|
2.50
|
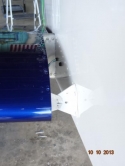
Trimmed Right Wing Spar Web for Trim Cable
|
Details
|


|
|
10-10-2013
|
0.30
|
Helped Remove Right Wing from Fuselage
|
Details
|
   |
|
10-10-2013
|
1.00
|
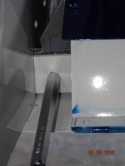
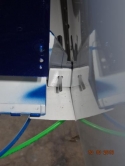
Helped Insert Right Wing and Spar Bolts
|
Details
|
 |
|
10-10-2013
|
0.50
|
Began to Reassemble Fuel Selector Valve
|
Details
|

  |
|
10-09-2013
|
1.00
|
Marked Right Spar for Trimming for Trim Cable
|
Details
|
   |
|
10-08-2013
|
1.00
|
Right Spar to be Trimmed for Trim Cable
|
Details
|


 |
|
10-08-2013
|
3.00
|
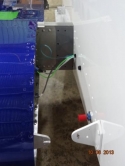
Inserted Both Wings into Fuselage
|
Details
|


|
|
10-08-2013
|
1.50
|
Assisted with Inserting Wings into the Fuselage
|
Details
|


|
|
10-03-2013
|
0.50
|
Fuselage Holes for Wires/Fuel Selector Valve
|
Details
|


 |
|
10-02-2013
|
2.00
|
Used Tie-Wraps to Tie Wire Loom to Ribs
|
Details
|

  |
|
10-01-2013
|
1.50
|
Ran Strobe Wiring
|
Details
|


|
|
10-01-2013
|
2.00
|
Move Equipment from Shop to Hangar/Wiring
|
Details
|


|
|
10-01-2013
|
1.50
|
Helped Move Equipment from Shop to Hangar
|
Details
|
   |
|
09-30-2013
|
0.50
|
Helped with Strobe Wiring
|
Details
|
   |
|
09-30-2013
|
2.00
|
Determined Strobe Wiring/Visitor
|
Details
|
   |
|
09-25-2013
|
2.00
|
Spiral Wrapped Pitot/AOA Tubes-Bellcrank
|
Details
|


 |
|
09-25-2013
|
1.00
|
Ran Strobe Wiring and Nav Coax Thru Wings
|
Details
|


|
|
09-24-2013
|
2.50
|
Aileron Bellcranks
|
Details
|


|
|
09-23-2013
|
0.50
|
Turned Wings Over
|
Details
|

  |
|
09-23-2013
|
1.00
|
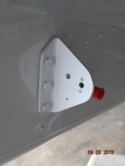
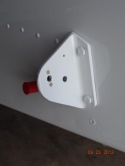
Riveted Nutplates to Fuse/Tank Attach Brackets
|
Details
|
 |
|
09-23-2013
|
1.00
|
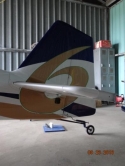
Replaced Torque Tube Bearings/Emp Fairings
|
Details
|


|
|
09-23-2013
|
0.50
|
Delivered Ailerons, Flaps, and Wing Fairings
|
Details
|
   |
|
09-17-2013
|
2.50
|
Painted Access Panel/Fairings/Touch-up Areas
|
Details
|
   |
|
09-17-2013
|
3.50
|
Cut and Riveted Aileron Torque Tubes
|
Details
|


 |
|
09-15-2013
|
1.50
|
Shortened Aileron Torque Tube
|
Details
|

  |
|
09-15-2013
|
1.00
|
Cotter Pin in Tailwheel Bolt/Rudder Steering Link
|
Details
|


|
|
09-14-2013
|
0.50
|
Aileron Torque Tubes/Tailwheel Cotter Pin
|
Details
|
   |
|
09-13-2013
|
2.00
|
Tailwheel Installed and Torqued Bolts
|
Details
|

  |
|
09-12-2013
|
3.00
|
Wet-sanded/Clearcoated Flap and Aileron
|
Details
|
   |
|
09-12-2013
|
2.00
|
Greased Tailwheel and Reinstalled
|
Details
|
   |
|
09-11-2013
|
2.00
|
Installed Tail Wheel Fork
|
Details
|
   |
|
09-10-2013
|
1.00
|
Cleaned up Hangar
|
Details
|
   |
|
09-09-2013
|
3.00
|
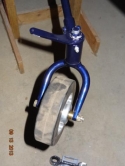
Clearcoat Ailerons & Flaps/Painted Tailwheel Fork
|
Details
|
  |
|
09-05-2013
|
3.50
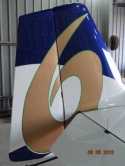
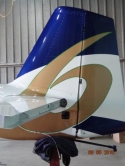
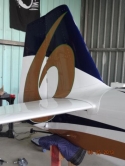
|
Moved Wings to Hangar
|
Details
|
|
|
09-05-2013
|
3.50
|
Moved Wings and Tools to Hangar
|
Details
|


 |
|
09-04-2013
|
2.50
|
Wet-sanded Flaps and Ailerons
|
Details
|


 |
|
09-04-2013
|
2.50
|
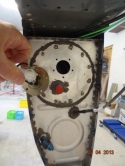
Resealed Fuel Sending Units
|
Details
|
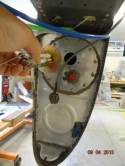
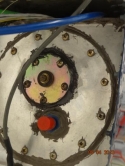
|
|
09-04-2013
|
0.10
|
Photo-Left Fuel Sending Unit Prosealed
|
|
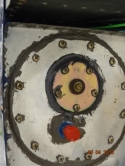
  |
|
09-03-2013
|
1.00
|
Assisted Walt
|
Details
|

  |
|
09-03-2013
|
2.50
|
Applied Two More Coats of Clearcoat
|
Details
|


|
|
09-02-2013
|
2.50
|
Wet-sanded Wings
|
Details
|


|
|
09-02-2013
|
2.50
|
Marked Fuselage Access Panel/Removed Tailwheel
|
Details
|


 |
|
08-28-2013
|
0.50
|
Assisted Walt
|
Details
|


|
|
08-28-2013
|
2.00
|
Applied Two Coats of Clearcoat
|
Details
|


|
|
08-22-2013
|
4.00
|
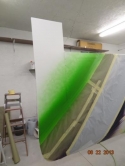
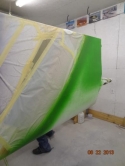
Painted Green and Light Blue
|
Details
|

|
|
08-22-2013
|
4.00
|
Masked Wing Components/Unmasked!
|
Details
|


|
|
08-22-2013
|
2.00
|
Helped Mask and Unmasked Wing Pieces
|
Details
|


|
|
08-22-2013
|
2.00
|
Helped Mask and Unmask Wing Components
|
Details
|


|
|
08-21-2013
|
3.50
|
Masked Flaps & Ailerons/Gold and Dk Blue Paint
|
Details
|


|
|
08-21-2013
|
1.00
|
Helped Mask/Visitors
|
Details
|


|
|
08-20-2013
|
4.50
|
Taped Templates onto Wings
|
Details
|


|
|
08-20-2013
|
4.50
|
Attached Wing Panels and Wing Tips
|
Details
|
   |
|
08-20-2013
|
3.00
|
Assisted with Masking the Wings
|
Details
|
   |
|
08-15-2013
|
0.10
|
Photos-Wing Components Painted
|
|


|
|
08-15-2013
|
3.50
|
Patched Nav Light Hole/Painted Wings
|
Details
|


|
|
08-15-2013
|
1.00
|
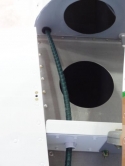
Canopy Cover/Ran Trim Cable thru Fuselage
|
Details
|

 |
|
08-14-2013
|
2.50
|
Masked and Primed Wing Components
|
Details
|


|
|
08-14-2013
|
2.00
|
Helped MaskWings
|
Details
|

  |
|
08-14-2013
|
2.00
|
Helped Mask Wing Components
|
Details
|
   |
|
08-14-2013
|
2.00
|
Helped Mask and Final Prep of Wing Components
|
Details
|
   |
|
08-13-2013
|
4.00
|
Cleaned, Acid-etched and Alodyned Wings
|
Details
|


|
|
08-13-2013
|
3.00
|
Assisted with Acid-Etching and Alodyning
|
Details
|


 |
|
08-13-2013
|
3.00
|
Assisted with Acid-Etching and Alodyning
|
Details
|

  |
|
08-13-2013
|
3.50
|
Assisted Walt with Acid-Etching and Alodyning
|
Details
|
 |
|
08-12-2013
|
3.50
|
Hung Wings, Ailerons, and Flaps
|
Details
|


|
|
08-12-2013
|
3.50
|
Assisted with Hanging Wings, Etc.
|
Details
|
   |
|
08-12-2013
|
4.00
|
Assisted with Hanging Wings, Etc.
|
Details
|

  |
|
08-12-2013
|
3.50
|
Assisted with Hanging Wings
|
Details
|
   |
|
08-08-2013
|
0.50
|
Cleaned and Spray-painted Center Spars
|
Details
|


 |
|
08-07-2013
|
2.00
|
Transferred Patterns to Right Wing/Hung Hooks
|
Details
|
   |
|
08-07-2013
|
2.00
|
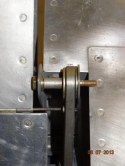
Attached Right Aileron/Patterns on Right Wing
|
Details
|
  |
|
08-07-2013
|
1.00
|
Assisted with Transferring Patterns to Right Wing
|
Details
|
   |
|
08-06-2013
|
1.00
|
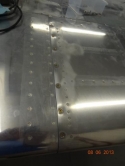
Reattached Fuel Tank to Left Wing
|
Details
|

 |
|
08-06-2013
|
1.00
|
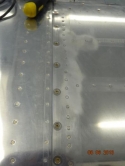
Left Fuel Tank On and Off the Wing
|
Details
|


|
|
08-06-2013
|
3.00
|
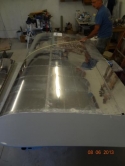
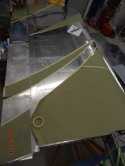
Laid out Paint Scheme on Left Wing/Patterns
|
Details
|

|
|
08-06-2013
|
3.00
|
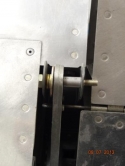
Attached Left Aileron/Helped with Patterns
|
Details
|


|
|
07-21-2013
|
3.00
|
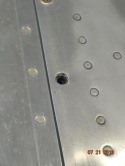
Reinstalled Left Fuel Tank/Visitors
|
Details
|

 |
|
07-20-2013
|
1.00
|
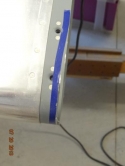
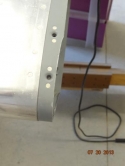
Trimmed Leading Edge of Fuse/Tank Intersection
|
Details
|

|
|
07-20-2013
|
3.00
|
Repainted Fuselage-Empennage Fairing
|
Details
|

  |
|
07-20-2013
|
1.00
|
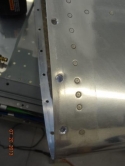
Photo-Fuel Tank Holes Enlarged
|
|
  |
|
07-20-2013
|
1.00
|
Installed Left Fuel Tank
|
Details
|


|
|
07-19-2013
|
2.00
|
AOA Tubing Attached to Ports
|
Details
|


 |
|
07-18-2013
|
2.00
|
Sanded Wing Tips
|
Details
|
   |
|
07-18-2013
|
1.00
|
Rolled Leading Edge of Left Flap/Swapped Wings
|
Details
|


 |
|
07-18-2013
|
1.00
|
Moved Fairing Nutplate on Wing/Filled Hole
|
Details
|


|
|
07-14-2013
|
1.30
|
Drilled Landing Light Lens Cover
|
Details
|


 |
|
07-13-2013
|
2.00
|
Tubing and Wiring Run Behind Tank/Visitor
|
Details
|


|
|
07-13-2013
|
2.00
|
Screwed Left Fuel Tank to Wing
|
Details
|


 |
|
07-13-2013
|
1.00
|
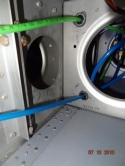
Photos-Pitot and Static Tubing inside Wing
|
|


|
|
07-13-2013
|
2.00
|
Completed Left Landing Light Wiring in Wing
|
Details
|


 |
|
07-12-2013
|
3.00
|
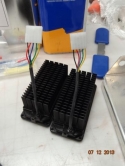
Made Connectors for AeroLED Lights
|
Details
|


|
|
07-12-2013
|
2.00
|
Landing Light Wiring
|
Details
|


 |
|
07-11-2013
|
2.00
|
Pitot Tube and Heat Controller Screwed in Place
|
Details
|
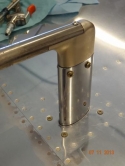


|
|
07-11-2013
|
1.00
|
Pitot Heat Wiring in Wire Loom
|
Details
|

  |
|
07-11-2013
|
0.10
|
Landing Light Cover Laid in Wing
|
Details
|

  |
|
07-10-2013
|
2.00
|
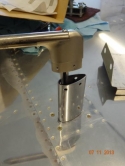
Tapped Screw Holes in Pitot Tube
|
Details
|
  |
|
07-06-2013
|
1.00
|
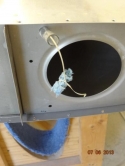
Ran String thru Tubing/Landing Light Work
|
Details
|


|
|
07-06-2013
|
1.00
|
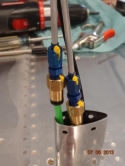
Drilled Screw Holes in Pitot Tube/Tightened Fittin
|
Details
|

 |
|
07-05-2013
|
2.00
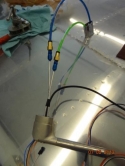
|
Worked on Pitot/Static Tubing
|
Details
|


|
|
07-05-2013
|
5.00
|
Sanded and Primed Wing Tips
|
Details
|


 |
|
07-05-2013
|
2.00
|
Pitot Tube-Nutplate/Shortened Tubes
|
Details
|


|
|
07-05-2013
|
3.00
|
Pitot Tube Wiring
|
Details
|


 |
|
07-04-2013
|
2.00
|
Sanded and Epoxied Hole in Left Wing Tip
|
Details
|

 |
|
07-04-2013
|
1.50
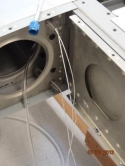
|
Pitot Heat Controller and Wiring
|
Details
|

 |
|
07-04-2013
|
2.00
|
Drilled Pitot Heat Controller to Access Panel
|
Details
|


|
|
06-30-2013
|
0.50
|
Riveted Tip Rib to Wing Tip
|
Details
|

  |
|
06-29-2013
|
1.00
|
Drilled Tip Rib to Left Wing/Visitor
|
Details
|

  |
|
06-28-2013
|
0.50
|
Installed Left Wing Tip on Wing
|
Details
|


 |
|
06-28-2013
|
1.00
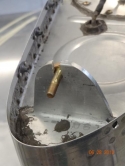
|
Cleaned up Openings in Fuel Tank Brackets
|
Details
|
  |
|
06-28-2013
|
1.50
|
Cleaned Parts/Weight Checked on Elevators
|
Details
|
   |
|
06-27-2013
|
3.00
|
Sanded and Primed Wing Tips
|
Details
|


 |
|
06-27-2013
|
4.00
|
Removed Left Fuel Tank/Pitot Tube Plumbing
|
Details
|


 |
|
06-21-2013
|
2.50
|
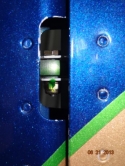
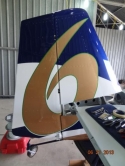
Installed Remaining Bolts in Rudder
|
Details
|
 |
|
06-21-2013
|
0.30
|
Helped Install Bolt in Rudder
|
Details
|
   |
|
06-20-2013
|
2.00
|
Sanded Left Wing Tip
|
Details
|

  |
|
06-20-2013
|
0.10
|
Photo-Torque Seal on Nuts
|
|

  |
|
06-20-2013
|
1.00
|
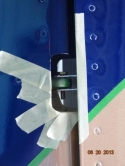
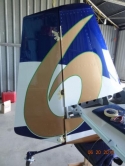
Installed Bolts on Rudder/Torque Seal on Nuts
|
Details
|

|
|
06-20-2013
|
0.50
|
Countersunk Left Fuel Tank Screw Holes
|
Details
|
   |
|
06-19-2013
|
1.50
|
Termporarily Attached Rudder
|
Details
|


 |
|
06-19-2013
|
2.00
|
Bolted HS and VS to Fuselage
|
Details
|


|
|
06-19-2013
|
1.00
|
Assisted with Applying Resin and Flox to Wing Tip
|
Details
|
   |
|
06-19-2013
|
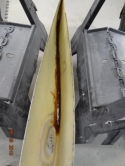
1.00
|
Applied Resin and Flox to Inside of Left Wing Tip
|
Details
|

 |
|
06-18-2013
|
1.00
|
Slotted Fuel Tank Brackets
|
Details
|


 |
|
06-18-2013
|
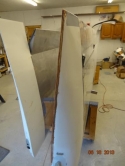
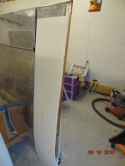
2.50
|
Laid Fiberglass on Outside of Left Wing Tip
|
Details
|

|
|
06-18-2013
|
0.50
|
HS and VS on Fuselage/Visitors
|
Details
|
   |
|
06-18-2013
|
1.50
|
Assisted with Glassing the Left Wing Tip
|
Details
|
   |
|
06-17-2013
|
1.00
|
Trimmed Aft End of Left Wing Tip
|
Details
|


|
|
06-17-2013
|
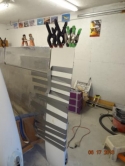
1.00
|
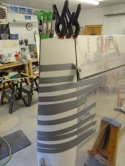
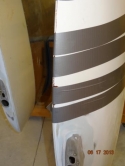
Taped and Glued Left Wing Tip Together
|
Details
|
|
|
06-17-2013
|
1.00
|
Split the Left Wing Tip
|
Details
|


|
|
06-17-2013
|
3.00
|
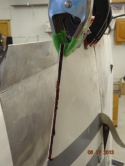
Assisted with Splitting and Glueing Left Wing Tip
|
Details
|
  |
|
06-16-2013
|
0.10
|
Visitors to the Hangar
|
Details
|
   |
|
06-15-2013
|
1.00
|
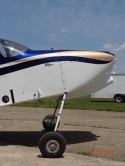
Portrait Photos in the Sun
|
|


|
|
06-15-2013
|
1.00
|
Photos-Shop without the Fuselage
|
|


|
|
06-15-2013
|
1.00
|
Photos-Fuselage out of Shop
|
|
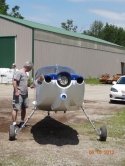


|
|
06-15-2013
|
1.00
|
Moving Fuselage into Hangar
|
|


|
|
06-15-2013
|
1.00
|
Moved Fuselage out of Shop
|
Details
|


|
|
06-15-2013
|
3.00
|
Helped with Moving Fuselage to Hangar
|
Details
|
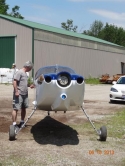
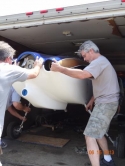

|
|
06-15-2013
|
2.00
|
Drove Trailer with Fuselage to the Airport
|
Details
|
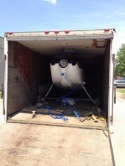


|
|
06-15-2013
|
1.00
|
Cleaned off Duct Tape-Photos-Rudder,Hangar
|
Details
|


 |
|
06-06-2013
|
2.00
|
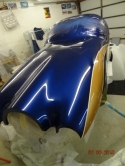
Wet-sanded and Polished Top Cowling
|
Details
|

 |
|
06-06-2013
|
1.00
|
Assisted with Unmasking Fuselage/Visitor
|
Details
|

  |
|
06-05-2013
|
1.00
|
Wet-sanded the Cowling/Xyrillic Pearl
|
Details
|


|
|
06-05-2013
|
0.50
|
Removed Stencil and Masking on N Numbers
|
Details
|


|
|
06-05-2013
|
0.50
|
Helped Mask Fuselage for Applying N Number
|
Details
|


|
|
06-05-2013
|
0.50
|
Applied Stencils for N Numbers
|
Details
|


|
|
06-05-2013
|
0.50
|
Applied Lime Green Border
|
Details
|


|
|
05-29-2013
|
0.10
|
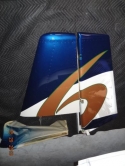
Photo-Vertical Stab and Rudder Together
|
|
  |
|
05-29-2013
|
4.00
|
Helped with Unmasking and Remasking Fuselage
|
Details
|


|
|
05-29-2013
|
3.50
|
Clearcoat Sprayed on Fuselage
|
Details
|


|
|
05-28-2013
|
0.10
|
Photo-Right Front of Cowling
|
|

  |
|
05-28-2013
|
2.50
|
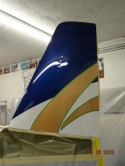
Clearcoated Canopy, Cowling, VS and Rudder
|
Details
|


|
|
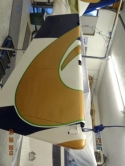
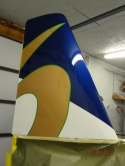
05-28-2013
|
1.00
|
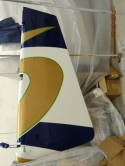
Assisted with Unmasking/Masking
|
Details
|
|
|
05-25-2013
|
7.00
|
Sprayed Blue Stripes on Fuselage
|
Details
|
   |
|
05-22-2013
|
0.10
|
Photos 4-Unmasked Fuselage for Blue Stripes
|
Details
|


 |
|
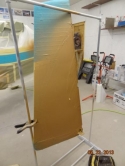
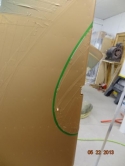
05-22-2013
|
0.10
|
Photos 3-Painted Gold onto Fuselage
|
|

|
|
05-22-2013
|
0.10
|
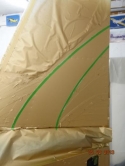
Photos 2-Gold Painted on Fuselage
|
|


|
|
05-22-2013
|
0.10
|
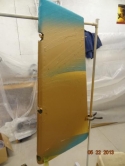
Photos 1-Gold Painted on Fuselage
|
|


|
|
05-22-2013
|
3.00
|
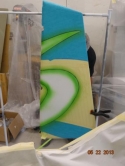
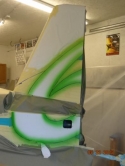
Painted Green Stripes and Gold
|
Details
|

|
|
05-21-2013
|
1.50
|
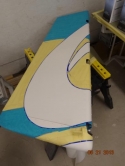
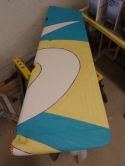
Striped Aft Right Fuselage and Rudder
|
Details
|

|
|
05-21-2013
|
2.00
|
Masked off the Fuselage for Painting
|
Details
|


|
|
05-21-2013
|
3.50
|
Assisted with Masking Fuselage/Emp Fairing
|
Details
|


 |
|
05-17-2013
|
1.50
|
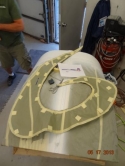
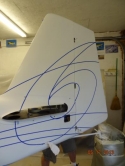
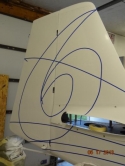
Made '6' Template and Striped Tail
|
Details
|
 |
|
05-17-2013
|
2.50
|
Assisted with Creating the '6' Template
|
Details
|
  |
|
05-16-2013
|
2.50
|
Finished Striping Right Side of Fuselage
|
Details
|

  |
|
05-16-2013
|
2.50
|
Assisted with Striping Fuselage
|
Details
|
   |
|
05-15-2013
|
3.50
|
Transferred Stripes from Left to Right Side Fuse
|
Details
|


|
|
05-15-2013
|
0.50
|
Split Lower Fairing on Empennage Fairing/Visitor
|
Details
|


|
|
05-15-2013
|
4.00
|
Helped Stripe Fuselage
|
Details
|


|
|
05-14-2013
|
3.50
|
Striped Left Side of Fuselage
|
Details
|


|
|
05-14-2013
|
3.50
|
Assisted Walt with Striping
|
Details
|

  |
|
05-11-2013
|
1.00
|
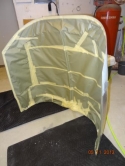
Canopy Masked and Primed
|
Details
|


|
|
05-11-2013
|
10.00
|
Assisted Walt/Caused a Run in Paint
|
Details
|


|
|
05-11-2013
|
1.00
|
7-Primed/Painted Lower Part of Vertical Stab
|
Details
|


|
|
05-11-2013
|
2.00
|
6-First Coat of Paint
|
Details
|


|
|
05-11-2013
|
2.00
|
5-Primed Fuselage
|
Details
|


|
|
05-11-2013
|
1.00
|
4-Fuselage Ready for Primer/Initial Coat of Primer
|
Details
|


|
|
05-11-2013
|
1.00
|
3-Masked off Cowling and Gear Legs
|
Details
|


|
|
05-11-2013
|
1.00
|
2-Masked off All Openings in Fuselage
|
Details
|


|
|
05-11-2013
|
1.00
|
1-Masked off Cockpit/Installed Cowling
|
Details
|


|
|
05-10-2013
|
3.50
|
Wiped off Fuselage after Acid Etching
|
Details
|


|
|
05-10-2013
|
0.10
|
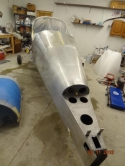
Photos-Fuselage Ready for Paint!
|
|


|
|
05-10-2013
|
0.10
|
Photos-Canopy Prepped for Painting
|
|

  |
|
05-10-2013
|
0.10
|
Photos-Applying Acid-Etching
|
|


|
|
05-10-2013
|
0.10
|
Photos-Applied Alodyning Solution
|
|


|
|
05-10-2013
|
0.10
|
Photos-Acid Etching
|
|


|
|
05-10-2013
|
1.00
|
Masked, Cleaned, Acid-Etched Fuselage
|
Details
|


|
|
05-09-2013
|
0.50
|
Worked on Rudder
|
Details
|
  |
|
05-09-2013
|
0.50
|
Riveted Nav Antenna to Doublers, Wing Tip
|
Details
|


|
|
05-09-2013
|
2.00
|
Prepared Shop for Painting
|
Details
|


 |
|
05-09-2013
|
0.10
|
Moved More Stuff to the Hangar
|
Details
|
   |
|
05-09-2013
|
0.50
|
Camlocs Installed on Top Cowling
|
Details
|

  |
|
05-09-2013
|
0.20
|
Called Van's re Ski Jump on Left Wing Tip
|
Details
|
   |
|
05-08-2013
|
0.10
|
Moved Items to Hangar
|
Details
|


 |
|
05-08-2013
|
0.50
|
Marked Trailing Edge of Left Wing Tip for Trimming
|
Details
|

  |
|
05-08-2013
|
3.50
|
Installed Archer Nav Antenna into Right Wing Tip
|
Details
|


 |
|
05-08-2013
|
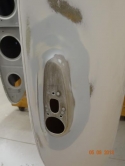
3.00
|
Filled and Sanded Wing Tip and Nav Light Area
|
Details
|

 |
|
05-07-2013
|
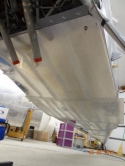
1.00
|
Scuffed Fuselage for Painting
|
Details
|
  |
|
05-07-2013
|
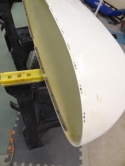
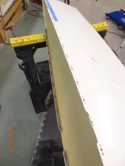
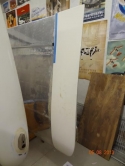
4.00
|
Riveted More Nutplates to Right Wing Tip
|
Details
|
|
|
05-07-2013
|
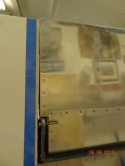
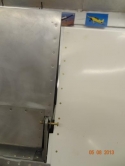
1.00
|
Marked Wing Tips for Trimming Gap
|
Details
|
 |
|
05-07-2013
|
1.00
|
Empennage Fairing after Sanding/Priming
|
Details
|


|
|
05-07-2013
|
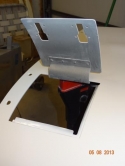
1.00
|
Brought Cowling Back after Sanding, Priming
|
Details
|


|
|
05-06-2013
|
3.00
|
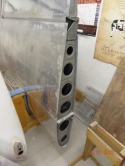
Riveted Nutplates on Left Wing Tip
|
Details
|


|
|
05-06-2013
|
1.00
|
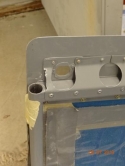
Removed Lock on Canopy
|
Details
|
  |
|
05-06-2013
|
3.00
|
Primed Windshield Fairing/Top Skin/Fuselage
|
Details
|


|
|
04-22-2013
|
1.00
|
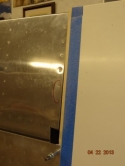
Trimmed off Inside Edge of Right Wing Tip
|
Details
|


|
|
04-21-2013
|
3.00
|
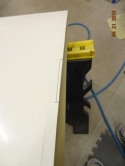
Riveted Rib to Rt Wing Tip/Trimmed Tip
|
Details
|


|
|
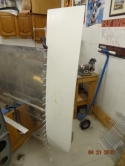
04-21-2013
|
1.00
|
Right Wing Tip Drilled to Wing
|
Details
|
  |
|
04-20-2013
|
5.00
|
Sanded Windshield and Top Skin
|
Details
|


 |
|
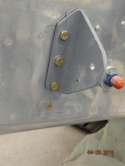
04-20-2013
|
0.50
|
Installed Screw on Fuel Tank/Fuse Bracket
|
Details
|
  |
|
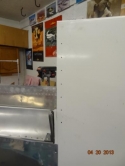
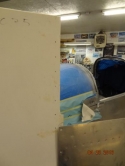
04-20-2013
|
2.50
|
Drilled Wing Tip Rib to Wing Tip
|
Details
|
 |
|
04-20-2013
|
1.00
|
Assisted with Bolting Bracket and Wing Tip
|
Details
|
   |
|
04-19-2013
|
2.50
|
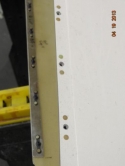
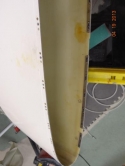
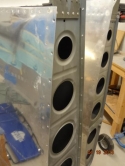
Riveted Nutplates to Right Wing Tip
|
Details
|
|
|
04-19-2013
|
1.00
|
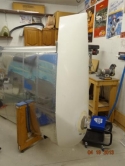
Right Wing Tip Screwed to Fuselage
|
Details
|
  |
|
04-18-2013
|
3.50
|
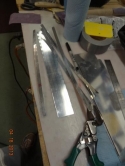
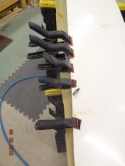
Cut Aluminum Strips for Wing Tip Reinforcement
|
Details
|

|
|
04-18-2013
|
1.00
|
Aluminum Strips Drilled to Wing Tip
|
Details
|

  |
|
04-17-2013
|
1.00
|
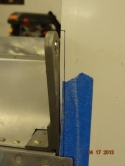
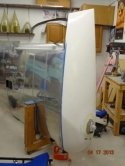
Marked Right Wing Tip for Trimming
|
Details
|
 |
|
04-17-2013
|
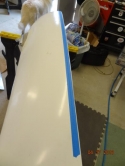
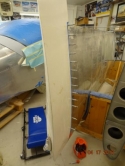
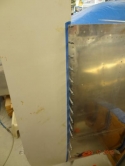
2.50
|
Drilled Right Wing to Wing Tip
|
Details
|
|
|
04-16-2013
|
1.00
|
Measured and Sanded Right Wing Tip Edges
|
Details
|
   |
|
04-15-2013
|
3.00
|
Sanded and Filled Windshield Fairing/Top Skin
|
Details
|


|
|
04-15-2013
|
0.50
|
Installed Star Washer on #1 Cylinder Cover
|
Details
|

  |
|
04-13-2013
|
6.00
|
Sanded Windshield Fairing
|
Details
|
   |
|
04-11-2013
|
3.00
|
Sanded Windshield Fairing
|
Details
|
   |
|
04-11-2013
|
1.00
|
Riveted More Nutplates to HS
|
Details
|
   |
|
04-10-2013
|
0.10
|
Photo-Windshield Fairing and Top Skin
|
|

  |
|
04-10-2013
|
4.00
|
Made Two F-699 Brackets
|
Details
|


 |
|
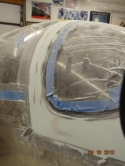
04-10-2013
|
3.50
|
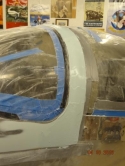
Filled and Sanded Windshield Fairing
|
Details
|

|
|
04-09-2013
|
1.00
|
Riveted Nutplates to Top of HS
|
Details
|

  |
|
04-06-2013
|
7.00
|
Painted Empennage Pieces
|
Details
|
   |
|
04-04-2013
|
1.00
|
Riveted Nutplate in HS
|
Details
|

  |
|
04-04-2013
|
2.50
|
Installed Nutplates in Fuselage and HS
|
Details
|


|
|
04-03-2013
|
1.00
|
Checked Position of Left Rear Spar Hole
|
Details
|

  |
|
04-02-2013
|
2.00
|
Chamfered Edge of Right Wing Root Fairing
|
Details
|

  |
|
04-01-2013
|
1.00
|
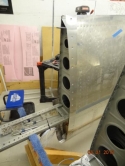
Screwed Left Wing Root Fairing to Wing
|
Details
|
  |
|
03-31-2013
|
2.00
|
Painted Empennage Pieces
|
Details
|
   |
|
03-30-2013
|
7.00
|
Prepped Empennage Pieces for Painting
|
Details
|
   |
|
03-27-2013
|
2.00
|
Worked on the Windshield Fairing
|
Details
|


 |
|
03-27-2013
|
1.50
|
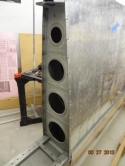
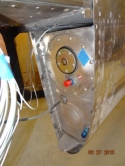
Riveted Nutplates to Left Wing
|
Details
|
 |
|
03-27-2013
|
1.00
|
Reorganized Shop/Removed Camlocs
|
Details
|


 |
|
03-26-2013
|
2.00
|
Riveted Nutplates to Right Wing
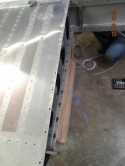
|
Details
|
  |
|
03-26-2013
|
7.00
|
Removed Left Wing/Moved Everything to Shop
|
Details
|


 |
|
03-26-2013
|
0.50
|
Helped Move Wings/Fuselage to Shop
|
Details
|
   |
|
03-26-2013
|
0.50
|
Helped Move Wings/Fuselage to Shop
|
Details
|
   |
|
03-25-2013
|
1.50
|
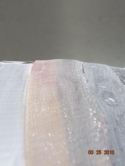
Sanded Top Skin and Canopy Roll Bar
|
Details
|


|
|
03-25-2013
|
1.00
|
Sanded Lower Cowl over Rivets
|
Details
|


 |
|
03-25-2013
|
1.50
|
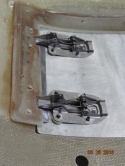
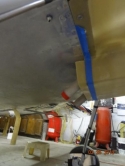
Oil Door Clecoed/Trimmed Cowl for Exhaust
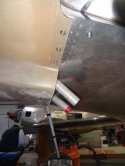
|
Details
|
|
|
03-25-2013
|
3.00
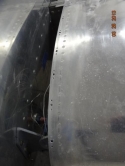
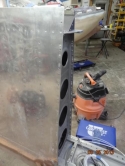
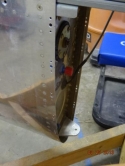
|
Lt Wing before Removal/Rt Wing Nutplate Holes
|
Details
|
|
|
03-19-2013
|
3.50
|
Sanded Top Skin/Filled Rivets in Lower Cowl
|
Details
|


 |
|
03-19-2013
|
0.10
|
Right Wing Removed from Fuselage
|
|

  |
|
03-19-2013
|
2.00
|
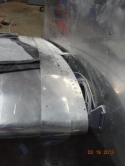
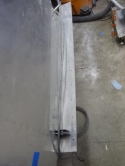
Removed Wings from Fuselage
|
Details
|

|
|
03-19-2013
|
2.00
|
Drilled and Upsized Fuselage Overhang Holes
|
Details
|
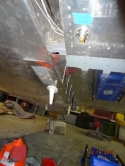


|
|
03-19-2013
|
2.00
|
Checked Oil Door Doubler after Glassing
|
Details
|


 |
|
03-18-2013
|
1.00
|
Began to Drill Lower Wing/Fuse for Nutplates
|
Details
|
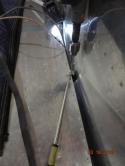
  |
|
03-16-2013
|
1.00
|
Checked Angles of Flaps with Fuselage Holes
|
Details
|


 |
|
03-15-2013
|
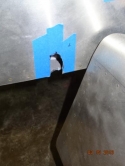
1.00
|
Helped with Enlarging the Flap Rod Hole
|
Details
|

 |
|
03-15-2013
|
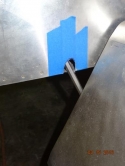
1.00
|
Enlarged Right Flap Rod Hole in Fuselage
|
Details
|


|
|
03-13-2013
|
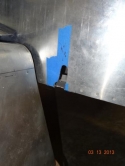
2.00
|
Enlarged and Cleaned up Left Flap Rod Hole
|
Details
|
  |
|
03-12-2013
|
0.50
|
Sanded Top Skin
|
Details
|


|
|
03-12-2013
|
1.00
|
Sanded Forward Top Skin
|
Details
|


|
|
03-12-2013
|
0.50
|
Sanded Forward Top Skin
|
Details
|


|
|
03-12-2013
|
0.10
|
Played with Max
|
Details
|
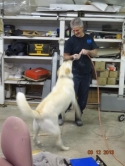
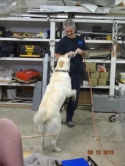
|
|
03-12-2013
|
4.00
|
Made Holes in Fuselage for Flap Control Rods
|
Details
|
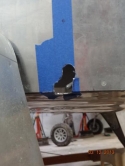
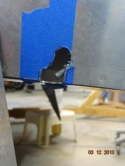

|
|
03-07-2013
|
1.00
|
Trimmed Lower Inboard Corner of Right Flap
|
Details
|

  |
|
03-07-2013
|
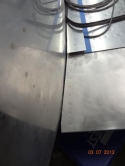
2.00
|
Trimmed Inboard Lower Flaps
|
Details
|


|
|
03-07-2013
|
0.50
|
Received Rear-view Mirrors
|
Details
|


 |
|
03-07-2013
|
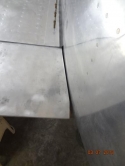
1.00
|
Installed Bolts in Flaps
|
Details
|


|
|
03-05-2013
|
2.00
|
Trimmed Inboard Right Flap for Fuselage
|
Details
|


|
|
03-05-2013
|
1.00
|
Jeff's New Titan Mustang Projedt
|
Details
|


 |
|
03-05-2013
|
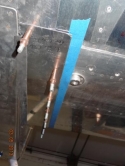
1.50
|
Drilled Underside of Rt. Wing Fairing to Wing
|
Details
|


|
|
02-28-2013
|
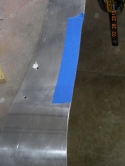
4.50
|
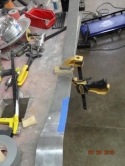
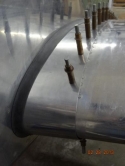
More Trimming of Wing Root Fairings
|
Details
|
|
|
02-28-2013
|
1.00
|
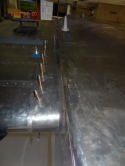
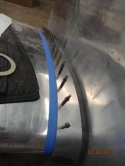
Helped with Fit of Wing Fairings
|
Details
|
 |
|
02-28-2013
|
2.00
|
Helped Epoxy Reinforcements on Oil Door
|
Details
|


 |
|
02-27-2013
|
3.50
|
Wing Root Fairing Fittings
|
Details
|
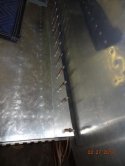
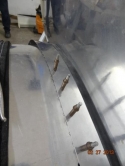
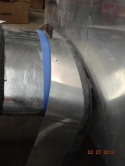
|
|
02-27-2013
|
1.50
|
Windshield Fiberglass Work/Cowling
|
Details
|


|
|
02-27-2013
|
0.50
|
Applied More Filler to Windshield Fairing
|
Details
|

  |
|
02-26-2013
|
1.00
|
Photos-Right Wing Fairing Drilled to Wing
|
|
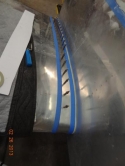


|
|
02-26-2013
|
1.50
|
Drilled the Right Wing Fairing to the Wing
|
Details
|
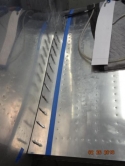
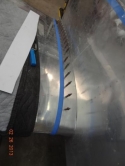
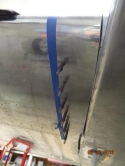
|
|
02-21-2013
|
3.50
|
Trimmed Right Wing Fairing
|
Details
|
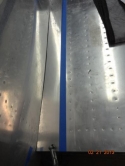
  |
|
02-21-2013
|
2.00
|
Sanded the Forward Top Skin
|
Details
|


 |
|
02-20-2013
|
1.00
|
Worked on Trimming Inboard Edge of Left Flap
|
Details
|


|
|
02-20-2013
|
1.00
|
Put Joggle in Inboard Corner of Left Flap
|
Details
|

 |
|
02-20-2013
|
1.00
|
More Fitting of the Left Flap
|
Details
|


|
|
02-20-2013
|
1.50
|
Marked Left Wing Root Fairing for More Trimming
|
Details
|
  |
|
02-20-2013
|
1.00
|
Helped Trim Inboard Portion of Left Flap
|
Details
|
   |
|
02-20-2013
|
0.50
|
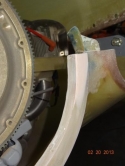
Built up Lower Cowling and Inlet Ring Areas
|
Details
|

|
|
02-20-2013
|
1.00
|
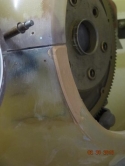
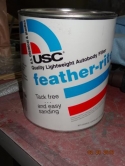
Built up Cowling Behind Spinner Plate
|
Details
|

|
|
02-20-2013
|
0.50
|
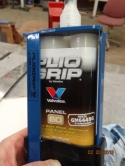
Applied Plio-Grip to Rivet Lines on Fwd Top Skin
|
Details
|


|
|
02-19-2013
|
1.00
|
Marked Left Flap for Trimming
|
Details
|


 |
|
02-19-2013
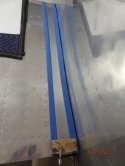
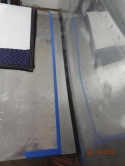
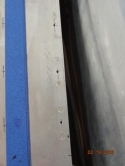
|
4.00
|
Finished Trimming Fairing/Drilled Wing
|
Details
|
|
|
02-14-2013
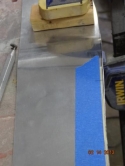
|
2.00
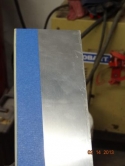
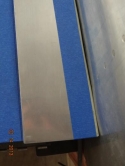
|
More Trimming of the Left Wing Root Fairing
|
Details
|
|
|
02-13-2013
|
3.00
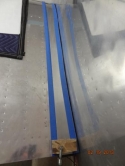
|
Trimmed Edge of Left Wing Root Fairing
|
Details
|

 |
|
02-10-2013
|
1.00
|
Check Left Flap to Fuselage Prior to Trimming
|
Details
|


 |
|
02-10-2013
|
1.50
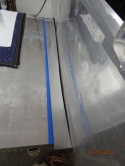
|
Began Work on Left Wing Root Fairing
|
Details
|


|
|
02-09-2013
|
4.50
|
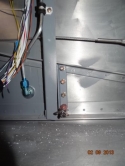
Primed/Bolted Wing Attach Brackets
|
Details
|


|
|
02-09-2013
|
1.50
|
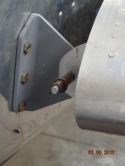
Assisted with Wing Attach Bracket Installation
|
Details
|
  |
|
02-08-2013
|
0.50
|
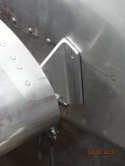
Right Attach Bracket Drilled-One Hole
|
Details
|
  |
|
02-08-2013
|
3.00
|
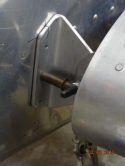
Made Left Internal Brackets for Attach Brackets
|
Details
|


|
|
02-07-2013
|
0.50
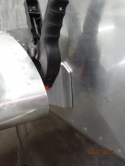
|
Right Wing Attach Bracket Clamped in Place
|
Details
|
  |
|
02-07-2013
|
3.50
|
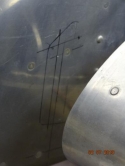
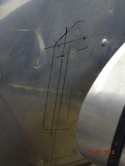
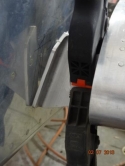
Marked Fuselage/Drilled Attach Bracket
|
Details
|
|
|
02-06-2013
|
2.50
|
Sanded Cowl Inlet Ring Areas/Installed Rings
|
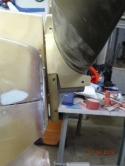
Details
|


|
|
02-06-2013
|
0.10
|
Photos-Wings/Cowling on Fuselage
|
|


 |
|
02-06-2013
|
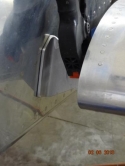
4.50
|
Clamped Left Wing Attach Bracket in Place
|
Details
|
  |
|
02-05-2013
|
0.10
|
Photos-Cowl Inlet Ring Areas Beefed Up
|
|


|
|
02-05-2013
|
0.50
|
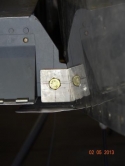
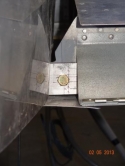
Inserted AN 5 Bolts into Rear Spar
|
Details
|
 |
|
02-05-2013
|
2.00
|
Finished Making Attach Bracket
|
Details
|

  |
|
02-05-2013
|
2.50
|
Filled and Sanded Cowl Inlet Areas
|
Details
|


|
|
02-05-2013
|
0.50
|
Double-checked Wing Leveling
|
Details
|


|
|
02-05-2013
|
0.50
|
Checked Various Parts of Aircraft for Leveling
|
Details
|


|
|
01-29-2013
|
2.50
|
Sanded Edges of Inner Cowling Joints
|
Details
|


 |
|
01-29-2013
|
4.50
|
Made Wing Root Attach Brackets
|
Details
|


 |
|
01-29-2013
|
2.50
|
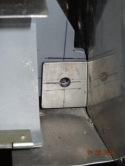
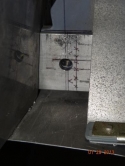
Drilled/Reamed Rear Spar Holes to Proper Size
|
Details
|
 |
|
01-28-2013
|
1.00
|
Trimmed Rt Fwd Clevis/Notched Rt Rear Spar
|
Details
|


|
|
01-28-2013
|
1.00
|
Measured Trimming of Clevis
|
Details
|


|
|
01-28-2013
|
1.50
|
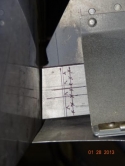
Drilled Right Rear Spar w/Drill Guide
|
Details
|


|
|
01-28-2013
|
2.00
|
Drawing # w/Rear Clevis Measurements
|
Details
|


|
|
01-28-2013
|
3.00
|
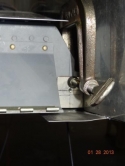
Assisted with Drilling the Rear Spars
|
Details
|
  |
|
01-27-2013
|
1.00
|
Made Drill Guide for Drilling Rear Spars
|
Details
|

  |
|
01-27-2013
|
0.50
|
Helped Put the Left Wing in the Fuselage
|
Details
|
   |
|
01-27-2013
|
1.00
|
Helped Install the Left Wing into the Fuselage
|
Details
|
   |
|
01-27-2013
|
2.00
|
Checking Rear Spars in Clevis for Clearance
|
Details
|
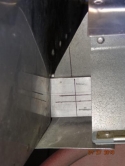
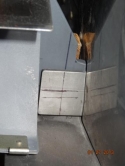
 |
|
01-22-2013
|
0.20
|
Photos-Empennage/Fuselage Nutplate Location
|
Details
|


 |
|
01-22-2013
|
1.00
|
Notched Left Rear Spar
|
Details
|


|
|
01-22-2013
|
0.30
|
Helped Pull out Left Wing from Fuselage
|
Details
|

  |
|
01-22-2013
|
0.30
|
Helped Pull out Left Wing
|
Details
|

  |
|
01-22-2013
|
1.00
|
Checked Rear Spars next to Fuselage
|
Details
|
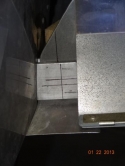
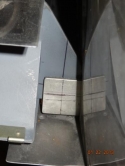
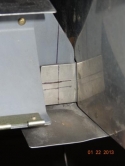
|
|
01-21-2013
|
3.00
|
Max/Assisted with Leveling the Aircraft
|
Details
|

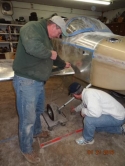

|
|
01-21-2013
|
5.00
|
Leveled the Aircraft and Checked Wing Sweep
|
Details
|


|
|
01-21-2013
|
2.00
|
Assisted with Leveling Aircraft
|
Details
|


|
|
01-20-2013
|
2.50
|
Screwed in 3/16" Bolts in Spars/Visitors
|
Details
|


|
|
01-20-2013
|
1.50
|
Assisted with Installing Remainder of Bolts
|
Details
|


|
|
01-15-2013
|
4.00
|
Wings Installed for the First Time!
|
Details
|


|
|
01-15-2013
|
1.00
|
Helped Install Wings
|
Details
|


 |
|
01-15-2013
|
2.00
|
Assisted with Installing Wings
|
Details
|


|
|
01-15-2013
|
2.00
|
Assisted with Installing the Wings
|
Details
|
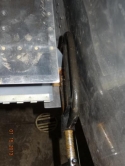
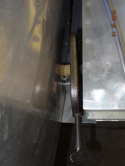

|
|
01-14-2013
|
2.00
|
Supervised the Move from Shop to Garage
|
Details
|


|
|
01-14-2013
|
1.00
|
Moved Fuselage/Wings to Jeff's Garage
|
Details
|


|
|
01-14-2013
|
1.00
|
Moved Fuselage and Wings into Garage
|
Details
|


|
|
01-14-2013
|
0.50
|
Found Unglued Spots of Windshield Fairing
|
Details
|


 |
|
01-11-2013
|
1.00
|
Riveted Nutplate to Fuselage
|
Details
|

  |
|
01-04-2013
|
0.50
|
Drilled Nutplates for Empennage Fairing
|
Details
|
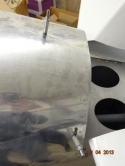
  |
|
01-04-2013
|
0.50
|
Dried out Dessicant Plugs
|
Details
|


 |
|
12-12-2012
|
0.50
|
Reriveted Hinge to Oil Access Door Properly!
|
Details
|


 |
|
12-12-2012
|
1.00
|
Applied Fiberglass Cloth to Cowling
|
Details
|


|
|
12-12-2012
|
0.50
|
Applied and Sanded Filler to Oil Access Door
|
Details
|

  |
|
12-12-2012
|
1.00
|
Added Resin and Fiberglass Cloth to Cowling
|
Details
|


|
|
12-11-2012
|
2.00
|
Redrilled Hinge to Oil Access Door
|
Details
|


|
|
12-11-2012
|
2.00
|
Cut Side of Van's Oil Door for Doubler
|
Details
|


|
|
12-04-2012
|
1.50
|
Riveted Hartwell Latches to Oil Access Door
|
Details
|


|
|
12-04-2012
|
1.00
|
Filled Gaps in Front of Cowling
|
Details
|


|
|
12-04-2012
|
1.50
|
Drilled Hinge to Cowling and Oil Access Door
|
Details
|

  |
|
12-04-2012
|
1.50
|
Checked Gaps in Front Cowling Areas
|
Details
|


|
|
12-03-2012
|
0.50
|
Enlarged Holes in Oil Access Door for Latches
|
Details
|

  |
|
11-29-2012
|
0.50
|
Made a Striker Plate out of Paint Scraper
|
Details
|


|
|
11-29-2012
|
1.00
|
Filed Hartwell Latch Openings
|
Details
|


|
|
11-29-2012
|
1.00
|
Began to Cut Out Openings for Hartwell Latches
|
Details
|


|
|
11-27-2012
|
2.00
|
Sanded Oil Access Door Opening
|
Details
|


|
|
11-27-2012
|
1.00
|
Oil Access Door Opening Cut/Cowling in Place
|
Details
|


|
|
11-27-2012
|
1.00
|
Cut Out the Oil Access Door
|
Details
|


|
|
11-27-2012
|
0.50
|
Changed Out Hobbs Meter Pressure Switch
|
Details
|


|
|
11-27-2012
|
1.00
|
Began Cutting out the Oil Access Door Opening
|
Details
|


|
|
11-07-2012
|
2.00
|
Sanded Straight Lines along Top Cowl
|
Details
|


|
|
11-07-2012
|
1.00
|
Photos-Cowl and Inlet Rings
|
Details
|


 |
|
11-07-2012
|
1.50
|
Helped Walt with Sanding Top Cowl Edges
|
Details
|


|
|
11-06-2012
|
1.50
|
Sanded Edges of Top Cowl
|
Details
|
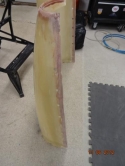
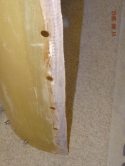
|
|
10-20-2012
|
3.00
|
Changed Hobbs Switch Wire to Ground
|
Details
|

  |
|
10-20-2012
|
4.00
|
Assisted with Oil Pressure Line Wire/Glass Cowl
|
Details
|

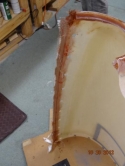
 |
|
10-20-2012
|
1.50
|
Applied Fiberglass Cloth to Sides of Top Cowl
|
Details
|
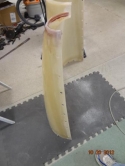

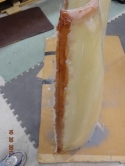
|
|
10-19-2012
|
2.50
|
Made Power Wire for Hobbs Pressure Switch
|
Details
|


 |
|
10-18-2012
|
2.00
|
Reinstalled In-Line Fuse Holder/Oil Press Wire
|
Details
|


|
|
10-13-2012
|
2.50
|
Finished Low Oil Press Lt Wire/Lighting Inverter
|
Details
|


|
|
10-12-2012
|
0.50
|
Took Camloc Screws Out of Upper Cowl
|
Details
|

  |
|
10-12-2012
|
1.50
|
Cleaned up Inlet Ring Areas
|
Details
|


|
|
10-07-2012
|
1.00
|
Sanded Inlet Ring Areas on Cowling
|
Details
|


|
|
10-07-2012
|
0.10
|
Photos-Sanded Cowl Inlet Ring Areas
|
|


|
|
10-07-2012
|
0.10
|
Found that Cowl Inlets had to be Marked
|
Details
|
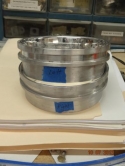
  |
|
10-06-2012
|
1.00
|
Splitting the Cowling
|
Details
|
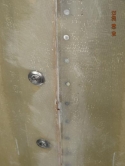
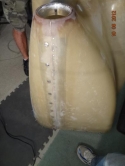
|
|
10-06-2012
|
1.00
|
Split the Cowling
|
Details
|


|
|
10-06-2012
|
0.50
|
Ran Wire Thru Firewall for Low Oil Pressure Light
|
Details
|

  |
|
10-06-2012
|
1.00
|
Began to Split Cowling
|
Details
|


|
|
10-06-2012
|
2.50
|
Assisted with Splitting the Cowling
|
Details
|


|
|
10-06-2012
|
0.50
|
Assisted with Installing Oil Lines
|
Details
|

  |
|
10-05-2012
|
1.50
|
Tightened Fitting on Manifold Transducer
|
Details
|


 |
|
10-05-2012
|
1.00
|
Made the Other Two Fittings/Added Tee Fitting
|
Details
|


|
|
10-05-2012
|
1.00
|
Finally! Got Fittings Installed on Oil Lines
|
Details
|


|
|
10-04-2012
|
3.50
|
Sanded Patches on Windshield Fairing
|
Details
|
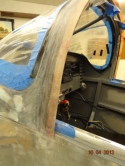

 |
|
09-28-2012
|
0.50
|
Glued Patches on Windshield Fairing
|
Details
|
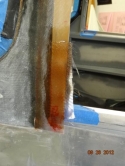
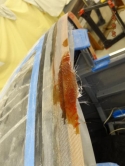
 |
|
09-28-2012
|
0.50
|
Began to Run Wire for Hobbs Oil Pressure Switch
|
Details
|

  |
|
09-28-2012
|
1.50
|
Attempted to Install Fitting on Oil Hose
|
Details
|

 |
|
09-27-2012
|
2.00
|
Removed Oil Pressure Hose/Making New Hoses
|
Details
|


 |
|
09-27-2012
|
0.50
|
Pulled Elec Ignition SloBlo Fuse Wire Off
|
Details
|

  |
|
09-23-2012
|
1.00
|
Seams Sanded/Seams Taped for Cutting
|
Details
|


|
|
09-22-2012
|
2.00
|
The Cowling Seams Sanded
|
Details
|
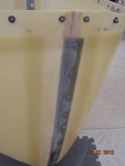
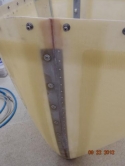
|
|
09-22-2012
|
2.00
|
Riveted Fairing onto Canopy
|
Details
|

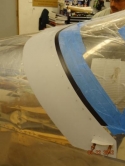
|
|
09-22-2012
|
0.30
|
Rerouting of the Oil Line for Hobbs Meter Switch
|
Details
|

  |
|
09-22-2012
|
2.00
|
Assisted with Riveting Fairing to Canopy
|
Details
|
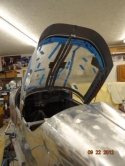
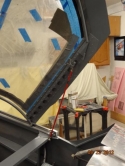

|
|
09-21-2012
|
0.20
|
Temporarily Installed Hobbs Meter Pressure Switch
|
Details
|

  |
|
09-21-2012
|
1.00
|
Sanded Windshield Fairing
|
Details
|

 |
|
09-21-2012
|
1.00
|
Applied Epoxy Resin/Flox to Cowling
|
Details
|
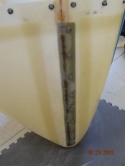
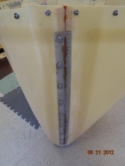
 |
|
09-20-2012
|
2.00
|
Painted Canopy Fairing
|
Details
|

  |
|
09-14-2012
|
0.10
|
Picked up Replacement Spark Plugs
|
Details
|

 |
|
09-14-2012
|
1.00
|
Dried Dessicant Plugs
|
Details
|
  |
|
09-07-2012
|
2.00
|
Visited Shop/Evaluated Installations
|
Details
|

|
|
08-30-2012
|
4.50
|
Trimmed/Sanded New Roll Bar Fairing
|
Details
|
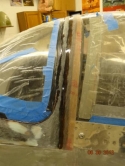

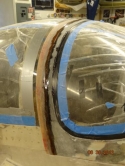
|
|
08-30-2012
|
0.50
|
Installed Blade Transponder
|
Details
|


 |
|
08-30-2012
|
2.00
|
Applied Primer Filler on Canopy Fairing
|
Details
|

  |
|
08-29-2012
|
2.00
|
Sanded New Fairing over Roll Bar
|
Details
|
|
|
08-29-2012
|
2.00
|
Sanded New Fairing
|
Details
|


|
|
08-29-2012
|
2.00
|
Photos-New Glass on Windshield Fairing
|
|

 |
|
08-24-2012
|
2.00
|
Taped Canopy in Preparation of Glassing
|
Details
|
|
|
08-24-2012
|
1.00
|
Photos-Sides of New Windshield Fairing
|
|
 |
|
08-24-2012
|
1.00
|
Laid down Fiberglass on Windshield Fairing
|
Details
|

|
|
08-24-2012
|
1.00
|
Cutting Fiberglass for Windshield Fairing
|
Details
|
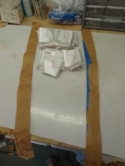


|
|
08-23-2012
|
2.50
|
Trimmed Fairing by Roll Bar-Photos of Gary
|
Details
|

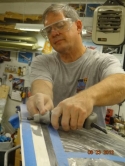
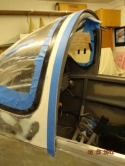
|
|
08-23-2012
|
0.50
|
Roll Servo Temporarily in Place
|
Details
|
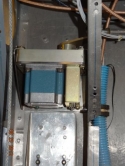

 |
|
08-23-2012
|
2.50
|
Photos-Fairing Trimmed Back to Roll Bar
|
|
|
|
08-23-2012
|
2.50
|
Applied More Filler Primer to Canopy Fairing
|
Details
|

 |
|
08-22-2012
|
1.50
|
Retaped Windshield
|
Details
|


|
|
08-22-2012
|
1.00
|
Fairing Obstructions
|
Details
|
 |
|
08-21-2012
|
2.00
|
Windshield Fairing-Interference Closing Canopy
|
Details
|

|
|
08-21-2012
|
1.00
|
Removed Clamps/Straps from Windshield Fairing
|
Details
|


|
|
08-21-2012
|
2.00
|
Photos-Fairing after gluing
|
|


|
|
08-20-2012
|
0.50
|
Primer Filling to Canopy Fairing
|
Details
|


 |
|
08-20-2012
|
3.00
|
Glued Windshield Fairing in Place
|
Details
|
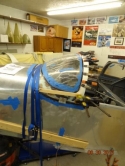


|
|
08-20-2012
|
2.50
|
Dimpled Remainder of Screw Holes for Roll Servo
|
Details
|

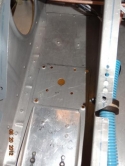

|
|
08-20-2012
|
2.00
|
Assisted with Gluing Windshield Fairing
|
Details
|

  |
|
08-20-2012
|
2.50
|
Assisted with Gluing Fairing to Windshield
|
Details
|


 |
|
08-19-2012
|
1.50
|
Prepared Skin/Doubler for Roll Servo
|
Details
|
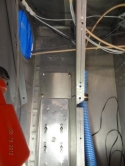

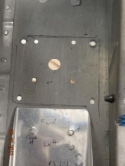
|
|
08-19-2012
|
0.50
|
Painted Center Fuselage Cover
|
Details
|
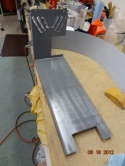
  |
|
08-14-2012
|
1.50
|
Trim Cable Indicator/Allowable Bend in Cable
|
Details
|
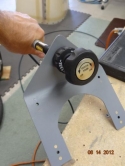

 |
|
08-14-2012
|
1.50
|
Primed Underside of Canopy Fairing
|
Details
|


 |
|
08-14-2012
|
1.00
|
How to Take the Trim Cable Apart
|
Details
|


|
|
08-14-2012
|
1.50
|
Drilled Trim Cable Hole in Center Fuselage
|
Details
|


 |
|
08-13-2012
|
0.70
|
Sanded Sides of Cowling
|
Details
|
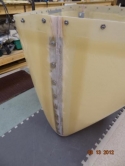
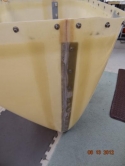
 |
|
08-13-2012
|
0.50
|
Sanded Left Side of Windshield and Fairing
|
Details
|


 |
|
08-13-2012
|
0.30
|
Drilled Hole for Trim Cable in Bracket
|
Details
|
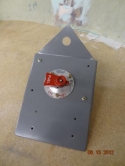
  |
|
08-13-2012
|
1.00
|
Applied Epoxy-Flox Slurry to Center Gaps
|
Details
|


|
|
08-12-2012
|
2.50
|
Riveted Remaining Side Panels/Screws
|
Details
|


 |
|
08-12-2012
|
1.00
|
Applied Filler to Canopy Fairing
|
Details
|

  |
|
08-12-2012
|
1.00
|
Applied Epoxy Flox Slurry to Cowling Seams
|
Details
|
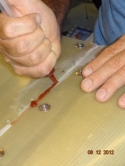
 |
|
08-11-2012
|
2.00
|
Riveted Canopy Together
|
Details
|
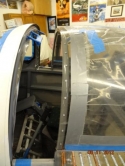
|
|
08-11-2012
|
1.00
|
Left Side Panel Riveted
|
Details
|


 |
|
08-11-2012
|
1.00
|
Canopy Removed/Side Panels Riveted
|
Details
|


|
|
08-10-2012
|
1.50
|
Trimmed Canopy Center Cover Strip
|
Details
|


 |
|
08-04-2012
|
1.00
|
Countersunk Canopy Rivet Holes
|
Details
|

 |
|
07-09-2012
|
1.00
|
Sanded Cowl Inlet Ring Areas
|
Details
|


 |
|
07-08-2012
|
1.00
|
Sanded SuperFil on Canopy
|
Details
|


|
|
07-08-2012
|
1.00
|
Photo-SuperFil Sanded on Right Side
|
|

  |
|
07-08-2012
|
1.00
|
Applied SuperFil to Fuselage/Windshield Juncture
|
Details
|


|
|
07-07-2012
|
1.00
|
Windshield Screwed in Place
|
Details
|
 |
|
07-07-2012
|
0.50
|
Taped Fuselage /Placed Windshield
|
Details
|


|
|
07-07-2012
|
1.00
|
Painted Aft Edge of Windshield Fairing
|
Details
|
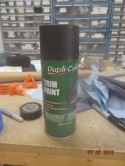
|
|
07-06-2012
|
0.50
|
Taped Fuselage around the Windshield Fairing
|
Details
|


 |
|
07-06-2012
|
0.50
|
Removed Duct Tape From Cowl Inlets
|
Details
|


 |
|
07-06-2012
|
1.00
|
Painted Inside of Windshield
|
Details
|


 |
|
07-01-2012
|
1.00
|
Marked Inside of Cowl Inlet Areas for Epoxy
|
Details
|


|
|
07-01-2012
|
0.50
|
Made Dividers for Cowl Inlet Rings and Epoxy
|
Details
|
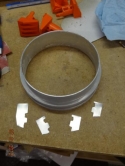
  |
|
07-01-2012
|
0.50
|
Applied Epoxy Slurry around Cowl Inlet Rings
|
Details
|


|
|
06-30-2012
|
0.40
|
Tape off Cowl Inlet in Preparation of Epoxy App
|
Details
|

  |
|
06-30-2012
|
0.30
|
Retapped Screw Hole in Roll Bar
|
Details
|

  |
|
06-30-2012
|
0.30
|
Dried out a Dessicant Plug
|
Details
|

  |
|
06-26-2012
|
0.50
|
Sanded Flox on Cowling
|
Details
|
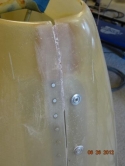
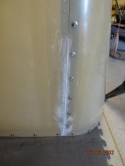
 |
|
06-26-2012
|
1.00
|
Rubbed off Primer on Fuselage
|
Details
|


 |
|
06-25-2012
|
0.50
|
Swapped Out Bolts on Roll Bar Handles
|
Details
|


 |
|
06-25-2012
|
3.00
|
Sanded Windshield for Painting and Gluing
|
Details
|


 |
|
06-25-2012
|
3.00
|
Sanded Windshield
|
Details
|


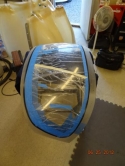
|
|
06-25-2012
|
0.50
|
Photo-Fiberglass Patch on Cowling
|
|
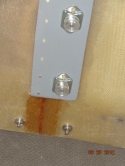
  |
|
06-25-2012
|
0.50
|
Glassed Cowling Together
|
Details
|


|
|
06-25-2012
|
0.50
|
Cowling Halves Glassed Together
|
Details
|
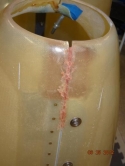
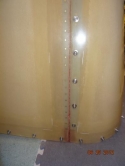
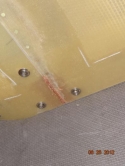
|
|
06-24-2012
|
2.00
|
Removed Windshield
|
Details
|

  |
|
06-20-2012
|
0.50
|
Waxed Inlet Rings
|
Details
|

  |
|
06-20-2012
|
0.50
|
Sanded Aft Edge of Canopy Fairing/Fuselage Skin
|
Details
|
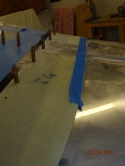

|
|
06-20-2012
|
0.50
|
Applied Epoxy to Cowling Extensions
|
Details
|


|
|
06-19-2012
|
1.50
|
SuperFil Added to Canopy Fairing
|
Details
|


|
|
06-19-2012
|
1.50
|
Sanded SuperFil on Aft Canopy Fairing
|
Details
|


|
|
06-19-2012
|
0.50
|
Installed Clip for Support Rod/Visitors
|
Details
|


 |
|
06-19-2012
|
1.00
|
Final Sanding of Edges of Windshield Fairing
|
Details
|


|
|
06-18-2012
|
3.50
|
Trimmed Roll Bar Edge of Windshield Fairing
|
Details
|
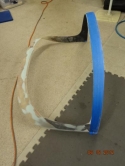
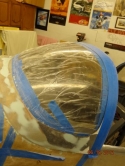
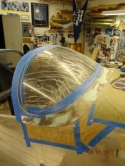
|
|
06-18-2012
|
1.00
|
Sanded and Added Flox to Windshield Fairing
|
Details
|


|
|
06-18-2012
|
2.50
|
Assisted with Trimming Windshield Fairing
|
Details
|


 |
|
06-17-2012
|
1.00
|
Split Fairing over the Roll Bar and Glassed
|
Details
|


|
|
06-17-2012
|
0.30
|
Installed Tip-Up Canopy Support Rod on Bolt
|
Details
|
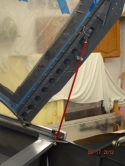
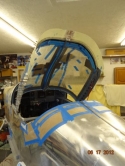
 |
|
06-17-2012
|
0.10
|
Father's Day Visitors
|
Details
|


|
|
06-17-2012
|
1.20
|
Fairing/Handles Drilled to Canopy Side Skirts
|
Details
|


|
|
06-17-2012
|
0.50
|
Assisted with Shortening Windshield Fairing
|
Details
|
   |
|
06-15-2012
|
1.50
|
Sanded Canopy Fairing
|
Details
|
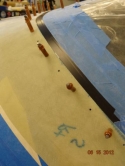
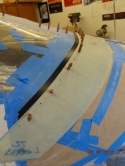
 |
|
06-12-2012
|
0.70
|
Sanded Micro on Canopy Fairing
|
Details
|

  |
|
06-12-2012
|
2.50
|
Applied Primer Filler/Sanded Windshield Fairing
|
Details
|


|
|
06-11-2012
|
1.00
|
Spread Micro to Underside of Canopy Fairing
|
Details
|


 |
|
06-09-2012
|
0.50
|
Photos of Canopy and Windshield
|
|


|
|
06-09-2012
|
0.50
|
Flox on the Canopy Fairing
|
Details
|


|
|
06-09-2012
|
0.50
|
Applied Flox on Fairing around Canopy Track
|
Details
|


|
|
06-08-2012
|
2.50
|
Sanded Aft Edge of Canopy Fairing
|
Details
|


|
|
06-07-2012
|
3.00
|
Sanded Canopy Fairing/Made Template over Fairing
|
Details
|


|
|
06-07-2012
|
1.00
|
Patched Underside of Windshield Fairing
|
Details
|

  |
|
06-05-2012
|
1.00
|
Sanded Center Section Patch of Canopy Fairing
|
Details
|

  |
|
06-05-2012
|
3.50
|
Determined Final Edges of Windshield Fairing
|
Details
|


|
|
06-05-2012
|
3.00
|
Applied Epoxy and Glass to Sides of Fairing
|
Details
|


|
|
06-04-2012
|
0.10
|
Patched Fairing/Placed Cowling on Engine
|
Details
|


 |
|
06-04-2012
|
1.00
|
Added Patches to Canopy Fairing
|
Details
|


|
|
06-03-2012
|
2.50
|
Sanded Underside of Canopy Fairing
|
Details
|


|
|
06-03-2012
|
0.30
|
Dried Dessicant Plugs/Spark Plugs Rusted
|
Details
|


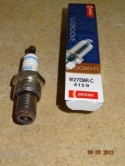
|
|
06-02-2012
|
2.00
|
Canopy Fairing Sanded
|
Details
|


 |
|
06-01-2012
|
1.00
|
Sanded Windshield and Canopy Fairings
|
Details
|

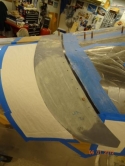
 |
|
05-31-2012
|
1.00
|
Sanded Edges of Fairing/Added More Patches
|
Details
|


|
|
05-31-2012
|
1.00
|
Prepped the Fuselage under the Canopy Fairing
|
Details
|


 |
|
05-30-2012
|
2.50
|
Sanded Glass Patches on Fairing
|
Details
|


|
|
05-27-2012
|
1.50
|
Sanded Fairing and Added Patches of Glass
|
Details
|


|
|
05-27-2012
|
1.50
|
More Patching of the Fairing
|
Details
|


|
|
05-27-2012
|
0.10
|
Added Glass on Inside of Left Intersection
|
Details
|

  |
|
05-24-2012
|
1.00
|
Sanded Top of Fairing with Tube
|
Details
|


|
|
05-24-2012
|
2.50
|
Glassed Right Side
|
Details
|
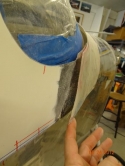

 |
|
05-24-2012
|
2.00
|
Began Sanding of Top of Fairing
|
Details
|


|
|
05-23-2012
|
1.50
|
Used Belt Sander to Remove Bondo
|
Details
|
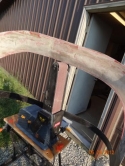


|
|
05-23-2012
|
1.50
|
Sanded Underside of Fairing
|
Details
|
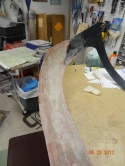
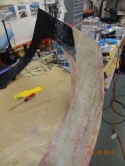
 |
|
05-19-2012
|
1.00
|
Took Tape Off Fairing
|
Details
|


|
|
05-19-2012
|
1.00
|
Took Fairing off Fuselage
|
Details
|


|
|
05-19-2012
|
1.00
|
Attempted to Remove Bondo from Fairing
|
Details
|


 |
|
05-18-2012
|
1.00
|
Windshield Fairing Laid up
|
Details
|


|
|
05-18-2012
|
1.00
|
Right Side of Fairing and Center
|
Details
|


 |
|
05-18-2012
|
1.00
|
Began the Fairing Lay-up
|
Details
|


 |
|
05-17-2012
|
1.00
|
Sorted Lengths of Fiberglass Cloth for Fairing
|
Details
|


 |
|
05-06-2012
|
1.50
|
Cut Lengths of Fiberglass Cloth for Fairing
|
Details
|

  |
|
05-05-2012
|
1.00
|
Taped/Clamped Roll Bar Faining in Place
|
Details
|
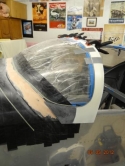

 |
|
05-01-2012
|
2.00
|
Added Bondo to Fuselage/Sanded Fairing
|
Details
|

  |
|
04-30-2012
|
1.00
|
Countersunk Right Side Screw Holes
|
Details
|
 |
|
04-29-2012
|
2.00
|
Countersunk Windshield Screw Holes
|
Details
|

|
|
04-23-2012
|
1.00
|
Sanded Bondo on Fuselage/Windshield
|
Details
|


|
|
04-23-2012
|
1.00
|
Fairing on Roll Bar
|
Details
|
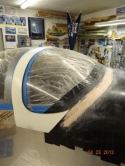
 |
|
04-22-2012
|
1.00
|
Bondo Sanded and Reapplied
|
Details
|

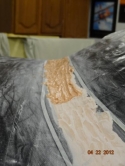

|
|
04-22-2012
|
1.00
|
Applied Bondo to Front of Windshield Area
|
Details
|
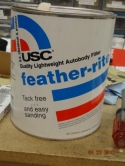


|
|
04-19-2012
|
1.00
|
Taped Top Skin in Preparation of New Fairing
|
Details
|


|
|
04-19-2012
|
1.00
|
Split Windshield Fairing
|
Details
|


|
|
04-19-2012
|
0.50
|
Offered Suggestions for Working the Fairing
|
Details
|
   |
|
04-19-2012
|
1.00
|
Checked Fit of Split Fairing
|
Details
|
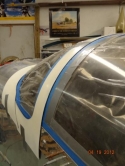
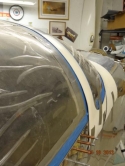

|
|
04-18-2012
|
1.50
|
Windshield Fairing Line-up Marks
|
Details
|

  |
|
04-18-2012
|
1.00
|
Nylon Washers Added to Windshield/Roll Bar
|
Details
|
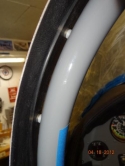
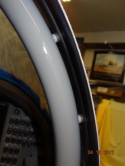
 |
|
04-18-2012
|
1.00
|
Leather Glareshield Cover
|
Details
|


|
|
04-18-2012
|
1.00
|
Initial Fit of Windshield Fairing
|
Details
|


 |
|
04-18-2012
|
1.00
|
Finished Screwing Windshield to Roll Bar
|
Details
|


 |
|
04-18-2012
|
1.00
|
Clips Holding Windshield Riveted to Top Skin
|
Details
|


 |
|
04-18-2012
|
1.00
|
Assisted with Windshield Fairing Alignment
|
Details
|

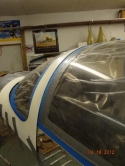
 |
|
04-17-2012
|
1.00
|
Used Cherry Max Rivets to Finish Top Skin
|
Details
|


 |
|
04-17-2012
|
2.00
|
Screwed Windshield into Place/Fairing
|
Details
|

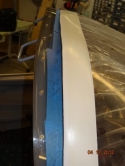
 |
|
04-17-2012
|
0.50
|
New Battery/Terminal Nipples over Starter Wires
|
Details
|

  |
|
04-17-2012
|
0.50
|
Cleaned up Scratches and Applied SuperFil
|
Details
|
   |
|
04-16-2012
|
2.50
|
Riveted Top Skin to Firewall
|
Details
|


|
|
04-16-2012
|
2.50
|
Riveted Remainder of Top Skin
|
Details
|

  |
|
04-16-2012
|
1.00
|
Replaced Dynons/Reclamped Amp Wires
|
Details
|

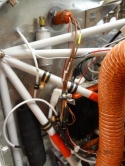
 |
|
04-16-2012
|
1.50
|
Crimped Dsub Terminals onto Wires
|
Details
|
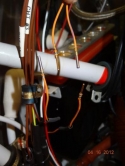
  |
|
04-16-2012
|
3.50
|
Assisted with Riveting Remainder of Top Skin
|
Details
|

  |
|
04-12-2012
|
0.50
|
Riveted the Top Skin to the Firewall
|
Details
|

  |
|
04-12-2012
|
3.00
|
Riveted Part of the Instrument Top Skin
|
Details
|

  |
|
04-12-2012
|
1.00
|
Found Amp Wires too Short/Pulled out Dynon
|
Details
|


 |
|
04-12-2012
|
3.00
|
Assisted with Riveting the Top Skin
|
Details
|

  |
|
04-11-2012
|
2.00
|
RTV under Clock/Quick Disconnects in TruTrak
|
Details
|

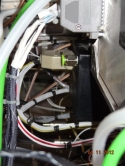

|
|
04-11-2012
|
3.00
|
Photos-Pitot and Static Tubing into the ADI
|
|


 |
|
04-11-2012
|
3.00
|
Instrument Panel Glareshield Cover/Top Skin
|
Details
|


|
|
04-11-2012
|
0.10
|
Dehydrator Plugs Dried Out
|
Details
|

  |
|
04-11-2012
|
0.50
|
Assisted with Tightening Bolts on Canopy Rod
|
Details
|

  |
|
04-11-2012
|
1.00
|
Assisted with Riveting Top Skin
|
Details
|

  |
|
04-10-2012
|
2.00
|
Painted Instrument Top Skin/In Place on Fuselage
|
Details
|


|
|
04-10-2012
|
2.00
|
P1 Connector
|
Details
|


|
|
04-10-2012
|
2.00
|
Bolted Windshield Center Support Rod
|
Details
|


 |
|
04-10-2012
|
0.10
|
Autographs on the Top Skin
|
|


|
|
04-10-2012
|
2.00
|
16 AWG Starter Wire
|
Details
|


|
|
04-09-2012
|
3.00
|
Roll Servo Wires/Pinned Mag Wires
|
Details
|
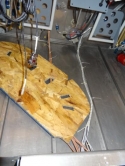


|
|
04-09-2012
|
1.00
|
Removed Center Windshield Support Bar
|
Details
|

  |
|
04-09-2012
|
1.00
|
FireBarrier Applied over Grommets in Firewall
|
Details
|


|
|
04-06-2012
|
1.50
|
Finished Dsub Connector-Roll Servo
|
Details
|


|
|
04-05-2012
|
1.00
|
Made Jumper Wire for Starter/Roll Servo Wires
|
Details
|


 |
|
04-04-2012
|
3.00
|
Made Power Wires for Lightspeed Ignition
|
Details
|


 |
|
04-04-2012
|
2.50
|
Lightspeed Wires to Battery/Roll Servo Wires
|
Details
|


|
|
04-03-2012
|
2.00
|
Wired Tach Transducer to RPM Wire and Power
|
Details
|


|
|
04-03-2012
|
1.30
|
Tach Transducer Wire
|
Details
|


|
|
04-03-2012
|
0.20
|
Labeled Lightspeed Power Wire
|
Details
|
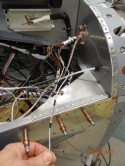
  |
|
04-02-2012
|
1.00
|
Pilot Stick Grip P7 Reassembled
|
Details
|


 |
|
04-02-2012
|
3.50
|
Made Output Connector for Lightspeed Control Box
|
Details
|


|
|
03-28-2012
|
1.50
|
Lightspeed Ignition
|
Details
|


|
|
03-28-2012
|
0.50
|
Found Smoke System Wiring Problem
|
Details
|
   |
|
03-28-2012
|
2.00
|
Chased Wiring Problem-Smoke System Ident Button
|
Details
|
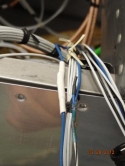

 |
|
03-27-2012
|
2.50
|
Reassembled the P7 Connector
|
Details
|
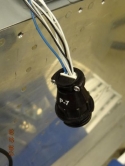
 |
|
03-27-2012
|
2.00
|
Added Wire in Pilot Stick Grip for Smoke System
|
Details
|


|
|
03-26-2012
|
1.50
|
Zaon Power Wire on Bus Bar
|
Details
|

  |
|
03-26-2012
|
1.50
|
Soldered Zaon Data Wire into Garmin Wiring
|
Details
|


|
|
03-26-2012
|
1.50
|
Modified Pilot Stick Grip Wiring for Smoke System
|
Details
|


|
|
03-26-2012
|
1.50
|
Completed Zaon Wiring
|
Details
|


|
|
03-25-2012
|
0.50
|
Crimped Molex Pins onto Garmin 496 Data Wires
|
Details
|

  |
|
03-24-2012
|
2.00
|
Made New GPS Wire/Sealed Firewall PassThru's
|
Details
|


|
|
03-23-2012
|
1.00
|
Screwdriver Access Holes Drilled for Shelf
|
Details
|

  |
|
03-23-2012
|
1.00
|
GPS/XM Antenna Shelf Construction #4
|
Details
|


|
|
03-23-2012
|
1.00
|
GPS/XM Antenna Shelf Construction #3
|
Details
|


|
|
03-23-2012
|
2.00
|
GPS/XM Antenna Shelf Construction #2
|
Details
|


|
|
03-23-2012
|
1.00
|
GPS/XM Antenna Shelf Construction
|
Details
|


|
|
03-22-2012
|
1.00
|
More Wires Inserted into P1
|
Details
|

  |
|
03-22-2012
|
2.00
|
Installed Firewall Pass-through for GPS Wires
|
Details
|


|
|
03-22-2012
|
2.00
|
Garmin Data Cable
|
Details
|


 |
|
03-21-2012
|
1.00
|
P7 Connector/Garmin GPS & XM Antennas
|
Details
|


|
|
03-19-2012
|
1.00
|
Nav Wire Run to Left Wing
|
Details
|
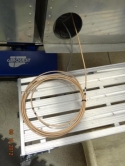

 |
|
03-19-2012
|
2.00
|
Comm Antenna Installed
|
Details
|

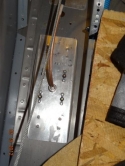

|
|
03-19-2012
|
2.00
|
Antenna Wires Positioned/Ran P4 Wires
|
Details
|
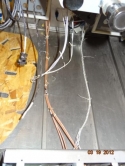


|
|
03-19-2012
|
2.00
|
Antenna Wires Connected/Antenna Installed
|
Details
|


|
|
03-17-2012
|
2.00
|
Finished Flap Wires/Comm Antenna Coax Wires
|
Details
|
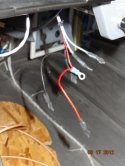


|
|
03-17-2012
|
1.00
|
Comm Antennas Run thru Center Spar Area
|
Details
|


 |
|
03-16-2012
|
1.00
|
Rotated Smoke System Arm/On Switch
|
Details
|


 |
|
03-16-2012
|
2.00
|
Rewired Flap Switch
|
Details
|


 |
|
03-16-2012
|
1.00
|
Attached Battery and Master Relay Wire
|
Details
|


|
|
03-15-2012
|
1.00
|
Labeled Flap Switch and Strobe Power Wires
|
Details
|


 |
|
03-15-2012
|
1.00
|
Joined the Two EDC-10A Connectors
|
Details
|


 |
|
03-15-2012
|
1.00
|
Inserted EDC-10A Wires into Connector
|
Details
|


|
|
03-13-2012
|
0.50
|
Zaon XRX Interface Cable Assembly
|
Details
|

  |
|
03-13-2012
|
2.00
|
Smoke System Power/EDC-10A Wiring
|
Details
|

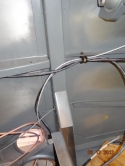
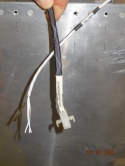
|
|
03-13-2012
|
2.00
|
Pitch Servo Wiring/Smoke System Power
|
Details
|
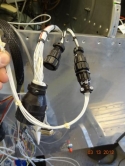


|
|
03-12-2012
|
1.00
|
Smoke System Wiring
|
Details
|

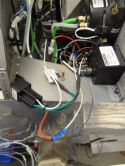

|
|
03-12-2012
|
2.00
|
Ran Wires along Center Section/Smoke Wires
|
Details
|
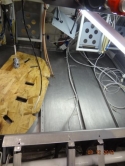


|
|
03-12-2012
|
2.00
|
Finished Smoke System Tubing
|
Details
|

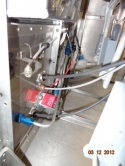

|
|
03-11-2012
|
0.50
|
Trimmed Center Section by Heat Cable
|
Details
|

  |
|
03-11-2012
|
1.50
|
Smoke System Tubing Routing
|
Details
|


|
|
03-11-2012
|
2.00
|
Riveted Bracket to Subpanel/Smoke Tubing
|
Details
|


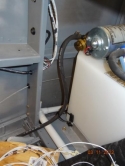
|
|
03-10-2012
|
1.00
|
Pitot Tubing/Trimmed Floor Center Cover
|
Details
|

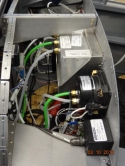

|
|
03-10-2012
|
2.00
|
Made Bracket for Attaching P4S Connector
|
Details
|
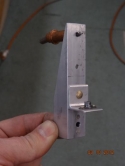
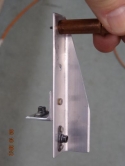

|
|
03-09-2012
|
1.50
|
Static Tubing into EFIS/Airspeed Indicator
|
Details
|


|
|
03-09-2012
|
1.50
|
Photos-Static Tubing
|
|


 |
|
03-09-2012
|
1.50
|
Laced up Wires/Floor Center Section in Fuselage
|
Details
|


|
|
03-08-2012
|
2.50
|
Pinged Pitch Servo Wires
|
Details
|


|
|
03-07-2012
|
2.00
|
Pinned P4S Connector and Clamped in place
|
Details
|


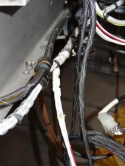
|
|
03-07-2012
|
2.00
|
Photos-P4S Connector
|
|


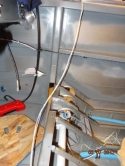
|
|
03-07-2012
|
0.50
|
Drilled Center of Right Spar for Wiring
|
Details
|


 |
|
03-06-2012
|
1.00
|
P4S Connector Partially Pinned
|
Details
|


|
|
03-06-2012
|
0.50
|
Ground Wires Screwed Together
|
Details
|

  |
|
03-06-2012
|
1.00
|
Crimped Three Ground Wires into One Ground
|
Details
|


|
|
03-06-2012
|
2.00
|
Began to Pin P4S Connector
|
Details
|


|
|
03-05-2012
|
1.00
|
Wires Stripped in Preparation of Making Connector
|
Details
|

  |
|
03-05-2012
|
4.00
|
Reran Headset Wires on Left Side
|
Details
|
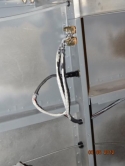


|
|
02-29-2012
|
2.50
|
Replaced Wire Loom on Right Side/Nutplate
|
Details
|

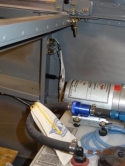

|
|
02-29-2012
|
0.50
|
Installed Jacks on Bulkheads
|
Details
|
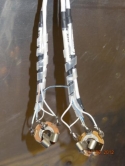
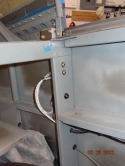
|
|
02-28-2012
|
2.50
|
Wiring LEMO Plugs
|
Details
|


|
|
02-28-2012
|
2.50
|
Right Headset Jack Wires Resoldered
|
Details
|


|
|
02-27-2012
|
3.00
|
Headset Jack Wires Run/LEMO Plug Wires
|
Details
|


|
|
02-22-2012
|
1.00
|
Photo-Wire Labeling/Jacks Wiring on Right Side
|
Details
|


|
|
02-22-2012
|
5.00
|
Jacks installed on Left Side/Wire Sleeve Used
|
Details
|


|
|
02-22-2012
|
0.50
|
Cowling Placed Back on the Engine
|
Details
|

  |
|
02-21-2012
|
3.00
|
Soldered Last Two Headset Jacks
|
Details
|


|
|
02-21-2012
|
0.30
|
Removed Tape from Cowling and Air Inlet Ring
|
Details
|


|
|
02-21-2012
|
2.50
|
Headset Wire Run-Left Side/Finished Jacks Wiring
|
Details
|


|
|
02-20-2012
|
4.50
|
Received Slo-Blo Fuse/Soldered Headset Jacks
|
Details
|


 |
|
02-20-2012
|
0.50
|
Glassed Air Inlet Ring into Cowling
|
Details
|
|
|
02-19-2012
|
0.30
|
Applied Heat to Carb Heat Inlet for B-Nut Clearanc
|
Details
|

  |
|
02-19-2012
|
3.00
|
Added Arm to Carb Heat Control
|
Details
|


 |
|
02-18-2012
|
2.50
|
Ram Air Door Control/Carb Heat Cable
|
Details
|


 |
|
02-18-2012
|
0.50
|
Pulled Cover off Lightspeed Wires
|
Details
|

  |
|
02-18-2012
|
0.50
|
Assisted w/Tightening Carb Heat Bulkhead Fitting
|
Details
|
   |
|
02-13-2012
|
3.50
|
Added Carb Heat Cable Clamp/New Door Control
|
Details
|


|
|
02-12-2012
|
2.00
|
Heated Plenum/Added Air Filter Bracket
|
Details
|


|
|
02-11-2012
|
3.00
|
Applied Heat to Plenum
|
Details
|
   |
|
02-10-2012
|
2.50
|
Applied Heat to Plenum to Improve Clearance
|
Details
|


 |
|
02-09-2012
|
2.00
|
Reinstalled Cowl/Sanded Plenum
|
Details
|
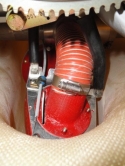
 |
|
02-09-2012
|
0.50
|
Firewall Forward Evaluation
|
Details
|
   |
|
02-08-2012
|
2.50
|
Shortened Attach Tubes/Made Brackets
|
Details
|


|
|
02-08-2012
|
2.50
|
Exhaust Tube Hangars Installed on Air Filter
|
Details
|
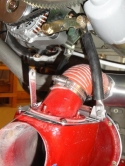
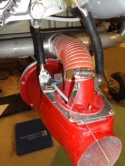

|
|
02-08-2012
|
2.50
|
Completed Carb Heat Inlet Bracket/Air Filter
|
Details
|
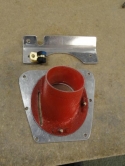
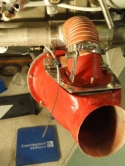

|
|
02-07-2012
|
0.50
|
Received Vetterman Attach Brackets for Air Filter
|
Details
|
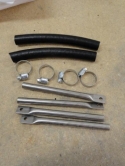
  |
|
02-07-2012
|
0.50
|
Picked up Polished Cowl Inlet Rings at Buffex
|
Details
|


 |
|
02-07-2012
|
2.00
|
Carb Heat Control Cable/Ram Air Door Control
|
Details
|


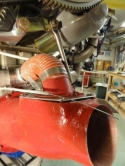
|
|
02-07-2012
|
2.50
|
Carb Heat Cable Bracket on Throttle Bracket
|
Details
|

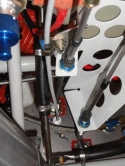

|
|
02-02-2012
|
2.50
|
Installed Carb Heat Cable Bracket/Terminal Ends
|
Details
|


|
|
02-01-2012
|
1.00
|
VS on Fuse/Wrapped up Elevators, Rudder
|
Details
|


|
|
02-01-2012
|
1.00
|
Laid Oil Door Cutout on Cowl/Rotated Clamps
|
Details
|

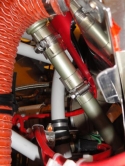
 |
|
01-31-2012
|
0.10
|
Laid Carb Heat Cable in Line to Ram Air Door
|
Details
|


 |
|
01-31-2012
|
2.00
|
Installed Air Filter Housing
|
Details
|


|
|
01-30-2012
|
3.00
|
Installed Carb Air Inlet and Safetied
|
Details
|


|
|
01-28-2012
|
9.00
|
Painted Empennage Components
|
Details
|

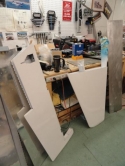
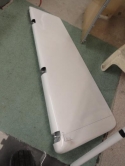
|
|
01-28-2012
|
4.00
|
Assisted with Cleaning Empennage Components
|
Details
|


 |
|
01-26-2012
|
0.50
|
Scotchbrited Ailerons for Painting
|
Details
|
 |
|
01-25-2012
|
2.50
|
Scotchbrited Scratches/Cleaned Flaps, Elevator
|
Details
|
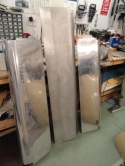
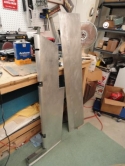
 |
|
01-25-2012
|
1.00
|
Removed and Marked the Carb Inlet for Trimming
|
Details
|

  |
|
01-25-2012
|
1.00
|
Bent Trim Tab Hinge for Screwing into Elevator
|
Details
|

  |
|
01-23-2012
|
1.00
|
Reinstalled Nutplates/Completed Carb Heat Inlet
|
Details
|


|
|
01-23-2012
|
1.00
|
Lower Cowl in Place/Air Filter Housing in Cowl
|
Details
|


|
|
01-23-2012
|
1.00
|
Cut Slit in Right Front Baffle/Bent Down Ramps
|
Details
|

  |
|
01-23-2012
|
1.00
|
Carb Heat Inlet/Sanded Cowl Ring/Filter in Cowl
|
Details
|
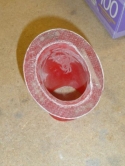

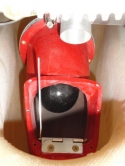
|
|
01-23-2012
|
1.00
|
Applied Flox to Carb Heat Inlet Holes
|
Details
|


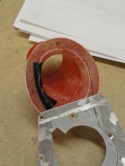
|
|
01-22-2012
|
0.50
|
Photo-Carb Heat Inlet/Air Inlet on Cowling
|
Details
|


|
|
01-22-2012
|
2.00
|
Drilled out Nutplates on Carb Heat Inlet
|
Details
|


|
|
01-18-2012
|
3.00
|
Filled Rudder Dents/Applied Primer to Fairings
|
Details
|
   |
|
01-17-2012
|
4.50
|
Took HS and VS off Fuselage/Cleaned off Plastic
|
Details
|
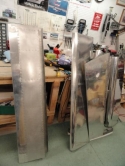

 |
|
01-17-2012
|
0.50
|
Found Problem with Orientation of Carb Heat Inlet
|
Details
|

  |
|
01-16-2012
|
1.00
|
Sanded Empennage Fairing Edges
|
Details
|

  |
|
01-16-2012
|
4.00
|
Bolted Air Inlet Box to Carburetor
|
Details
|


 |
|
01-15-2012
|
1.00
|
Drilled Empennage Fairing to VS/HS
|
|

  |
|
01-15-2012
|
1.00
|
Drilled Empennage Fairing to HS and VS
|
Details
|


|
|
01-11-2012
|
1.00
|
Sanded Flox/Applied RTV under Carb Heat Deck
|
Details
|


|
|
01-11-2012
|
0.10
|
Photo-Carb Heat Ram Air Door Open
|
|

  |
|
01-11-2012
|
1.00
|
Painted Air Filter Fiberglass Components
|
Details
|


|
|
01-11-2012
|
1.00
|
Drilled Air Filter to Housing/Added Nutplates
|
Details
|


|
|
01-11-2012
|
1.00
|
Assembled Air Filter Housing
|
|


|
|
01-10-2012
|
1.50
|
Sanded Empennage Fairing
|
Details
|


 |
|
01-10-2012
|
1.00
|
Sanded Carb Heat Box
|
Details
|


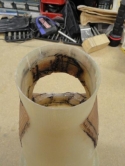
|
|
01-10-2012
|
1.00
|
Positioned Air Filter in Air Inlet
|
Details
|


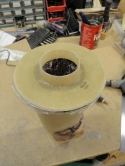
|
|
01-10-2012
|
1.00
|
More Sanding and Added Flox
|
Details
|


|
|
01-10-2012
|
1.00
|
Flox in Gaps/Cut Out Alum Ring for Air Filter
|
Details
|


|
|
01-10-2012
|
0.10
|
Air Filter Inserted in the Air Inlet
|
|
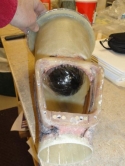
  |
|
01-09-2012
|
2.50
|
Riveted Control Arm to Ram Air Door
|
Details
|


|
|
01-09-2012
|
2.50
|
Glassed Carb Heat Deck to Air Inlet
|
Details
|
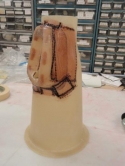
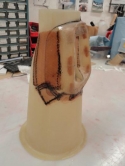

|
|
01-09-2012
|
2.50
|
Glassed around Gaps between Box and Inlet
|
Details
|

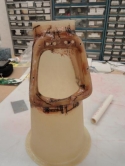

|
|
01-09-2012
|
0.50
|
Applied Double-Sided Duct Tape to Hold Glass Down
|
Details
|

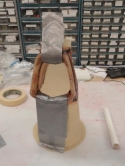
 |
|
01-08-2012
|
1.00
|
Extended Area on Deck for Handle
|
Details
|


 |
|
01-07-2012
|
1.50
|
Sanded Flox/Made New Hinge
|
Details
|


|
|
01-07-2012
|
0.50
|
Met with Tim Conway to See Paint Booth
|
Details
|
   |
|
01-07-2012
|
1.00
|
Made Holes in Air Filter for Nutplates
|
Details
|
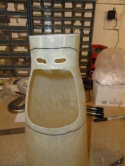

 |
|
01-07-2012
|
1.00
|
Drilled Inlet Hole in Carb Heat Deck
|
Details
|


|
|
01-07-2012
|
1.00
|
Deck Drilled to Carb Heat Box
|
Details
|


|
|
01-07-2012
|
1.00
|
Carb Heat Box Deck Center Drilled Out
|
Details
|


|
|
01-06-2012
|
1.00
|
Added Flox to Reinforce Carb Heat Box
|
Details
|


|
|
01-05-2012
|
1.50
|
Made Carb Heat Inlet Deck
|
Details
|


 |
|
01-05-2012
|
0.50
|
Looked over Empennage and Canopy Fairing
|
Details
|
   |
|
01-05-2012
|
1.50
|
Cut Out Ram Air Door
|
Details
|


|
|
12-30-2011
|
0.50
|
Work on Ram Air Door Hinge
|
Details
|


|
|
12-30-2011
|
0.50
|
Sanded Fairing Edges on Belt Sander
|
Details
|


|
|
12-30-2011
|
0.50
|
Photos-Fairing
|
|


|
|
12-30-2011
|
0.50
|
Applied Sealant on Lightspeed Wires/Dehyd Plugs
|
Details
|


|
|
12-29-2011
|
0.50
|
Sanded and Spread Primer on Fairing
|
Details
|


 |
|
12-29-2011
|
0.50
|
Added Microballoons to Low Spot on Fairing
|
Details
|
   |
|
12-23-2011
|
2.50
|
Sanded Empennage Fairing
|
Details
|


|
|
12-23-2011
|
0.10
|
Photo-Fairing
|
|
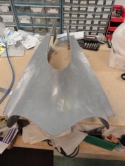
  |
|
12-22-2011
|
1.50
|
Plenum Baffling/Transferred Carb Holes to Air Filt
|
Details
|

 |
|
12-22-2011
|
0.10
|
Photos-Purchased Tail Kit
|
|
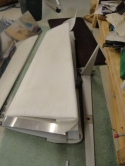

 |
|
12-22-2011
|
0.50
|
Made a Practice Twist in Elevator Hinge Pin
|
Details
|

  |
|
12-22-2011
|
0.10
|
Bought Partially-Assembled Tail Kit
|
Details
|
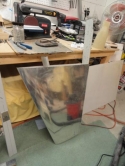
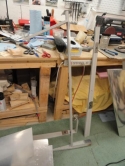

|
|
12-20-2011
|
1.00
|
Primed Fairing and Applied Micro
|
Details
|


 |
|
12-19-2011
|
1.00
|
Sanding of Flox and Contouring
|
Details
|


|
|
12-19-2011
|
1.00
|
Sanding of Fairing
|
|


|
|
12-19-2011
|
1.00
|
Fairing Sanding
|
|
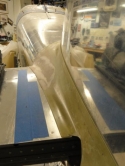


|
|
12-17-2011
|
1.50
|
Applied Reinforcement Glass on Crack
|
Details
|


|
|
12-17-2011
|
0.50
|
Applied Micro, Flox and Glass
|
Details
|


|
|
12-16-2011
|
1.50
|
Sanded Weak Area and Edges on Fairing
|
Details
|


 |
|
12-15-2011
|
0.50
|
Cut out Cardboard Template for Carb Air Filter
|
Details
|

  |
|
12-15-2011
|
1.50
|
Added One Bid of Glass to Right Lower Fairing
|
Details
|


 |
|
12-14-2011
|
1.50
|
Used Sander on Empennage Fairing Edges
|
Details
|


|
|
12-14-2011
|
0.10
|
Photos-Empennage Fairing
|
|


 |
|
12-10-2011
|
2.50
|
Sanding of the Flox and Microballoons
|
Details
|


|
|
12-10-2011
|
0.10
|
Photos-Empennage Fairing
|
|


 |
|
12-09-2011
|
1.50
|
Spread Flox over Inside of Corners of Fairing
|
Details
|


|
|
12-09-2011
|
1.00
|
Photo-Micro Added to Left Side of Fairing
|
|

  |
|
12-09-2011
|
0.50
|
Completed Rudder
|
Details
|
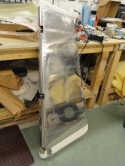


|
|
12-08-2011
|
3.00
|
Sanded Flox and Micro
|
Details
|


 |
|
12-01-2011
|
0.50
|
Sanded Microballoons on Fairing
|
Details
|


|
|
12-01-2011
|
0.50
|
Photos-Added Microballoons
|
|


 |
|
12-01-2011
|
1.00
|
More Sanding/Added Micro
|
Details
|


|
|
11-26-2011
|
2.00
|
Sanded Empennage/Added Microballoons
|
Details
|

  |
|
11-25-2011
|
4.00
|
Sanded Fiberglass/Added Flox to Empennage
|
Details
|


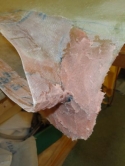
|
|
11-23-2011
|
0.50
|
Still More Trimming of the Fairing
|
Details
|


|
|
11-23-2011
|
0.50
|
Popped Modified Empennage Fairing off Fuselage
|
Details
|


|
|
11-23-2011
|
1.00
|
More Trimming of the Fairing
|
Details
|


|
|
11-23-2011
|
0.50
|
Made 2x8 Clamp for Control Surfaces
|
Details
|

  |
|
11-23-2011
|
1.00
|
Began Trimming the Modified Fairing
|
Details
|


|
|
11-22-2011
|
1.00
|
Pressure Applied to Fairing Flange
|
Details
|


|
|
11-22-2011
|
0.50
|
Placed Sandbag on Right Side Flange
|
Details
|


 |
|
11-22-2011
|
1.00
|
Placed Packing Tape over Duct Tape on Empennage
|
Details
|


|
|
11-22-2011
|
1.00
|
Glass Cloth Epoxied and Laid in Position
|
Details
|


|
|
11-22-2011
|
1.00
|
Fiberglass Cloth in Place on the Fairing
|
Details
|


|
|
11-22-2011
|
1.00
|
Cut Fiberglass Pieces for Each Side
|
Details
|


|
|
11-21-2011
|
1.00
|
Trimmed More of the Right Flange on Fairing
|
Details
|


|
|
11-21-2011
|
1.00
|
Applied Duct Tape on Fuselage and HS
|
Details
|


|
|
11-20-2011
|
1.50
|
Trimmed Empennage Fairing/Sanded Insulation
|
Details
|


|
|
11-19-2011
|
0.50
|
Trimmed Insulation to Fit Contour of Fairing
|
Details
|


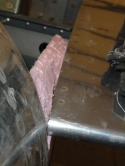
|
|
11-19-2011
|
0.50
|
Trimmed Front Corners of Empennage Fairing
|
Details
|


|
|
11-19-2011
|
0.50
|
Left Flange of Empennage Fairing Split
|
Details
|


 |
|
11-18-2011
|
1.50
|
Empennage Fairing Drilled/Clecoed in place
|
Details
|


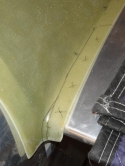
|
|
11-17-2011
|
2.50
|
Riveted HS and Elevator Fairings in Place
|
Details
|


|
|
11-16-2011
|
1.00
|
Rudder Fairing Riveted to Rudder/SuperFil Added
|
Details
|


|
|
11-16-2011
|
1.00
|
Dimpled Rudder/Riveted Rudder
|
Details
|

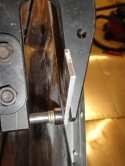

|
|
11-16-2011
|
1.00
|
Dimpled Aft Holes in Top of Rudder
|
Details
|


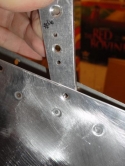
|
|
11-16-2011
|
1.00
|
Countersunk Fairing Holes
|
Details
|


 |
|
11-15-2011
|
2.00
|
Riveted VS Fairing/Glued Strips
|
Details
|


|
|
11-15-2011
|
1.50
|
Perma-Grit Countersink/Fairing Riveted/Glued
|
Details
|


|
|
11-14-2011
|
1.00
|
Trimmed Fuselage-Empennage Fairing
|
Details
|


 |
|
11-14-2011
|
1.00
|
T-88 Epoxy Bottles/Reinforcement Strips
|
|

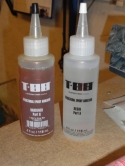
 |
|
11-14-2011
|
2.00
|
Glued Reinforcement Strips to Fairings
|
Details
|


|
|
11-10-2011
|
2.00
|
Sanding of Fairings
|
Details
|


|
|
11-10-2011
|
2.00
|
Made Reinforcement Strips for Fairings
|
Details
|


|
|
11-10-2011
|
0.50
|
Aluminum Strips for the Fairings
|
Details
|


 |
|
11-09-2011
|
1.00
|
Mixed More Microballoons and Flox-Weak Mix
|
Details
|


 |
|
11-09-2011
|
1.00
|
Lower Rudder Fairing Trimmed
|
Details
|


 |
|
11-09-2011
|
2.00
|
Added Two Strips of Glass to Each Fairing
|
Details
|


|
|
11-08-2011
|
2.50
|
Applied Epoxy and Flox to Inside of Fairings
|
Details
|


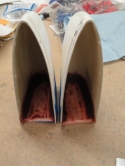
|
|
11-07-2011
|
1.80
|
Used Superfil to Fill Holes in Fairings
|
Details
|


|
|
11-07-2011
|
1.50
|
Used SuperFil to Fill Holes in Elevator Fairing
|
Details
|


 |
|
11-07-2011
|
1.50
|
Made Left Emp Fairing Insert and Microballoons
|
Details
|


 |
|
11-07-2011
|
0.20
|
Changed out Dessicant in Dehydrator Plugs
|
Details
|

  |
|
11-03-2011
|
1.50
|
Trimmed Fuselage/Empennage Fairing
|
Details
|


|
|
11-03-2011
|
2.00
|
Made a New Edge on Left Elevator Fairing
|
Details
|


 |
|
11-02-2011
|
1.00
|
Trimmed Rudder Fairing
|
Details
|


 |
|
11-02-2011
|
2.00
|
Sanded Fiberglass Tips in Fairings
|
Details
|


|
|
11-02-2011
|
1.00
|
Right Fairings/Torqued Elevator Weights/VS
|
Details
|


|
|
10-26-2011
|
0.50
|
More Trimming of Rudder Bottom Fairing
|
Details
|


 |
|
10-26-2011
|
3.00
|
HS and Elevator Tip Fairings Sanded/Reglassed
|
Details
|


|
|
10-26-2011
|
2.00
|
Elevator Fairing/Rudder Bottom FairingTrimmed
|
Details
|


|
|
10-25-2011
|
1.50
|
Prepared Empennage Fairings for Glassing Tips
|
Details
|


|
|
10-25-2011
|
1.50
|
Microballoons and Epoxy Applied to Fairings
|
Details
|


 |
|
10-24-2011
|
3.50
|
Some Fairings Drilled to the HS, VS and Control Su
|
Details
|

 |
|
10-22-2011
|
3.00
|
Faired Edges to Fairings/Cleaned Fairings
|
Details
|
 |
|
10-19-2011
|
0.50
|
Sanded Vertical Stab Fairing
|
Details
|


 |
|
10-19-2011
|
0.40
|
Reinstalled Scat Tubing after Bending Wire End
|
Details
|

  |
|
10-19-2011
|
0.10
|
Photo-Hi-Temp RTV on Oil Cooler Shutter Cable
|
|
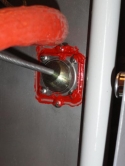
  |
|
10-19-2011
|
0.50
|
Hi-Temp RTV Applied to Areas in Engine Compartment
|
Details
|


|
|
10-18-2011
|
2.50
|
Installed Scat Tubing for Heat Muffs
|
Details
|
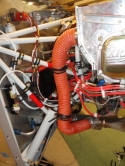


|
|
10-17-2011
|
1.50
|
Right Injector Installed/PK Screw in Heat Muff
|
Details
|


|
|
10-17-2011
|
1.50
|
Reattached Tail Components
|
Details
|

  |
|
10-17-2011
|
1.00
|
Clamped Smoke Hoses to Engine Mount
|
Details
|


|
|
10-17-2011
|
1.00
|
Assisted with Reattaching Empennage
|
Details
|
   |
|
10-16-2011
|
3.00
|
Drilled Injector Hole in Right Exhaust/PK Screw
|
Details
|


 |
|
10-15-2011
|
2.00
|
Smoke Injector Installed in Left Exhaust
|
Details
|


|
|
10-15-2011
|
2.50
|
Located/Drilled Firewall for Smoke System Fitting
|
Details
|


|
|
10-13-2011
|
0.50
|
Torque Seal Applied
|
Details
|
  |
|
10-13-2011
|
2.00
|
Clamped Ignition Wires/Firewall Pass-thru
|
Details
|

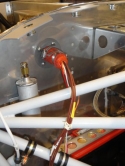
|
|
10-12-2011
|
1.00
|
Wrapped Up Wires in Firewall Pass-Through
|
Details
|


|
|
10-12-2011
|
1.00
|
Tie-wraps Replaced with Lacing String
|
Details
|
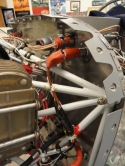

|
|
10-12-2011
|
1.00
|
More Wire Lacing of Wires on the Right Side
|
Details
|

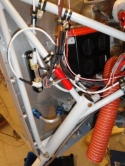
 |
|
10-11-2011
|
1.50
|
Tach Sensor to Mag/Retimed Mag/Eng Review
|
Details
|

 |
|
10-11-2011
|
1.00
|
Lightspeed Ignition Wires/Laced Wires
|
Details
|


|
|
10-11-2011
|
3.00
|
Crimped Terminals onto Coax-Lightspeed Ignition
|
Details
|


|
|
10-11-2011
|
1.00
|
Assisted Tom Cullen with Adding Tach Sensor
|
|

  |
|
10-10-2011
|
0.50
|
Replaced Dehydrator Plugs
|
Details
|


 |
|
10-10-2011
|
1.50
|
Ran Lightspeed Power Wires thru Baffle
|
Details
|


 |
|
10-10-2011
|
1.50
|
Clamped Tanis Wire to Brake Line
|
Details
|


 |
|
10-09-2011
|
1.50
|
More Tie-wrapping of Wiring
|
Details
|


|
|
10-09-2011
|
1.50
|
More Tie-Wrapping of Wires
|
Details
|

|
|
10-08-2011
|
0.10
|
Tanis Plug Mount/EGT/CHT Wires
|
Details
|

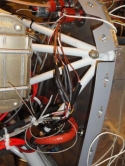
 |
|
10-08-2011
|
2.50
|
More Wire Wrapping/Safetying/Tanis Plug
|
Details
|
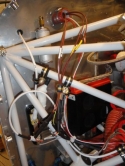

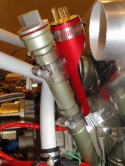
|
|
10-05-2011
|
1.00
|
Used Adel Clamp Keeper Tool to Install Clamp
|
Details
|


|
|
10-05-2011
|
2.00
|
Tie-Wrapping/Safety Alternator/GPS Antenna Bracket
|
Details
|

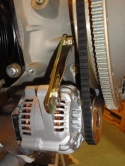

|
|
10-05-2011
|
0.10
|
Photos-Adel Clamp Keeper Tool
|
|


|
|
10-04-2011
|
2.00
|
Tied Up More Wires/Ground Wire for Tanis
|
Details
|


|
|
10-04-2011
|
0.50
|
More Drilling of Firewall for GPS Antenna Bracket
|
Details
|

  |
|
10-04-2011
|
1.00
|
HeatShrink Terminals/Wiring
|
Details
|

|
|
10-03-2011
|
1.50
|
Safetied Tach Cap/Tiewrapped Wires/Visitors
|
Details
|


 |
|
10-03-2011
|
1.00
|
Riveted Right Rear Baffles Together
|
Details
|
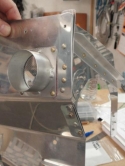

|
|
10-01-2011
|
1.00
|
Tie-Wrapped Wires/Crimped EGT/CHT Terminals
|
Details
|


|
|
10-01-2011
|
1.50
|
Attempted to Screw Tach Sensor Plug into Magneto
|
Details
|

  |
|
09-30-2011
|
0.50
|
Replaced Adel Clamps with Slick Two Wire Clamps
|
Details
|


|
|
09-30-2011
|
0.50
|
Removed Magneto Vent Plug to Install Transducer
|
Details
|


|
|
09-30-2011
|
0.10
|
Photo-Slick Two Wire Clamp Installed
|
|

  |
|
09-30-2011
|
1.00
|
Installed Terminal Nipples on Master/Starter Relay
|
Details
|


 |
|
09-30-2011
|
0.40
|
Drilled Pilot Holes in Firewall for GPS Bracket
|
Details
|
   |
|
09-27-2011
|
1.00
|
Unused EMS-120 Wires Wrapped in Spiral Wrap
|
Details
|

  |
|
09-27-2011
|
0.10
|
Photos-Engine in Current State
|
|


 |
|
09-27-2011
|
1.50
|
Finished Making Firewall Pass-Thru-Ignition Wire
|
Details
|


 |
|
09-24-2011
|
3.00
|
Replaced P1 Wire/Attached It to ALT CB
|
Details
|


|
|
09-24-2011
|
0.10
|
Photo-Power Wires to ALT CB and CB Panel
|
|

  |
|
09-23-2011
|
4.00
|
Removed P-Lead Ground/Wiring Questions Answered
|
Details
|


|
|
09-23-2011
|
0.10
|
Photos-Fuel Flow Transducer Wires/Ammeter Shunt
|
|

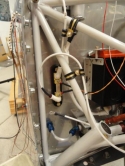

|
|
09-23-2011
|
0.10
|
Photos 2-Wire from Shunt to Relay Removed
|
|

  |
|
09-22-2011
|
1.00
|
Ignition Wires Tie-Wrapped/EGT & CHT Wires Wrapped
|
Details
|
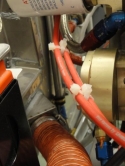

 |
|
09-22-2011
|
2.00
|
Clamp Ignition Wires/Spiral-wrapping
|
Details
|


|
|
09-21-2011
|
2.50
|
Pulled P1 Wire off Master Relay/P-Lead/Connectors
|
Details
|


|
|
09-21-2011
|
3.00
|
Drilled Firewall for Passthru for Ignition Wires
|
Details
|
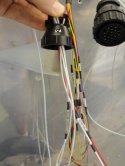


|
|
09-16-2011
|
1.50
|
Checked Starter Switch Wiring/Made P-Lead
|
Details
|


|
|
09-15-2011
|
0.50
|
Photos-Alternator Wire and Circuit Breaker
|
|
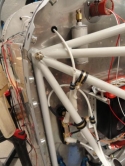


|
|
09-15-2011
|
5.00
|
Clamped Wires/Finished Alternator Wire to CB
|
Details
|


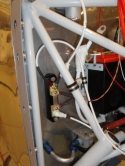
|
|
09-14-2011
|
2.50
|
Connected Wires to Relays/Clamped Tube-Firewall
|
Details
|

 |
|
09-13-2011
|
1.00
|
Starter Wire, Master Relay Wire/Photo-Wire Bundle
|
Details
|


 |
|
09-13-2011
|
3.00
|
Made Another Wire Bundle from EMS to Right Side
|
Details
|
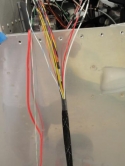

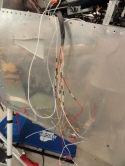
|
|
09-13-2011
|
2.00
|
Finished Crimping #8 Wire Betw/Shunt and Relay
|
Details
|


|
|
09-13-2011
|
1.00
|
Drilled Firewall for Alternator Wire
|
Details
|


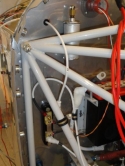
|
|
09-08-2011
|
0.50
|
Crimped Terminal onto 8 AWG Wire
|
Details
|
   |
|
09-07-2011
|
1.50
|
Trimmed Flange and Installed Oil Cooler
|
Details
|
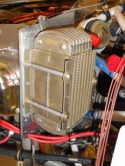

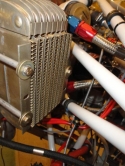
|
|
09-07-2011
|
1.00
|
Made Fusible Links for Dynon Ammeter Shunt
|
Details
|


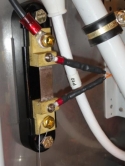
|
|
09-07-2011
|
0.50
|
Crimped Terminal on Alternator Wire
|
Details
|

 |
|
09-07-2011
|
1.00
|
Clamped Manifold Pressure Hose to Baffle
|
Details
|


 |
|
09-06-2011
|
2.00
|
Installed 2nd Oil Pressure Restrictor Fitting
|
Details
|


 |
|
09-06-2011
|
1.00
|
Attached Oil Cooler Shutter Door Cable
|
Details
|


|
|
09-06-2011
|
2.00
|
Added Screen to Baffle/Snapped Alt Terminal Bolt
|
Details
|


|
|
09-01-2011
|
0.20
|
Flightline Interiors' Glareshield/Visitors
|
Details
|


|
|
09-01-2011
|
0.10
|
Dehydrator Plug/Ammeter Shunt Fuse Links
|
Details
|

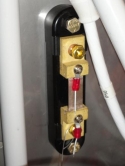
 |
|
09-01-2011
|
0.20
|
Crimped Terminal onto #8 Wire
|
Details
|


 |
|
08-31-2011
|
2.50
|
Riveted Oil Cooler Shutter/Baffles/GPS Shelf
|
Details
|


|
|
08-30-2011
|
2.50
|
Spacer Between Baffles/Enlarged Sparkplug Hole
|
Details
|


 |
|
08-30-2011
|
0.10
|
Cleaned Edges of GPS Antenna Bracket
|
Details
|

  |
|
08-26-2011
|
1.00
|
Reattached MP Hose/Sparkplug Access Hole
|
Details
|


|
|
08-25-2011
|
1.00
|
Riveted Nutplate on Baffle/Routing of Smoke Hoses
|
Details
|


 |
|
08-25-2011
|
2.50
|
Installed Fuel Line/Rotated EGT Clamp
|
Details
|


|
|
08-25-2011
|
3.00
|
Clamp Alternator Wire/Run Thru Subpanel
|
Details
|


|
|
08-25-2011
|
0.50
|
Bolted Ammeter Shunt to Firewall
|
Details
|
 |
|
08-24-2011
|
4.00
|
Trimmed Oil Cooler Flange/Baffle Mod/Wiring
|
Details
|


|
|
08-24-2011
|
0.10
|
Photo-Oil Temperature Sensor Wire
|
|

  |
|
08-24-2011
|
1.00
|
Assisted with Wiring Ammeter Shunt
|
Details
|

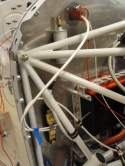

|
|
08-23-2011
|
2.00
|
Cleaned Fuel Line Fittings/Took off Baffling
|
Details
|


|
|
08-18-2011
|
0.10
|
Shop Visitor-Rod Hightower, Signed Map Box Door
|
Details
|


|
|
08-16-2011
|
1.50
|
Installed NewTeflon Fuel Lines
|
Details
|


|
|
08-11-2011
|
1.00
|
Showed Me Potential Paint Schemes
|
Details
|
   |
|
08-11-2011
|
0.10
|
Photos-Fuel Line Hoses
|
|


 |
|
08-11-2011
|
0.50
|
Oil Cooler Door Shutter Cable/Oil Fitting
|
Details
|


 |
|
08-11-2011
|
1.00
|
Measured and Ordered New Fuel Lines
|
Details
|


|
|
08-11-2011
|
2.00
|
Labeled Wires/Added Sealant around Tanis Oil Sump
|
Details
|


|
|
08-10-2011
|
1.00
|
Tanis Oil Sump Heater/Oil Door Shutter Cable
|
Details
|

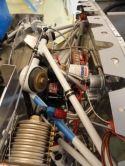

|
|
08-10-2011
|
0.50
|
Screwed Stop Nut on Oil Fitting
|
Details
|


|
|
08-05-2011
|
1.00
|
Safetied Oil Temp Sensor/Bolted Engine Ground
|
Details
|


|
|
08-05-2011
|
0.10
|
Photo-Oil Cooler Shutter Door Cable Routing
|
|
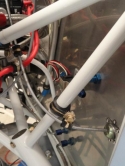
  |
|
08-05-2011
|
1.50
|
Clamped Oil Cooler Shutter Door Cable
|
Details
|


|
|
08-04-2011
|
3.50
|
Oil Fittings Screwed into Engine/Hoses in Place
|
Details
|


|
|
08-04-2011
|
0.30
|
Moved LightSpeed Control Box on Top of Engine
|
Details
|

  |
|
08-04-2011
|
0.50
|
Glued Tanis Preheater to Oil Sump
|
Details
|


 |
|
08-04-2011
|
1.00
|
Brake Hoses/Elastic Grommet-Wires/Oil Door Cable
|
Details
|


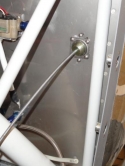
|
|
08-04-2011
|
0.70
|
Attached Oil Hose to Fitting by Engine Mount
|
Details
|

  |
|
08-04-2011
|
1.50
|
Applied Spark Plug Lubricant/Oil Cooler Lines
|
Details
|

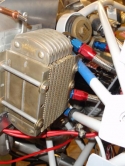

|
|
07-18-2011
|
0.50
|
Installed Cotter Pin on Left Rudder Pedal
|
Details
|

 |
|
07-18-2011
|
0.30
|
Dried Out Dehydrator Plugs
|
Details
|


 |
|
07-18-2011
|
1.20
|
Cut Out Template for Glareshield
|
Details
|
   |
|
07-18-2011
|
1.00
|
Assisted with Making the Glareshield Template
|
Details
|
   |
|
07-10-2011
|
3.00
|
Routed Sparkplug Wires into Plugs
|
Details
|


|
|
07-10-2011
|
1.00
|
Rerouted Oil Cooler Door Cable
|
Details
|


 |
|
07-10-2011
|
0.10
|
Photos-Sparkplug Wires Clamped
|
|


|
|
06-27-2011
|
1.00
|
Fuel Flow Transducer/Ammeter Shunt
|
Details
|
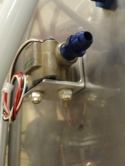
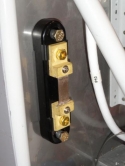
 |
|
06-22-2011
|
1.00
|
Temporarily Installed Ammeter Shunt/Engine Wires
|
Details
|
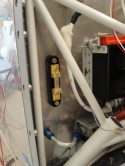

 |
|
06-22-2011
|
2.00
|
Riveted Fuel Flow Transducer Bracket
|
Details
|


|
|
06-21-2011
|
1.50
|
Pass-Through/Ammeter Shunt
|
Details
|

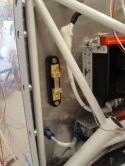
|
|
06-21-2011
|
0.50
|
Engine Wires Clamped to Cylinder
|
Details
|

  |
|
06-20-2011
|
3.50
|
Worked with Steve on Running Engine Wires
|
Details
|
   |
|
06-20-2011
|
3.50
|
Worked on Engine Wiring
|
Details
|


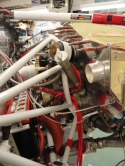
|
|
06-20-2011
|
1.00
|
Oil Cooler Shutter Cable Installation
|
Details
|


|
|
06-20-2011
|
1.50
|
Installing the Firewall Pass-Through
|
Details
|


|
|
06-19-2011
|
1.00
|
Put Firesleeve on Pass-through/NACA Vent Screen
|
Details
|


|
|
06-19-2011
|
1.00
|
Installed Oil Cooler Shutter Cable
|
Details
|


 |
|
06-13-2011
|
1.00
|
Split Firewall Pass-Through for Ignition Wires
|
Details
|


|
|
06-13-2011
|
3.00
|
Made Plenum Fit/Chamfered Top Skin
|
Details
|


|
|
06-12-2011
|
1.00
|
Riveted Oil Cooler Shutter/Baffle Bolt Reinforceme
|
Details
|

 |
|
06-12-2011
|
1.00
|
Notched Aft Left Baffle and Plenum
|
Details
|


 |
|
06-11-2011
|
2.00
|
Cleaned Up Bolt Holes for Oil Cooler
|
Details
|


 |
|
06-06-2011
|
0.30
|
Safetied Alternator Bolts
|
Details
|
  |
|
06-06-2011
|
0.20
|
Removed Cover on LSE Serial Plug from Sensor
|
Details
|


|
|
06-06-2011
|
0.50
|
Reinstalled Crush Washer on Oil Temp Sensor
|
Details
|

  |
|
06-06-2011
|
0.10
|
Met with Walt Halloran re Painting Process
|
Details
|
   |
|
06-06-2011
|
1.50
|
Installed Firewall Pass-Through on Left Side
|
Details
|


|
|
06-03-2011
|
0.50
|
Installed Crush Washer on Oil Temp Sensor
|
Details
|
   |
|
05-30-2011
|
0.50
|
Ran LSE Output Wires/Oil Temp Sensor
|
Details
|


 |
|
05-28-2011
|
5.50
|
Reworked Oil Cooler Mount/MP Sensor Tubing
|
Details
|


 |
|
05-27-2011
|
5.50
|
Riveted More Oil Cooler Mount Components
|
Details
|

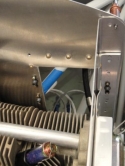
|
|
05-27-2011
|
4.00
|
Riveted Baffle Doublers/Curved Cylinder Baffles
|
Details
|


|
|
05-27-2011
|
0.50
|
Installed Steel Fittings in Oil Cooler
|
Details
|


 |
|
05-26-2011
|
4.50
|
Made Doublers for Cylinder Baffle Ties
|
Details
|


 |
|
05-26-2011
|
4.50
|
Drilled Doublers to Side and Aft Baffles
|
Details
|
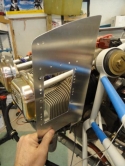


|
|
05-25-2011
|
0.10
|
Photo-Baffle Angle and Safetying Plug Cylinder #1
|
Details
|


 |
|
05-25-2011
|
6.00
|
Laid out New Position for Oil Cooler
|
Details
|


|
|
05-24-2011
|
0.10
|
Photos-Manifold Pressure Sensor Wires
|
|


 |
|
05-24-2011
|
5.50
|
Installed Manifold Pressure Hose and Wires
|
Details
|


|
|
05-24-2011
|
0.50
|
Fuel Pump Wire Connected to Fuel Pump
|
Details
|

  |
|
05-24-2011
|
0.10
|
Connected Manifold Pressure Tube to Sensor/Fitting
|
Details
|


 |
|
05-24-2011
|
0.10
|
Added Plastic Tubing Around Oil Dipstick
|
Details
|
  |
|
05-23-2011
|
1.50
|
Safetied #1 Cylinder/Starter Wire Bolted
|
Details
|


 |
|
05-23-2011
|
2.00
|
Made Doubler for Aft Left Baffle
|
Details
|


|
|
05-23-2011
|
1.50
|
Installed Manifold Pressure Sensor
|
Details
|


 |
|
05-22-2011
|
2.00
|
Safetied Fitting in Primer on #2 Cylinder
|
Details
|

  |
|
05-21-2011
|
1.00
|
Dave Ross' Visit
|
Details
|

  |
|
05-17-2011
|
1.00
|
Safetied Oil Quick Drain
|
Details
|

  |
|
05-16-2011
|
0.10
|
Photos-EGT/CHT Wires Plugged and Working!
|
Details
|


 |
|
05-16-2011
|
3.00
|
Installed Repl Fuel Pump Overflow/FW Pass-Thru
|
Details
|
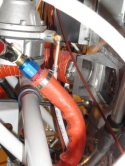

 |
|
05-15-2011
|
0.10
|
Photos-Firewall Pass-Through
|
|


 |
|
05-15-2011
|
2.00
|
Drilled Hole in Firewall for Pass-Through
|
Details
|


|
|
05-15-2011
|
1.00
|
Cut Air Hole in Right Rear Baffle/Lock Washers
|
Details
|


|
|
05-07-2011
|
0.00
|
Vacation in Hawaii!
|
Details
|


|
|
05-05-2011
|
2.00
|
Set Air Inlet Hole in Baffle/Ran Starter Wire
|
Details
|


 |
|
05-05-2011
|
0.50
|
Drilled Pilot Hole in Firewall for Wiring
|
Details
|

  |
|
05-04-2011
|
4.00
|
EGT & CHT Wires/Relabeled Dynon Wires/Visitors
|
Details
|


|
|
05-03-2011
|
1.50
|
Marked Dynon Wires
|
Details
|

  |
|
05-03-2011
|
1.00
|
Installed CHT Thermocouples
|
Details
|


 |
|
05-02-2011
|
2.50
|
Installed Throttle Cable/CHT Thermocouples
|
Details
|


|
|
04-28-2011
|
1.00
|
Installed New Engine Dehydrator Plugs
|
Details
|


 |
|
04-28-2011
|
2.00
|
Connected Mixture Cable to Carburetor
|
Details
|


 |
|
04-27-2011
|
0.10
|
Photos-Oil Cooler and Mini-Plenum on the Baffle
|
|
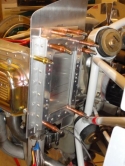
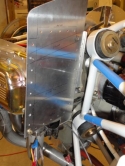

|
|
04-27-2011
|
0.10
|
Photo 2-Interior View of Mini-Plenum
|
|

  |
|
04-27-2011
|
3.50
|
Partial Construction of Oil Cooler Mini-Plenum
|
Details
|


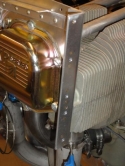
|
|
04-26-2011
|
0.10
|
Photos-Mini-Plenum and Baffle
|
|
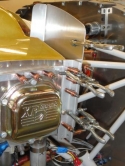
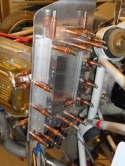

|
|
04-26-2011
|
3.00
|
Drilled Oil Cooler Mini-Plenum to New Baffle
|
Details
|


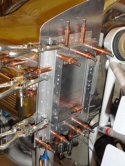
|
|
04-25-2011
|
3.00
|
Constructed Oil Cooler Mini-plenum
|
Details
|


|
|
04-24-2011
|
1.50
|
Tightened Throttle Firewall Passthrough/Cables
|
Details
|


 |
|
04-24-2011
|
0.10
|
Shop Visitors-Amy, Brian and Mary
|
Details
|

  |
|
04-24-2011
|
1.00
|
Installed EGT Thermocouple Probes
|
Details
|


|
|
04-24-2011
|
2.00
|
Cut Angle Brackets for Oil Cooler Mini-Plenum
|
Details
|


 |
|
04-24-2011
|
1.00
|
Assisted Drew in Cutting Brackets for Oil Cooler
|
Details
|
   |
|
04-23-2011
|
5.00
|
Riveted Cowl Inlet Ramps/Installed Throttle Cable
|
Details
|


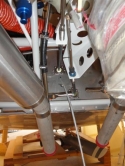
|
|
04-23-2011
|
3.50
|
Assisted Gary with Throttle and Carb Heat Cables
|
Details
|


|
|
04-22-2011
|
0.10
|
Photos-Positioning Doubler to Right Inlet Ramp
|
|


|
|
04-22-2011
|
3.00
|
Made Doubler for Under Right Inlet Cowl Ramp
|
Details
|


|
|
04-22-2011
|
1.00
|
Brackets for Attaching Inlet Ramps to Side
|
Details
|


|
|
04-21-2011
|
2.00
|
Drilled Angle Support for Right Cowl Inlet Ramp
|
Details
|

  |
|
04-20-2011
|
2.00
|
Made Support Bracket for Baffle on Cylinder #4
|
Details
|


|
|
04-20-2011
|
2.00
|
Made Angle Support Brackets on Cylinder #3
|
Details
|


|
|
04-16-2011
|
0.10
|
Photos-Shortened Screws/L-Brace on Left Ramp
|
|


 |
|
04-16-2011
|
2.50
|
Made Reinforcement Bracket for Left Cowl Inlet
|
Details
|


|
|
04-15-2011
|
3.00
|
Trimmed Left Front Cowl Inlet Ramp
|
Details
|


|
|
04-14-2011
|
1.00
|
Made Bolt Spacers for Oil Cooler
|
Details
|

  |
|
04-14-2011
|
0.10
|
Cleaned Up Shop for EAA Chapter 846 Tour
|
Details
|
   |
|
04-13-2011
|
0.10
|
Photos-Oil Shutter/Incorrect Positioning of Cooler
|
|


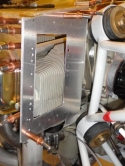
|
|
04-13-2011
|
0.10
|
Photos 2-Aft Left Center Baffle Trimmed
|
Details
|


 |
|
04-13-2011
|
5.00
|
Modified Baffle for Oil Cooler-Incorrectly!
|
Details
|


|
|
04-13-2011
|
1.50
|
Drilled Ice Drain Hole in Oil Breather Tube
|
Details
|


|
|
04-12-2011
|
0.10
|
Photos-Oil Breather Tube
|
|


 |
|
04-12-2011
|
4.00
|
Add Stiffener Angle to Baffling/Oil Breather Tube
|
Details
|
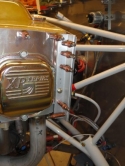

|
|
04-11-2011
|
0.10
|
Photos-Aft Corners of Baffling
|
|
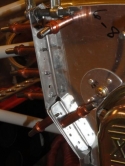

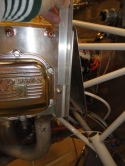
|
|
04-11-2011
|
4.00
|
Enlarged Holes in Baffling and Plenum
|
Details
|


|
|
04-10-2011
|
0.10
|
Photos-Baffling Drilled to the Plenum
|
|


|
|
04-10-2011
|
4.00
|
Installed Aft Center Baffle Support/More Baffling
|
Details
|


 |
|
04-09-2011
|
3.00
|
Trimmed Front Baffling and Left Side Baffles
|
Details
|


|
|
04-05-2011
|
2.00
|
Primed Aft Fairing after Sanding
|
Details
|


|
|
04-05-2011
|
0.10
|
Photos-Plenum on the Engine
|
|


|
|
04-05-2011
|
0.10
|
Photos-Aft Fairing on the Fuselage
|
|


|
|
04-05-2011
|
0.10
|
Photos 2-Aft Fairing Interior with Closed Canopy
|
|


|
|
04-05-2011
|
1.50
|
Baffling Trimmed
|
Details
|


|
|
04-04-2011
|
0.50
|
Sanded Cowling Extensions/Pulled Tape off Cowl
|
Details
|


|
|
04-04-2011
|
1.50
|
Sanded Canopy Fairing
|
Details
|


|
|
04-04-2011
|
0.10
|
Photos-Lines Marked on Baffles/Trimmed
|
|


 |
|
04-04-2011
|
0.10
|
Photos-Cowl Holes Filled with SuperFil
|
|


 |
|
04-04-2011
|
1.00
|
Made Spacer for Left Aft Baffle
|
Details
|


|
|
04-04-2011
|
1.00
|
Began Trimming the Baffling for the Plenum
|
Details
|


|
|
04-04-2011
|
1.00
|
Applied SuperFil to Outside of Canopy Fairing
|
Details
|

|
|
04-03-2011
|
0.10
|
Photos-Filled Drilled Holes with SuperFil
|
|


 |
|
04-03-2011
|
0.10
|
Photos-Cowl Extensions/Fairing Filled with SuperFi
|
|


|
|
04-03-2011
|
0.50
|
Mixed SuperFil for Filling Holes in Cowling
|
Details
|


|
|
04-03-2011
|
1.50
|
Applied SuperFil to Underside of Canopy Fairing
|
Details
|


|
|
03-31-2011
|
1.50
|
Rec SuperFil/Taped Cowling for Filling Holes
|
Details
|


|
|
03-31-2011
|
0.10
|
Collected Tools for Metal-Working Workshop
|
Details
|


 |
|
03-24-2011
|
2.50
|
Trimmed Aft Left Center Baffle
|
Details
|


|
|
03-24-2011
|
0.50
|
Installed Oil Quick-Change Drain/Baffle Trimming
|
Details
|


|
|
03-24-2011
|
1.50
|
Cleaned and Taped Canopy
|
Details
|


 |
|
03-23-2011
|
4.00
|
Trimmed Fairing to Final Shape
|
Details
|


|
|
03-23-2011
|
0.10
|
Photos-Aft Fairing Trimming
|
|

|
|
03-23-2011
|
0.10
|
Photos 4-Aft Fairing after Trimming
|
|


|
|
03-23-2011
|
0.10
|
Photos 3-Aft Fairing After Trimming
|
|


|
|
03-23-2011
|
0.10
|
Photos 2-Aft Fairing Trimming
|
|
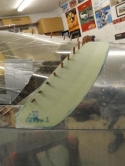

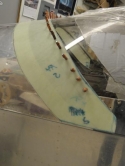
|
|
03-22-2011
|
4.50
|
Sanded and Drilled Fairing to Canopy
|
Details
|
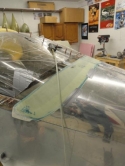
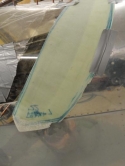

|
|
03-22-2011
|
0.10
|
Photos-Fairing Drilled to the Canopy
|
|


 |
|
03-21-2011
|
1.00
|
Sanded Cowling Reinforcements
|
Details
|
   |
|
03-21-2011
|
3.00
|
Sanded Aft Fairing
|
Details
|


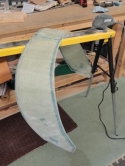
|
|
03-21-2011
|
0.10
|
Photos-Sanding the Aft Fairing Extension
|
|

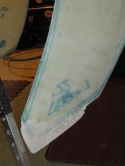
 |
|
03-19-2011
|
2.00
|
Lower Left Edge was Extended
|
Details
|


 |
|
03-16-2011
|
0.10
|
Reinforcements Glued over Extensions
|
Details
|


 |
|
03-16-2011
|
0.10
|
Reinforcements Glued in Place over Extensions
|
Details
|


|
|
03-16-2011
|
2.50
|
Popped the Extensions/More Reinforcements
|
Details
|


|
|
03-16-2011
|
1.00
|
More Sanding of the Fairing
|
Details
|

  |
|
03-15-2011
|
1.50
|
Sharpie Lines Transferred to Fairing
|
Details
|
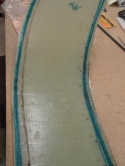

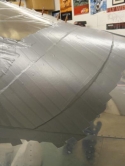
|
|
03-15-2011
|
0.50
|
Popped the Aft Fairing off the Tape
|
Details
|


|
|
03-15-2011
|
0.10
|
Photos-Fairing on the Aircraft
|
|
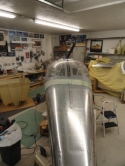

 |
|
03-15-2011
|
0.10
|
Glued Fiberglass Sheets Together for Extensions
|
Details
|


|
|
03-15-2011
|
1.50
|
Fiberglassed Extensions into Lower Cowling
|
Details
|


|
|
03-15-2011
|
0.10
|
Fiberglass Extensions Glued in Place
|
Details
|


|
|
03-15-2011
|
0.10
|
Began the Sanding of the Fairing
|
Details
|

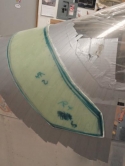

|
|
03-14-2011
|
0.10
|
Photos 3-Right and Center Areas of the Fairing
|
Details
|


|
|
03-14-2011
|
0.10
|
Photos 2-Aft Canopy Fairing
|
Details
|


|
|
03-14-2011
|
2.00
|
Made Fiberglass Fairings
|
Details
|

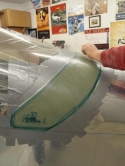

|
|
03-14-2011
|
4.50
|
Cut Out Fiberglass Strips for Canopy Aft Fairing
|
Details
|


|
|
03-14-2011
|
0.10
|
Cut Fairing Strips/Taped Cardboard onto Canopy
|
Details
|


|
|
03-10-2011
|
3.00
|
Made Right Cardboard Template for Fairing
|
Details
|

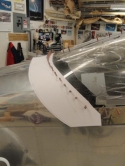

|
|
03-10-2011
|
0.10
|
Finished Right Template and Made Paper Copies
|
|


 |
|
03-09-2011
|
0.50
|
Sanded Plenum
|
Details
|


 |
|
03-09-2011
|
1.50
|
Made Cardboard Template for Aft Canopy Fairing
|
Details
|
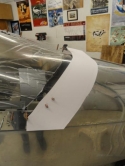
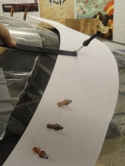

|
|
03-04-2011
|
0.50
|
Signed up for Rental of Hangar E3 @ Medina
|
Details
|
   |
|
03-03-2011
|
2.00
|
Baffle Back Left Side #5/Cowl Inlets Sanded
|
Details
|
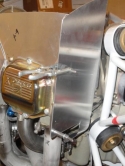


|
|
03-02-2011
|
0.10
|
Plenum/Bolt Reinforcements Riveted
|
|


|
|
03-02-2011
|
4.00
|
Laid Plenum Inside of the Baffling
|
Details
|


|
|
03-02-2011
|
0.10
|
Baffling Bolt Reinforcements Riveted in Place
|
|


 |
|
03-01-2011
|
3.00
|
Started to Install Baffling
|
Details
|


|
|
02-24-2011
|
2.00
|
Installed Mixture Cable Hardware
|
Details
|
   |
|
02-22-2011
|
0.10
|
Eyeball Assembly in Firewall for Mixture
|
|


|
|
02-22-2011
|
3.00
|
Drilled Mixture Hole in Firewall for Eyeball Ass'y
|
Details
|


|
|
02-17-2011
|
2.00
|
Locked Down the Rear Pin Mount
|
Details
|


|
|
02-17-2011
|
0.10
|
Began to Shape Canopy Latch/Seated Flap Switch
|
Details
|


 |
|
02-16-2011
|
0.10
|
Received Another Van's Order
|
Details
|

  |
|
02-16-2011
|
3.50
|
Drilled New Rear Pin Mount Moving Inboard
|
Details
|


|
|
02-10-2011
|
2.00
|
Drilled Attach Holes in Bracket/Cabin Heat Install
|
Details
|


|
|
02-10-2011
|
0.50
|
Cabin Heat Control/Mixture Cable Hole in Firewall
|
Details
|


|
|
02-09-2011
|
1.50
|
Moved Fuel Line/Removed Control Cable Bracket
|
Details
|


|
|
02-09-2011
|
2.00
|
Installed Tip-up Mod Stop
|
Details
|


|
|
02-08-2011
|
1.50
|
Evaluated Left Rear Pin Mount
|
Details
|


|
|
02-08-2011
|
1.50
|
Cleaned up the Rest of the Baffling Pieces
|
Details
|

  |
|
02-08-2011
|
1.00
|
Aft Edge of Canopy Sanded Some More
|
Details
|


|
|
02-03-2011
|
0.50
|
Touched Up the Canopy Anchor Block
|
Details
|

  |
|
02-03-2011
|
1.00
|
Sanded Aft Top Edge of Canopy/Visitors
|
Details
|


|
|
02-03-2011
|
1.00
|
Riveted the Last Few Rivets-Firewall to Fuselage
|
Details
|
 |
|
02-03-2011
|
2.50
|
Riveted Side Support Strips to Lower Cowling
|
Details
|


|
|
02-03-2011
|
0.10
|
Cowling Support Strips Riveted/Cowling is On
|
|


 |
|
02-03-2011
|
0.10
|
Began to Clean up Edges of Baffling
|
Details
|

  |
|
02-01-2011
|
2.00
|
Shiny Spinner/Control Cable Bracket/Anchor Blocks
|
Details
|


|
|
02-01-2011
|
3.00
|
Screwed Side Skirts in Place
|
Details
|


|
|
02-01-2011
|
0.10
|
Right Side Skirt/Aft Fairing Template
|
Details
|


 |
|
02-01-2011
|
0.10
|
Received Gear and Fuselage Intersection Fairings
|
Details
|

  |
|
02-01-2011
|
0.10
|
Initial Aircraft Weighing
|
Details
|


|
|
02-01-2011
|
0.10
|
Aircraft Weighing
|
|


|
|
02-01-2011
|
0.10
|
Aft Fairing Templates/Gap on Left Side
|
Details
|


|
|
01-31-2011
|
0.50
|
Left Side Skirt Replaced/Cub Scouts Visit
|
Details
|
   |
|
01-31-2011
|
0.10
|
Drew in the Cockpit
|
|

  |
|
01-30-2011
|
0.50
|
Filed Front Edge of Left Canopy Skirt
|
Details
|

  |
|
01-30-2011
|
0.10
|
Completed Toolbox/Fixed Errors
|
Details
|


|
|
01-29-2011
|
0.10
|
Made Van's Practice Toolbox Kit
|
Details
|


|
|
01-25-2011
|
0.10
|
Received the Windshield Fairing
|
Details
|

  |
|
01-25-2011
|
1.00
|
Installed Last 4 Camlocs/Camlocs Complete!
|
Details
|


|
|
01-24-2011
|
1.50
|
Installed 5 More Grommets/Studs in Top Cowl
|
Details
|


|
|
01-23-2011
|
1.50
|
Primed Left Side Brace/Riveted Receptacles
|
Details
|


|
|
01-23-2011
|
0.10
|
Photos-Left Side of the Top Cowling
|
|


 |
|
01-22-2011
|
1.50
|
Sanded Top Cowl Edge/Drilled Left Side Brace
|
Details
|

  |
|
01-21-2011
|
0.50
|
Dropped Off Spinner for Polishing
|
Details
|
   |
|
01-16-2011
|
0.10
|
Readied Spinner for Metal Polishing
|
Details
|

 |
|
01-16-2011
|
1.00
|
Installed Last Three Grommets Along Aft Edge
|
Details
|

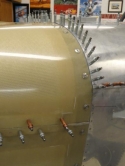
|
|
01-15-2011
|
0.10
|
Photo-Top Cowling with Grommets/Studs
|
|

  |
|
01-15-2011
|
2.50
|
Anti-lock Pins Removed/More Grommets Installed
|
Details
|


|
|
01-14-2011
|
2.00
|
Riveted Receptacles to Braces to Firewall
|
Details
|


|
|
01-14-2011
|
0.10
|
Photos-Aft Top Braces Riveted to Firewall
|
|


|
|
01-14-2011
|
0.10
|
Photos 2-Top Right Cowling With Camlocs
|
|
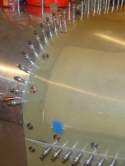

|
|
01-13-2011
|
2.00
|
Drilled Camloc Receptacle Holes in Aft Braces
|
Details
|

  |
|
01-12-2011
|
2.50
|
Dimpled Firewall Flange/C/S Camloc Braces
|
Details
|

 |
|
01-11-2011
|
0.10
|
Thick Part of Cowling/Reference Line Drawn
|
Details
|


|
|
01-11-2011
|
0.10
|
Installed Top Cowl Right Side Camlocs
|
Details
|


|
|
01-11-2011
|
3.50
|
Installed Camlocs in Right Side Brace
|
Details
|


|
|
01-10-2011
|
0.10
|
Photos-Brace Riveted/Cowling Fitted
|
|
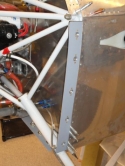
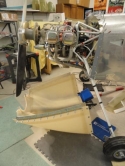

|
|
01-10-2011
|
0.10
|
Photos 2-Overall Look/Cowl Holes/Brace Drilled
|
|


|
|
01-10-2011
|
4.00
|
Installed Fastener Grommets and Studs
|
Details
|

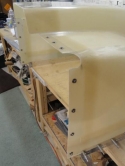
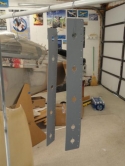
|
|
01-09-2011
|
0.10
|
Photos 4-Lower Cowling Fastened w/Camlocs
|
|


 |
|
01-09-2011
|
0.10
|
Photos 3-Installed Studs/Side Brackets to be Prime
|
|


 |
|
01-09-2011
|
0.10
|
Photos 2-Installing Camloc Stud Fasteners
|
|

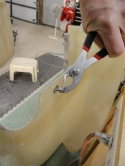

|
|
01-09-2011
|
0.10
|
Photo-Installed Fastener Grommets/Pliers Ground
|
Details
|


|
|
01-09-2011
|
1.50
|
Installed Camlocs on Bottom of Lower Cowling
|
Details
|


|
|
01-08-2011
|
6.50
|
Trimmed Front of Cowl to Close up Gaps
|
Details
|


|
|
01-08-2011
|
0.10
|
Photos-Right Bottom Camloc Bracket
|
Details
|


|
|
01-08-2011
|
5.00
|
Assisted with Trimming the Cowling
|
Details
|


|
|
01-08-2011
|
1.00
|
Assisted with Cowling Trimming/Photo-Camlocs
|
Details
|


|
|
01-07-2011
|
0.50
|
Trimmed Inside of Cowl Inlets
|
Details
|

  |
|
01-06-2011
|
2.00
|
Continued to Do Nothing but Look at Cowling
|
Details
|


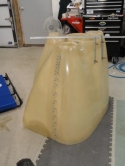
|
|
01-04-2011
|
0.30
|
Rec New Control Cable Bracket/Need Replacement
|
Details
|


 |
|
01-04-2011
|
1.80
|
Measured Cowling Inlets and Openings
|
Details
|


|
|
12-28-2010
|
2.00
|
Drilled Camloc Holes in Side Braces
|
Details
|

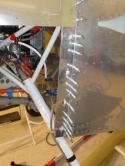
 |
|
12-21-2010
|
2.00
|
Removed Spacer/Drilled Camloc Holes-Bottom Brac
|
Details
|


 |
|
12-15-2010
|
0.10
|
Photos-Spacers Installed betw/Firewall and Brace
|
|


|
|
12-15-2010
|
0.10
|
Photos 2-Two Spacers in Place on Brace
|
|


|
|
12-15-2010
|
3.00
|
Made Spacers for Aft Right Cowling
|
Details
|


|
|
12-11-2010
|
3.00
|
Installed Spinner/Camloc Holes in Support Braces
|
Details
|


|
|
12-11-2010
|
1.00
|
Assisted with Taking Cowling On/Off
|
Details
|
   |
|
12-10-2010
|
0.10
|
Photos-Cowling Taped/Side Support Brace
|
|
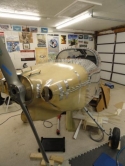

 |
|
12-10-2010
|
3.50
|
Drilled Top Cowl to Side Support Braces
|
Details
|


|
|
12-09-2010
|
0.10
|
Photos-Cowling Sides Pushed Out by Support Braces
|
|


 |
|
12-09-2010
|
1.00
|
Drilled Cowling Sides to Support Braces
|
Details
|
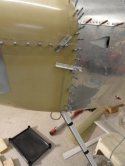


|
|
12-08-2010
|
1.50
|
Trimming Cowlings to Each Other and Fuselage
|
Details
|


|
|
12-08-2010
|
4.50
|
Tirmmed Sides of Cowls/Drilled Bottom to Brace
|
Details
|

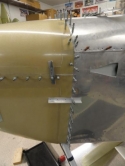

|
|
12-08-2010
|
0.10
|
Photo-Right Side of Cowlings
|
|

  |
|
12-07-2010
|
2.50
|
Worked on Side Supports because of Misfit of Top
|
Details
|


|
|
12-07-2010
|
0.10
|
Photos-Right Side of the Cowlings
|
|


|
|
12-07-2010
|
0.10
|
Photos 2-Bottom Cowl Marked for Trimming/Side Supp
|
|


|
|
12-03-2010
|
0.10
|
Photos-Trimmed Sides of Top Cowl
|
|


|
|
12-03-2010
|
0.10
|
Photos 2-Right Side of Top Cowling Trimmed
|
|

  |
|
12-03-2010
|
2.50
|
Drilled Top Cowling to Side Braces
|
Details
|


|
|
12-02-2010
|
0.10
|
Photos-Serial Numbers of Prop and Spinner Plate
|
Details
|


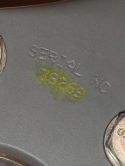
|
|
12-02-2010
|
0.10
|
Photos 2-Side Braces Drilled to Bottom Cowling
|
|


|
|
12-02-2010
|
5.50
|
Made Side Supports for Cowling
|
Details
|


|
|
12-02-2010
|
2.00
|
Assisted with Drilling Side Cowling Braces
|
Details
|


|
|
12-01-2010
|
0.10
|
Photos-Trimming the Bottom Cowling
|
|


|
|
12-01-2010
|
0.10
|
Photos 3-Sides Trimmed off Bottom Cowling
|
|


 |
|
12-01-2010
|
0.10
|
Photos 2-Initial Trimming of the Bottom Cowling
|
|


|
|
12-01-2010
|
2.50
|
Began Trimming Bottom Cowling
|
Details
|


|
|
11-28-2010
|
5.50
|
Set Height of Top Cowl to Spinner/Trimmed Cowl
|
Details
|


|
|
11-28-2010
|
2.00
|
Made Cardboard Template for Gear Leg Cutouts
|
Details
|


 |
|
11-27-2010
|
0.10
|
Photos-Marking Top Cowling for Trimming
|
|
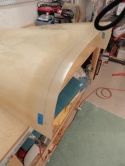
|
|
11-27-2010
|
0.10
|
Photos 5-Right Side of Cowling
|
|
  |
|
11-27-2010
|
0.10
|
Photos 4-Top Cowling
|
|
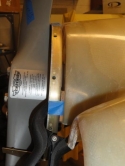

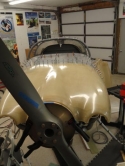
|
|
11-27-2010
|
0.10
|
Photos 3-Trimming the Top Cowl
|
|

|
|
11-27-2010
|
0.10
|
Photos 2-Trimming the Top Cowling
|
|


|
|
11-27-2010
|
3.00
|
Installed Prop/Trimmed Some of Top Cowling
|
Details
|


|
|
11-26-2010
|
2.00
|
Marked Top Cowling for Trimming
|
Details
|
   |
|
11-26-2010
|
1.00
|
Laid out Reinforcements for Air Filter
|
Details
|

  |
|
11-24-2010
|
3.00
|
Shipped Cowling/Heat Shield/Started on Cowling
|
Details
|


|
|
11-24-2010
|
0.10
|
Photos-Top Cowling on the Engine
|
|

 |
|
11-24-2010
|
0.10
|
Photos-Drain Plug, Carb Airbox, Cowling
|
|


|
|
11-23-2010
|
6.00
|
Scalloped Cowling Braces/Drilled to Firewall
|
Details
|


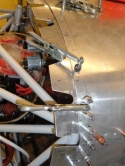
|
|
11-23-2010
|
0.10
|
Photos-Top Cowling Braces Clecoed in Place
|
|


 |
|
11-23-2010
|
2.00
|
Laid out Cowling Braces for Scalloping
|
Details
|


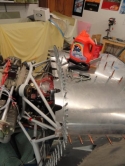
|
|
11-22-2010
|
4.00
|
Finished Drilling Firewall Flange/Trimmed Top Skin
|
Details
|


 |
|
11-17-2010
|
3.00
|
Riveted Instrument Panel Brackets/Firewall Holes
|
Details
|
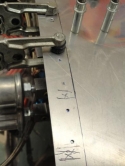


|
|
11-16-2010
|
4.00
|
Cleaned up Bench/Primer Plugs/Drilled Top Skin
|
Details
|


|
|
11-15-2010
|
0.10
|
Photos-PlanePower Alt Installed/Carb Heat Muff
|
|


|
|
11-15-2010
|
0.10
|
Photos 2-PlanePower Alternator/Primer Plugs
|
|
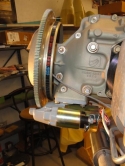
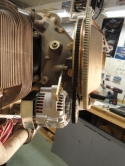

|
|
11-15-2010
|
4.00
|
Installed PlanePower Alternator
|
Details
|
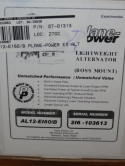


|
|
11-10-2010
|
0.10
|
Photos-Canopy Back on the Fuselage
|
|


|
|
11-10-2010
|
1.50
|
Clecoed Canopy Parts Together
|
Details
|


|
|
11-09-2010
|
4.50
|
Repainted Canopy Rail Supports
|
Details
|


|
|
11-09-2010
|
2.00
|
Changed Dehydrator Plugs/Removed Alternator
|
Details
|


 |
|
11-09-2010
|
2.50
|
Assisted with Installing Canopy Roll Bar/Side Rail
|
Details
|


|
|
11-08-2010
|
0.10
|
Photos-Koger Shade Installed/Tip-up Mod
|
|


|
|
11-08-2010
|
0.10
|
Photos 3-Side Skirts Riveted to Frame
|
|


 |
|
11-08-2010
|
0.10
|
Photos 2-Tip-Up Mod/Side Skirts
|
|


|
|
11-08-2010
|
0.50
|
Installed Cap over Oil Fitting
|
Details
|

  |
|
11-08-2010
|
4.00
|
Installed Canopy Handles/Assembled Canopy Rollers
|
Details
|


|
|
11-07-2010
|
0.20
|
Picked up Painted Canopy Pieces
|
Details
|

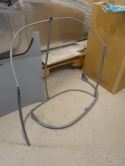
 |
|
11-07-2010
|
5.00
|
Painted the Canopy and Tip-up Mod Pieces
|
Details
|
   |
|
11-03-2010
|
0.10
|
Photo-Forward Top Skin Ready for Drilling
|
|

  |
|
11-03-2010
|
1.50
|
Installed Throttle/Mixture Cables Bracket
|
Details
|


|
|
11-02-2010
|
5.00
|
Installed Alternator Bracket/Marked Top Skin
|
Details
|

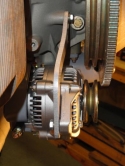

|
|
11-02-2010
|
1.50
|
Drilled Top Skin Center to #30/Throttle/Mixture Ca
|
Details
|


|
|
11-01-2010
|
3.00
|
Torqued Engine Mount Bolts/Bent Fuel Line Tubing
|
Details
|


|
|
11-01-2010
|
5.50
|
Starter Cable/Fuel Lines Firewall Forward Complete
|
Details
|


|
|
11-01-2010
|
0.10
|
Photos-Fuel Line/Starter Cable
|
|


|
|
11-01-2010
|
0.10
|
Photos 2-Fuel Line Tube and Hose
|
|


 |
|
10-31-2010
|
0.10
|
Photo-Fuel Line Hose and Ground Cable Clamped
|
|

  |
|
10-31-2010
|
1.50
|
Ground Cable/Fuel Lines
|
Details
|


|
|
10-26-2010
|
0.10
|
Photos-Exhaust Hangers Moved/Fuel Line
|
|


|
|
10-26-2010
|
6.00
|
Oil Line Routing/Fuel Line Firewall to Gascolator
|
Details
|


|
|
10-25-2010
|
0.50
|
Starter Cable Routing
|
Details
|
   |
|
10-25-2010
|
0.10
|
Removed Primer Lines
|
Details
|


|
|
10-25-2010
|
0.10
|
Photos-Fuel Lines, Primer Plugs
|
|


|
|
10-25-2010
|
0.10
|
Photos 2-Primer Hole/Fuel Line
|
|


|
|
10-25-2010
|
4.00
|
Fuel Pump Fitting Repl/Call to Vetterman
|
Details
|


|
|
10-24-2010
|
3.00
|
Taped/Clamped Brake Lines to Legs/Eng Mount
|
Details
|


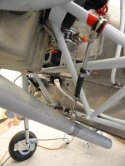
|
|
10-24-2010
|
0.10
|
Photos-Brake Line Taped/Clamped
|
|


|
|
10-24-2010
|
0.10
|
Photos 2-Cabin Heat Muff
|
|


 |
|
10-23-2010
|
1.00
|
Began Cabin Heat Muff Installation
|
Details
|


 |
|
10-17-2010
|
1.00
|
Heat Muffler Needs to be Installed/Visitors
|
Details
|
   |
|
10-16-2010
|
0.10
|
Photos-Right Exhaust Hanger/Center Hangers
|
|


 |
|
10-16-2010
|
3.00
|
Installing the Exhaust Hangers
|
Details
|
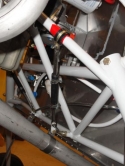


|
|
10-15-2010
|
0.10
|
Photos-Exhaust System Installation
|
|


|
|
10-15-2010
|
0.10
|
Photos 2-Exhaust Installation
|
|


|
|
10-15-2010
|
5.00
|
Installed Vetterman Exhaust
|
Details
|

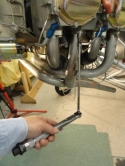

|
|
10-14-2010
|
0.10
|
Photos-Fuel Line and Exhaust System
|
|


|
|
10-14-2010
|
3.50
|
Made New Fuel Line betw/Electric Pump and Fitting
|
Details
|


|
|
10-13-2010
|
2.00
|
Sand Bags, Exhaust Port, and Modified Wrench
|
Details
|


|
|
10-13-2010
|
5.00
|
Hung the Engine!
|
Details
|


|
|
10-13-2010
|
4.00
|
Hanging the Engine
|
Details
|

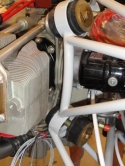

|
|
10-13-2010
|
2.00
|
Drilled Right Axle/Installed Bonaco Brake Hoses
|
Details
|


|
|
10-12-2010
|
1.50
|
Patched Original Gascolator Hole in Firewall
|
Details
|

  |
|
10-12-2010
|
4.00
|
Drilled Hole in Firewall for Fuel Line Fitting
|
Details
|

  |
|
10-11-2010
|
0.10
|
Photos-Repacked Wheel Bearings
|
|


|
|
10-11-2010
|
0.10
|
Photos 2-Tools Used to Drill Hole in Axle
|
Details
|

  |
|
10-11-2010
|
8.50
|
Cleaned and Repacked Wheel Bearings
|
Details
|

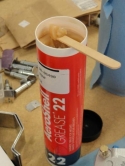

|
|
10-10-2010
|
1.50
|
Cleaned Wheel Bearings/Shop Visitors
|
Details
|


 |
|
10-09-2010
|
0.10
|
Shop Visitors-Walt and Blanca Spencer
|
Details
|


 |
|
10-08-2010
|
0.10
|
Dropped off Compass Bracket for Painting
|
Details
|
   |
|
10-07-2010
|
0.80
|
Tightened Gear Bolts/Received SIRS Compass
|
Details
|


 |
|
10-06-2010
|
4.00
|
Retrimmed Skin around Gear Legs
|
Details
|


 |
|
10-06-2010
|
0.50
|
Assisted with Retrimming Fuselage Skin by Gear Leg
|
Details
|


 |
|
10-05-2010
|
0.10
|
Photos-Wheel Bearing/Wheel Fairing Mount
|
|


|
|
10-05-2010
|
2.50
|
Axle Spacers/Installed Left Brake Mounting Flanges
|
Details
|


|
|
10-04-2010
|
1.00
|
Made up Axle Nuts and Avery Jack Kit
|
Details
|


 |
|
10-04-2010
|
2.00
|
Dried Dessicant Plugs/Torqued Gear Leg Bolts
|
Details
|


|
|
10-03-2010
|
3.50
|
Modify the Gascolator and Fuel Line Routing
|
Details
|

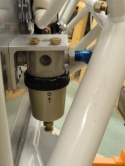

|
|
10-03-2010
|
0.10
|
Installed Oil Pressure Fitting on Engine
|
Details
|


 |
|
10-03-2010
|
0.50
|
Cleaned up Edges of U-810 Wheel Fairing Mount
|
Details
|

  |
|
09-26-2010
|
1.50
|
Riveted Skin to Fuselage/Canopy Pieces to Walt
|
Details
|


 |
|
09-26-2010
|
0.50
|
Poor Clearance for Gascolator/Reversed Brake Nippl
|
Details
|


 |
|
09-25-2010
|
5.00
|
Removed Side Rails and Roll Bar for Painting
|
Details
|


|
|
09-25-2010
|
1.50
|
Removed False Wood Spar
|
Details
|


 |
|
09-25-2010
|
0.10
|
Photos-Canopy Parts Removed to be Painted
|
|


 |
|
09-25-2010
|
1.50
|
Assisted Gary with Removing the False Spar
|
Details
|
   |
|
09-24-2010
|
6.00
|
Torqued Engine Mount Bolts/Installed Gear Legs
|
Details
|
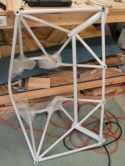


|
|
09-24-2010
|
2.00
|
Removed/Disassembled Canopy for Painting
|
Details
|
   |
|
09-24-2010
|
0.10
|
Photos-Sitting in the Cockpit with Wheels!
|
|

|
|
09-24-2010
|
0.10
|
Photos-Gary and Joe Walker in the Cockpit
|
|


|
|
09-24-2010
|
1.00
|
Looked for Replacement Engine Mount Bolts/Washers
|
Details
|
   |
|
09-24-2010
|
2.00
|
Helped Install Landing Gear Legs
|
Details
|

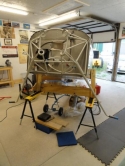

|
|
09-24-2010
|
0.50
|
Drilled Replacement Engine Mount Bolts
|
Details
|
   |
|
09-23-2010
|
2.50
|
Trimmed Firewall Corners/Install Engine Mount
|
Details
|


|
|
09-23-2010
|
0.10
|
Photo-Battery Box/Skin Trimmed for Gear Legs
|
|


|
|
09-22-2010
|
0.50
|
Windshield Holes/Firewall Recess
|
Details
|
 

|
|
09-22-2010
|
1.00
|
Removed Empennage Pieces/Firewall Recess
|
Details
|


|
|
09-22-2010
|
0.50
|
Reassembled Wheels/Gear Legs Unwrapped
|
Details
|


 |
|
09-22-2010
|
5.00
|
Firewall Recess, Skin Trimming for Gear Leg
|
Details
|

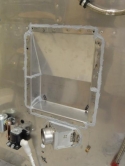

|
|
09-22-2010
|
2.00
|
Empennage Removal/Firewall Recess
|
Details
|

 |
|
09-21-2010
|
3.00
|
Drilled Roll Bar Holes for #8 Screws
|
Details
|
  |
|
09-18-2010
|
0.10
|
Photos-Canopy Lock and Slots
|
|


|
|
09-18-2010
|
0.10
|
Photos 3-Canopy Lock
|
|


 |
|
09-18-2010
|
0.10
|
Photos 2-Canopy Lock and Slots
|
|


|
|
09-18-2010
|
4.50
|
Completed Lock/Made Slots in Rail
|
Details
|


|
|
09-17-2010
|
0.10
|
Photo-Canopy Lock Construction
|
|


|
|
09-17-2010
|
4.00
|
Finished Assist Handles/Canopy Lock
|
Details
|


|
|
09-17-2010
|
0.10
|
Canopy Lock
|
|


|
|
09-10-2010
|
1.50
|
Upsized Holes for the Canopy Assist Handles
|
Details
|
   |
|
09-09-2010
|
4.50
|
Riveted Roller Weldments/Made Tip-up Slots
|
Details
|


|
|
09-09-2010
|
0.10
|
Photos-Slots made for the Tip-up Stops
|
|


 |
|
09-09-2010
|
0.10
|
Drilled Pilot Holes for Canopy Assist Handles
|
Details
|


 |
|
09-08-2010
|
2.00
|
Prepared Canopy Roller Weldments for Riveting
|
Details
|


|
|
09-08-2010
|
0.50
|
Finished Assembling Wheels
|
Details
|

  |
|
09-04-2010
|
0.30
|
Wiped ArmorAll on Inside of Canopy Rails
|
Details
|

  |
|
09-04-2010
|
2.70
|
Took Wheels Apart and Started to Assemble
|
Details
|


 |
|
09-03-2010
|
6.00
|
Trimmed Sides of Windshield/Drilled to Roll Bar
|
Details
|


|
|
09-03-2010
|
0.10
|
Photos-Drilled the Windshield to the Roll Bar
|
|


|
|
09-03-2010
|
0.10
|
Photos 2-Drilled the Windshield to the Roll Bar
|
|

|
|
09-03-2010
|
0.10
|
Photo 3-Drilled the Windshield to the Roll Bar
|
|

  |
|
09-03-2010
|
1.00
|
Assisted with Trimming Windshield Sides
|
Details
|


|
|
09-02-2010
|
3.00
|
Filed Top Center Aft Edges of Windshield
|
Details
|


|
|
09-02-2010
|
1.00
|
Assisted with Aligning Windshield and Trimming
|
Details
|


|
|
09-01-2010
|
4.50
|
Sanded Windshield Edge/Roller Weldment
|
Details
|


|
|
09-01-2010
|
0.10
|
Photo-Canopy Assist Handle
|
|

  |
|
08-26-2010
|
0.10
|
Photos-Mod Support Rod/Tip-Up Canopy
|
|


|
|
08-26-2010
|
0.10
|
Photos 2-Tip-up Support Arm/Canopy Tipped Up
|
|


 |
|
08-26-2010
|
5.00
|
Countersunk Side Rails/Frame Drilled to Weldments
|
Details
|


|
|
08-25-2010
|
0.10
|
Photos-Canopy Handles/Screw in Canopy
|
|


|
|
08-25-2010
|
3.00
|
Drilled Canopy Support Bracket to Frame
|
Details
|


|
|
08-24-2010
|
1.50
|
Drilled Tip-Up Support Bracket to Frame
|
Details
|


 |
|
08-19-2010
|
1.00
|
Installed Canopy Support Bracket
|
Details
|


|
|
08-18-2010
|
0.30
|
Reversed Screws in Canopy Rollers
|
Details
|


 |
|
08-18-2010
|
2.00
|
Made Tip-Up Support Strut/Bracket
|
Details
|


|
|
08-17-2010
|
0.10
|
Photos-Canopy Latch-Inside and Exterior
|
|


 |
|
08-17-2010
|
2.50
|
Drilled/Tapped Canopy Latch/Cut Inside Latch
|
Details
|


|
|
08-11-2010
|
2.00
|
Finished Koger Sunshade/Tapped Canopy Latch
|
Details
|


|
|
08-10-2010
|
2.00
|
Installed Koger Sunshade/Cleaned Roller Tracks
|
Details
|


|
|
08-09-2010
|
0.10
|
Ship Zaon MRX back for Repair
|
Details
|
   |
|
08-08-2010
|
0.10
|
Shop Visitors-Jerry Wang and Friends
|
Details
|
   |
|
08-01-2010
|
0.10
|
Shop Visitors-Craig Winglovitz, Brian
|
Details
|
   |
|
07-20-2010
|
2.50
|
Canopy
|
|
   |
|
07-19-2010
|
2.00
|
Canopy
|
Details
|
   |
|
07-18-2010
|
2.50
|
Trimmed Canopy Skirts
|
Details
|
   |
|
07-10-2010
|
1.50
|
Work on Canopy Skirts
|
Details
|
   |
|
07-09-2010
|
6.00
|
Call to Van's/Work on Canopy Screw Holes
|
Details
|
   |
|
07-08-2010
|
4.00
|
Drilled Left Canopy Skirt thru Canopy/Inside Skirt
|
Details
|
   |
|
07-07-2010
|
4.00
|
Dried out Dessicant Plugs/Installed New Canopy Rol
|
Details
|
   |
|
07-06-2010
|
2.00
|
Drilled the Left Canopy Skirt in Place
|
Details
|
   |
|
07-01-2010
|
0.10
|
Photos-Right Canopy Skirt Drilled in Place
|
|


|
|
07-01-2010
|
0.10
|
Photos 2-Notched Inside Skirt Braces/Add'l Hole in
|
|


|
|
07-01-2010
|
4.50
|
More Drilling thru the Canopy and Frame
|
Details
|


|
|
06-30-2010
|
3.50
|
Drilled Pilot Holes in C-791 Canopy Skirt Brace
|
Details
|


|
|
06-29-2010
|
0.10
|
Photos-Drilled Right Canopy Skirt to Bow
|
|


|
|
06-29-2010
|
3.50
|
Drilled Inside Canopy Skirts
|
Details
|


|
|
06-28-2010
|
3.00
|
Drilled Left Side Skirt
|
Details
|


|
|
06-23-2010
|
4.50
|
Trimmed Front Canopy Bow
|
Details
|


|
|
06-23-2010
|
3.00
|
Made Canopy Clips for Windscreen/Photos-Canopy
|
Details
|

|
|
06-22-2010
|
2.50
|
Drilled Left Side Skirt/Shortened Tube/C'sunk Hole
|
Details
|


|
|
06-21-2010
|
3.00
|
Worked on C-759 Side Skirts
|
Details
|


 |
|
06-21-2010
|
4.50
|
Drilled Canopy Latch Hole/Trimmed Latch Tube
|
Details
|


|
|
06-18-2010
|
0.10
|
Photos-Center Cover Strip Drilled to Canopy
|
|


|
|
06-18-2010
|
3.00
|
Drilled Canopy Cover Strip/Deburred Holes
|
Details
|


|
|
06-17-2010
|
0.10
|
Photos-Finished drilling the canopy to the frame
|
|


|
|
06-17-2010
|
0.10
|
Photos 3-Drilled Holes in the Canopy Frame
|
|


 |
|
06-17-2010
|
0.10
|
Photos 2-Tip-up Position/Trim Sides
|
|


|
|
06-17-2010
|
3.50
|
Finished Drilling Canopy to Canopy Bows
|
Details
|


|
|
06-16-2010
|
0.10
|
Photos-Drilling the Canopy to the Frame
|
|


|
|
06-16-2010
|
0.10
|
Photos 3-Drilling the Canopy to the Frame
|
|


|
|
06-16-2010
|
0.10
|
Photos 2-Drilling the Canopy to the Frame
|
|


|
|
06-16-2010
|
6.00
|
Drilled Canopy and Frame for Riveting
|
Details
|


|
|
06-11-2010
|
1.00
|
Marked Leading Edge of Canopy for Holes
|
Details
|

  |
|
06-10-2010
|
3.00
|
Polished Sides/Checked Side Skirts on Canopy
|
Details
|


|
|
06-09-2010
|
4.50
|
Polished the Big Cut/Trimmed More off Sides
|
Details
|


|
|
06-09-2010
|
0.10
|
Photos-Canopy Trimming
|
|


|
|
06-09-2010
|
0.10
|
Photos 2-More Canopy Trimming
|
|


|
|
06-03-2010
|
0.10
|
Photos-After the Big Cut
|
|


|
|
06-03-2010
|
2.50
|
Made the Big Cut!
|
Details
|


|
|
06-03-2010
|
0.30
|
Assisted with the Big Cut
|
Details
|


|
|
06-02-2010
|
4.00
|
Trimmed More Material off the Front Canopy
|
Details
|


 |
|
06-02-2010
|
2.00
|
Practiced Drilling with Plexiglass Bits
|
Details
|
   |
|
06-01-2010
|
6.00
|
Trimmed More Material off the Front
|
Details
|


|
|
06-01-2010
|
0.10
|
Photos-Trimmed More Material off the Front
|
|


|
|
06-01-2010
|
0.10
|
Photos 3-Sanding out a crack in an Edge
|
Details
|


|
|
06-01-2010
|
0.10
|
Photos 2-Me Trimming
|
|


|
|
05-31-2010
|
1.00
|
Sanded Edges and Checked Heights of Canopy
|
Details
|


|
|
05-31-2010
|
0.10
|
Photos-Canopy Trimming
|
|


|
|
05-31-2010
|
0.10
|
Photos 2-Canopy Trimming
|
|

  |
|
05-28-2010
|
0.10
|
Photos-Canopy Trimming
|
|


|
|
05-28-2010
|
0.10
|
Photos 5-Canopy Trimming
|
|


 |
|
05-28-2010
|
0.10
|
Photos 4-Canopy Trimming and Sandpaper
|
|


|
|
05-28-2010
|
0.10
|
Photos 3-Canopy Trimming
|
|


|
|
05-28-2010
|
0.10
|
Photos 2-Canopy Trimming
|
|


|
|
05-28-2010
|
3.50
|
Canopy Trimming
|
Details
|


|
|
05-27-2010
|
4.50
|
Made First Cuts of Perimeter of Canopy
|
Details
|


|
|
05-26-2010
|
5.00
|
Started Work on Canopy/1st Trimming of Canopy
|
Details
|


|
|
05-26-2010
|
1.00
|
Helped Find Centerline of Canopy
|
Details
|


|
|
05-25-2010
|
0.70
|
Picked Up Canopy from Dad's
|
Details
|
   |
|
05-25-2010
|
0.10
|
Photos-Modified Aft Canopy Rail
|
|


|
|
05-25-2010
|
0.10
|
Photos 3-Aft Rail and Frame
|
|


|
|
05-25-2010
|
0.10
|
Photos 2-Canopy Frame in the Tip-Up Mod
|
|


|
|
05-25-2010
|
5.00
|
Drilled Canopy Weldments/Trimmed Aft Rail
|
Details
|


|
|
05-19-2010
|
0.10
|
Photos-Right Canopy Weldment
|
|


 |
|
05-19-2010
|
4.00
|
Modified Canopy Frame for Meske Tip-Up Mod
|
Details
|


|
|
05-19-2010
|
3.00
|
Assisted with the Canopy Frame Mods
|
Details
|


|
|
05-18-2010
|
3.00
|
Tip-up Mod Components Install/Drilled Anchor Block
|
Details
|


|
|
05-18-2010
|
2.00
|
Measured Canopy Latch Tube for Cutting/Photos
|
Details
|


|
|
05-17-2010
|
2.00
|
Reinstalled SL-30 & EMS-120
|
Details
|
   |
|
04-20-2010
|
2.50
|
Positioned and Drilled the Rear Anchor Blocks
|
Details
|


|
|
04-18-2010
|
2.50
|
Checked Cracked Paint in Aft Corners of Frame
|
Details
|


|
|
04-17-2010
|
0.10
|
Photos-Canopy Frame Bending
|
|


|
|
04-17-2010
|
0.10
|
Photos 3-Checking Canopy Frame Positioning
|
|


|
|
04-17-2010
|
0.10
|
Photos 2-Checking Canopy Frame Positioning
|
|

|
|
04-17-2010
|
5.00
|
Finished Bending the Canopy Frame
|
Details
|


|
|
04-17-2010
|
4.00
|
Assisted Gary with Bending the Canopy Frame
|
Details
|


|
|
04-16-2010
|
6.00
|
Bent Canopy Bows
|
Details
|

|
|
04-16-2010
|
2.50
|
Assisted Gary with Bending Left Canopy Bow
|
Details
|


|
|
04-13-2010
|
2.50
|
Bent Canopy Side Bows
|
Details
|
   |
|
04-13-2010
|
1.50
|
Bent Canopy Side Bows
|
Details
|
   |
|
04-07-2010
|
2.50
|
Bent Canopy Bow
|
Details
|


|
|
04-02-2010
|
1.50
|
Worked on Bending Canopy Frame
|
Details
|

  |
|
04-02-2010
|
4.00
|
Caulked Firewall Recess/Rt Stick Grip/Canopy Bow
|
Details
|

  |
|
04-01-2010
|
3.00
|
Installed the Rod for the Canopy Rail
|
Details
|


|
|
04-01-2010
|
1.00
|
Installed LEMO Headset Jacks
|
Details
|

|
|
04-01-2010
|
0.50
|
Disconnected Keep Alive Wire in Dynon EMS D-120
|
Details
|


 |
|
03-31-2010
|
0.10
|
Photos-Gary Drilling Canopy Rail
|
|


 |
|
03-31-2010
|
4.00
|
Installed Canopy Rail
|
Details
|


 |
|
03-30-2010
|
0.10
|
Photos-Canopy Bow Bending
|
|

|
|
03-30-2010
|
3.00
|
Attempted to Bend Canopy Bows
|
Details
|
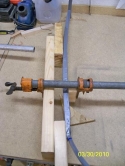


|
|
03-23-2010
|
0.10
|
Photo-Canopy Bow
|
|
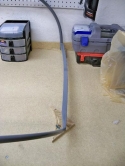
  |
|
03-23-2010
|
2.50
|
Canopy Bow Bending
|
Details
|


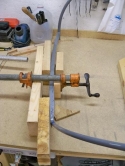
|
|
03-22-2010
|
2.00
|
Made Relief Cuts on Canopy Rail Braces
|
Details
|

  |
|
03-19-2010
|
3.50
|
Positioned Canopy Braces
|
Details
|


|
|
03-19-2010
|
0.10
|
Photos-Canopy Side Braces and Fuselage
|
|
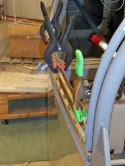
 |
|
03-18-2010
|
2.00
|
Smoke System Switches
|
Details
|


|
|
03-18-2010
|
0.10
|
Installed the Canopy Center Support Bracket
|
Details
|

  |
|
03-18-2010
|
2.00
|
Installed Canopy Tracks/Canopy Frame Fit
|
Details
|


|
|
03-17-2010
|
0.10
|
Photos-Canopy Tracks
|
|


|
|
03-17-2010
|
4.50
|
Made Nutplate Doubler Strips/Primed Pieces
|
Details
|


|
|
03-16-2010
|
2.00
|
Visitors-Labeled Wires and Cleaned up Fuselage
|
Details
|


 |
|
03-16-2010
|
1.00
|
Cut Doubler Strips for Canopy Tracks
|
Details
|

  |
|
03-09-2010
|
0.10
|
Photos-Canopy Frame and Track Spacers
|
|


|
|
03-09-2010
|
5.00
|
Drilled Canopy Rails to the Deck
|
Details
|


|
|
03-09-2010
|
3.00
|
Assisted Gary with Drilling Canopy Rails
|
Details
|


|
|
03-08-2010
|
0.10
|
Photos-Canopy Rollers in the Rails
|
|


 |
|
03-08-2010
|
0.10
|
Made 1/16" Guide for Canopy Frame Offset
|
Details
|


|
|
03-08-2010
|
3.50
|
Ground Down Canopy Rollers
|
Details
|


|
|
03-07-2010
|
3.50
|
Installed Elevator Bellcrank Hardware
|
Details
|


|
|
03-07-2010
|
1.00
|
Canopy Rollers/Clear Heat-Shrink over Labels
|
Details
|

  |
|
03-06-2010
|
6.50
|
Wire Labels/Drilled out Rivets in Top Skin
|
Details
|


 |
|
03-06-2010
|
3.50
|
Reviewed/Corrected Flap Wire Runs
|
Details
|


|
|
03-05-2010
|
7.00
|
Riveted Aft Forward Top Skin to Fuselage
|
Details
|


|
|
03-05-2010
|
0.10
|
Photos-Riveting the Aft Top Skin
|
|


|
|
03-05-2010
|
0.10
|
Photos 2-Riveting the Aft Top Skin
|
Details
|


 |
|
03-05-2010
|
3.50
|
Assisted with Riveting the Top Skin
|
Details
|


|
|
03-04-2010
|
3.00
|
Made Spacers
|
Details
|


 |
|
03-03-2010
|
2.50
|
Positioned Smoke System Remote Switch on Panel
|
Details
|


|
|
03-03-2010
|
0.10
|
Photos-Smoke System Switch/Top Skin
|
|


|
|
03-03-2010
|
0.10
|
Clecoed Aft Top Skin in Place
|
Details
|


|
|
03-02-2010
|
2.00
|
Started Labeling Wires
|
Details
|


|
|
03-01-2010
|
0.10
|
Photos-Transponder BNC/P-1 Connector
|
|


|
|
03-01-2010
|
0.10
|
Photos 3-FPS Wires, Transponder
|
|


|
|
03-01-2010
|
0.10
|
Photos 2-Flap Wires and Transponder Coax
|
|


|
|
03-01-2010
|
5.50
|
Organized Flap Wires/P1 Connector Reseated
|
Details
|


|
|
02-25-2010
|
0.10
|
Photos-Flap System and AOA Switch Wiring
|
|

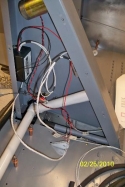

|
|
02-25-2010
|
0.10
|
Photos 3-Position the Smoke System Remote Switch
|
|


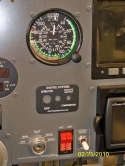
|
|
02-25-2010
|
0.10
|
Photos 2-Flap System and AOA Switch Wiring
|
|


 |
|
02-25-2010
|
5.00
|
Flap System and AOA Switch Wiring
|
Details
|


|
|
02-24-2010
|
0.10
|
Photos-Flap and AOA Wiring
|
|
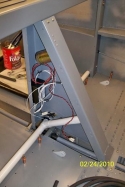

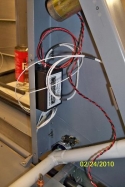
|
|
02-24-2010
|
0.10
|
Photos 2-FPS and AOA Wiring
|
|
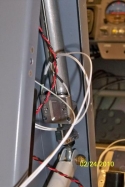
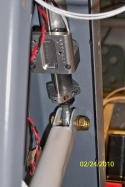
 |
|
02-24-2010
|
4.50
|
Flap and AOA Wiring
|
Details
|


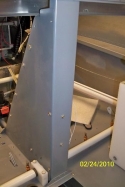
|
|
02-23-2010
|
0.30
|
Rotation of Static Tube T-connector
|
Details
|


|
|
02-23-2010
|
5.00
|
Chg Smoke Reservoir Orientation/Chg Static Tube
|
Details
|


|
|
02-22-2010
|
3.00
|
Pinned Pitch Servo Wires/Changed Smoke Reservoir
|
Details
|


|
|
02-22-2010
|
0.10
|
Photos-Pitch Servo & MB Wiring/Blue Tubes
|
|


|
|
02-17-2010
|
6.00
|
Wiring/Static Tube Clip
|
Details
|


|
|
02-17-2010
|
3.00
|
Strobe Power Supply/EDC-10A Wiring/Smoke Sys Tubin
|
Details
|


|
|
02-17-2010
|
0.10
|
Photo-Strobe Power Supply/ELT Wiring
|
|

  |
|
02-16-2010
|
2.00
|
Visitor-MB Wiring/BNC Connector-EDC 10A Wiring
|
Details
|


|
|
02-16-2010
|
0.30
|
Smoke System Tubing Routing-Photos-MB Wire
|
Details
|


|
|
02-15-2010
|
3.00
|
Nutplates for Wiring Tubes
|
Details
|


 |
|
02-03-2010
|
3.00
|
Replaced Smoke System Filter/Cowl Attach Strips
|
Details
|


|
|
02-03-2010
|
0.10
|
Photo-Instrument Top Skin Clecoed
|
|

  |
|
02-02-2010
|
0.50
|
Made New Bottom Cowl Attach Strip
|
Details
|

  |
|
01-30-2010
|
7.00
|
Attended SportAir Workshop-Test Flying Homebuilts
|
Details
|


|
|
01-27-2010
|
0.10
|
Ran Wires for the Pitch Servo/Strobe Power Supply
|
Details
|


 |
|
01-27-2010
|
3.50
|
Ran Wire for Strobes/Pinned Magnetometer
|
Details
|


|
|
01-27-2010
|
6.00
|
Drilled Cowl Attach Strips to the Fuselage/Firewal
|
Details
|
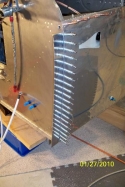

|
|
01-26-2010
|
0.10
|
Suggested Rotating Smoke Tank/Photos-Cabin Heat
|
Details
|


|
|
01-26-2010
|
2.50
|
Made Bolt Stand for Adel Clamp/Cabin Heat Control
|
Details
|


|
|
01-20-2010
|
0.10
|
Photos-More Firewall Work
|
|


|
|
01-20-2010
|
2.50
|
Firewall Work-Nutplates
|
Details
|


|
|
01-19-2010
|
2.50
|
Drilled Hole in Firewall for Relay Wires
|
Details
|

  |
|
01-18-2010
|
4.50
|
Riveted Nutplates to Firewall/Met with Steve V.
|
Details
|

 |
|
01-18-2010
|
1.00
|
First Visit to my Project
|
Details
|
   |
|
01-13-2010
|
5.00
|
Ordered BNC Connectors/Cut .063" Pieces for Camloc
|
Details
|


|
|
01-11-2010
|
0.50
|
Met Steve Vilimonovic--Sherwin-Williams
|
Details
|
   |
|
01-10-2010
|
1.00
|
Calibrated Coax Wire stripper
|
Details
|
   |
|
01-09-2010
|
3.50
|
Powered up Panel/OAT Wiring
|
Details
|


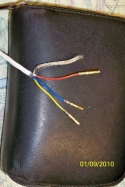
|
|
01-08-2010
|
0.10
|
Photo-Control Cable Bracket
|
|

  |
|
01-08-2010
|
2.50
|
Add Static Line Bushings/Riveted Cable Bracket
|
Details
|


|
|
01-07-2010
|
2.50
|
Primed Control Cable Bracket/Added Nutplates
|
Details
|

  |
|
01-07-2010
|
0.10
|
Cowling Inlet Covers
|
Details
|


 |
|
01-06-2010
|
5.50
|
Tech Counselor Visit/Control Cable Bracket
|
Details
|

  |
|
12-30-2009
|
1.00
|
Made Fuel Line Tube-Pump to Gascolator
|
Details
|

  |
|
12-18-2009
|
0.10
|
Photos-MB Antenna
|
|


 |
|
12-18-2009
|
0.10
|
Photos-Control Cable Bracket
|
|


 |
|
12-18-2009
|
0.10
|
Photos-Air Vents/Snap Bushings for Carb Heat Cable
|
|


|
|
12-18-2009
|
2.00
|
Lt. Dimmer Connectors/Air Vents/MB Antenna
|
Details
|


|
|
12-17-2009
|
3.00
|
Riveted Gascolator Bracket/Springs on GPS Wiring
|
Details
|


|
|
12-17-2009
|
0.10
|
Photo-Springs around GPS and Fuel Guard Wires
|
|

  |
|
12-16-2009
|
0.10
|
Photo-Throttle/Carb Heat Cables' Holes Drilled
|
|

  |
|
12-16-2009
|
4.00
|
Control Cable Bracket/Air Vents/Firewall
|
Details
|


|
|
12-15-2009
|
0.50
|
ELT Wiring
|
Details
|


 |
|
12-15-2009
|
2.00
|
Cap Screws in Instrument Panel
|
Details
|
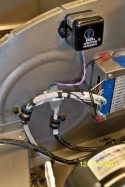


|
|
12-10-2009
|
0.10
|
Photos-Adel Clamps/ELT Antenna Routing
|
|

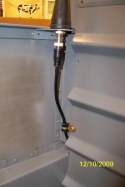

|
|
12-10-2009
|
3.00
|
Installed Modified T/W Steering Arm/Adel Clamps
|
Details
|


|
|
12-09-2009
|
6.00
|
Center Cabin Cover Work/Cabin Heat Cable
|
Details
|


|
|
12-09-2009
|
3.00
|
Cabin Heat Cable/Center Cabin Cover/ELT Antenna
|
Details
|

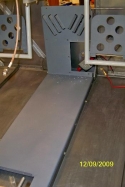

|
|
12-08-2009
|
4.00
|
Worked on Center Cabin Cover
|
Details
|

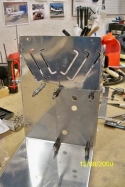
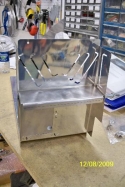
|
|
12-08-2009
|
0.10
|
Photos-Center Cabin Covers Diffusers Bent
|
|


|
|
12-07-2009
|
0.10
|
Photos-Wiring/ELT Wiring/Center Cabin Cover
|
|

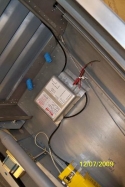

|
|
12-07-2009
|
2.00
|
Looked over Instrument Panel/ELT
|
Details
|
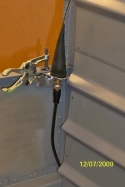

 |
|
12-07-2009
|
7.00
|
Inserted Tailwheel/Center Cabin Cover/ELT Antenna
|
Details
|


|
|
12-06-2009
|
0.10
|
Photos-Painted Canopy Parts/Static Tee
|
|


|
|
12-06-2009
|
0.10
|
Photos 2-Cooling Fan Wires Clamped
|
|


 |
|
12-06-2009
|
3.00
|
Adel Clamps/ELT Position
|
Details
|


|
|
12-04-2009
|
1.50
|
WigWag Wiring/Clamps
|
Details
|


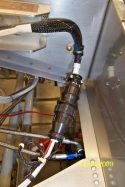
|
|
12-04-2009
|
4.00
|
Changed Headset Jacks
|
Details
|

 |
|
12-03-2009
|
4.00
|
ELT New Position/New Flap Switch Inserted
|
Details
|


|
|
12-02-2009
|
1.00
|
Shipped Spinner/ELT Bracket Base
|
Details
|

  |
|
11-25-2009
|
3.00
|
ELT Position/Riveted Brackets to Fwd Skin
|
Details
|


|
|
11-24-2009
|
0.10
|
Photos-Clamp/Flap Switch/Cooling Tubes
|
|


|
|
11-24-2009
|
5.50
|
Adel Clamps/OAT Wire/Clock
|
Details
|


|
|
11-22-2009
|
0.50
|
Gave Walt Halloran Canopy Parts for Painting
|
Details
|
   |
|
11-21-2009
|
0.10
|
Photos-Instrument Shelf in Place under the Ribs
|
|


|
|
11-21-2009
|
0.10
|
Photos 3-Wire Clamping/Missing Screw on Clock
|
|


|
|
11-21-2009
|
0.10
|
Photos 2-Instrument Shelf Installed
|
|


|
|
11-21-2009
|
4.50
|
Added Components to the Shelf
|
Details
|


|
|
11-20-2009
|
4.50
|
Instrument Shelf w/Nutplates
|
Details
|


|
|
11-18-2009
|
0.10
|
Photo-Instrument Panel and bays
|
|

  |
|
11-18-2009
|
4.50
|
More Adel Clamps/Inst Shelf
|
Details
|


|
|
11-17-2009
|
0.10
|
Photos-Instrument Shelf
|
|


|
|
11-17-2009
|
0.10
|
Photos 2-Instrument Shelf
|
|


|
|
11-17-2009
|
5.00
|
More Work on the Instrument Shelf
|
Details
|


|
|
11-16-2009
|
3.00
|
Started work on Instrument Shelf
|
Details
|


|
|
11-16-2009
|
0.10
|
Photos-Instrument Shelf Work
|
|


 |
|
11-12-2009
|
1.00
|
Positioned Bezel Lighting Inverter/Edging
|
Details
|


 |
|
11-10-2009
|
1.00
|
Unpacked SJ Cowl/Subpanel
|
Details
|


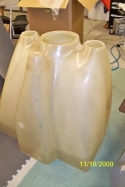
|
|
11-10-2009
|
0.10
|
Photos-SJ Cowl
|
|


|
|
11-10-2009
|
0.10
|
Photos 2-Wiring, Ground Block Positioned
|
|


|
|
11-09-2009
|
0.20
|
Picked up Sam James Cowl at ABF
|
Details
|
   |
|
11-06-2009
|
4.50
|
Switched Fuel Guardian position/Rib Brackets
|
Details
|


|
|
11-06-2009
|
0.10
|
Photos-Inst Panel Brackets/Adel Clamps
|
|


|
|
11-06-2009
|
0.10
|
Photos 3-Instrument Subpanel Mods
|
|


|
|
11-06-2009
|
0.10
|
Photos 2-Dimmer Connector/Avionics Relay
|
|


 |
|
11-04-2009
|
3.00
|
Work on Fuel Guardian/Nutplates
|
Details
|

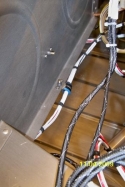

|
|
11-04-2009
|
0.10
|
Photos-Rib Bracket/Nutplate
|
|


|
|
11-03-2009
|
4.50
|
Doubler for WigWag Controller/Cooling Fan Wires
|
Details
|


|
|
11-02-2009
|
2.50
|
Brackets-LightSpeed Box/Rib Brackets
|
Details
|


|
|
10-31-2009
|
6.00
|
Rivet Gascolator Bracket/Made Instrument Shelf
|
Details
|


|
|
10-31-2009
|
0.50
|
Looked over Instrument Panel Component Layout
|
Details
|
   |
|
10-31-2009
|
2.00
|
Evaluated Instrument Components Positioning
|
Details
|
   |
|
10-30-2009
|
0.10
|
Photos-Gascolator Bracket
|
|


|
|
10-30-2009
|
0.10
|
Photos 2-Gascolator Bracket
|
|


|
|
10-30-2009
|
4.50
|
Made a new Gascolator Bracket
|
Details
|


|
|
10-28-2009
|
2.50
|
Worked with Andair Gascolator Bracket
|
Details
|

  |
|
10-27-2009
|
0.10
|
Photo-Gascolator Braket Drilled in Place
|
|

  |
|
10-27-2009
|
2.50
|
Fuel/Oil Transducers/Drilled Gascolator Brkt
|
Details
|


|
|
10-22-2009
|
3.00
|
Installed Heat Valve/Chamfered Aft Skin Edges
|
Details
|


|
|
10-21-2009
|
0.10
|
Photos-Preliminary Inst Panel Component Layout
|
|


|
|
10-21-2009
|
0.10
|
Photos 2-Preliminary Instrument Subpanel Layout
|
|


|
|
10-21-2009
|
4.50
|
Painted Skins/Readied Firewall for Heat Valve
|
Details
|


|
|
10-20-2009
|
5.50
|
Primed Skin/Static Tubing Clip/Battery Bolts Space
|
Details
|


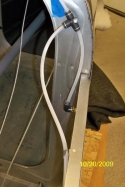
|
|
10-19-2009
|
4.00
|
Final Trim-Aft Top Skin/Added Transducers
|
Details
|


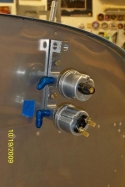
|
|
10-14-2009
|
0.10
|
Photos-Heat Box on Firewall
|
|


|
|
10-14-2009
|
3.00
|
Drilled Heat Vent Box on Firewall
|
Details
|


|
|
10-13-2009
|
0.10
|
Photos-F-6111 Pieces in Place
|
|


|
|
10-13-2009
|
4.00
|
Drilled F-6111 Pieces/Trimmed Canopy Latch
|
Details
|


|
|
10-12-2009
|
5.00
|
Trimmed Canopy Bow
|
Details
|


 |
|
10-09-2009
|
3.50
|
Glareshield Trimmed/Aft Top Skin Trimmed
|
Details
|


|
|
10-09-2009
|
0.50
|
Assisted Gary
|
|


 |
|
10-08-2009
|
0.10
|
Inst Panel Brackets/Riveted Rmt Comp Brckt
|
Details
|


|
|
10-08-2009
|
7.00
|
Drilled Inst Panel Brackets to Top Skin
|
Details
|


|
|
10-07-2009
|
6.00
|
Tunnel Cover Mod/Inst Top Skin Work
|
Details
|


|
|
10-06-2009
|
5.50
|
Visitors-Set up for EAA Ch. 1252 Shop Tour
|
Details
|


|
|
10-06-2009
|
0.10
|
Photos-Seats/Harnesses Installed
|
|


 |
|
10-05-2009
|
3.50
|
P/u Preservative Oil/Sprayed Engine Interior
|
Details
|


|
|
10-01-2009
|
2.00
|
Fit Instrument Top Skin
|
Details
|
   |
|
09-30-2009
|
2.00
|
Tested Fuel Tanks-Found 1 Leak
|
Details
|
   |
|
09-30-2009
|
1.50
|
Assisted Gary-Checked Fuel Tanks
|
|
   |
|
09-29-2009
|
4.00
|
Trimmed Glareshield Edge/1st Chk of Fuel Tank
|
Details
|
   |
|
09-28-2009
|
4.00
|
Vis-Trimmed Glareshield Edge of Top Skin
|
Details
|
   |
|
09-26-2009
|
2.00
|
Filed Instrument Panel Edge/Trimmed Skin Edge
|
Details
|


|
|
09-25-2009
|
1.00
|
New Side Brackets/Filed Inst Panel Edge
|
Details
|
   |
|
09-24-2009
|
4.00
|
Installed instrument Panel and Side Brackets
|
Details
|


|
|
09-18-2009
|
4.50
|
Drilled Pilot Holes for Canopy Rail Bolts
|
Details
|

  |
|
09-17-2009
|
0.10
|
Photos-Aft Top Skin Trimmed
|
|


|
|
09-17-2009
|
0.10
|
Photos 2-Aft Top Skin
|
|

  |
|
09-17-2009
|
3.50
|
More Trimming of the Aft Top Skin
|
Details
|


|
|
09-14-2009
|
0.10
|
Trimmed Fwd Edge of Aft Top Skin
|
Details
|


 |
|
09-14-2009
|
4.00
|
Drilled #40 Holes along Side of Fwd Top Skin
|
Details
|


 |
|
09-11-2009
|
4.00
|
Vis-Instrument Top Skin Drilled/Dimpled
|
Details
|


|
|
09-11-2009
|
0.10
|
Linseed Oil in Canopy Frame/Riveted Bracket
|
Details
|


|
|
09-10-2009
|
0.10
|
Photos-Underside of Skin/Bracket/Wedge
|
|


|
|
09-10-2009
|
0.10
|
Photos 2-Drilling the Instrument Top Skin
|
|


|
|
09-10-2009
|
0.10
|
Photo 2-Top Skin Drilled to the Forward Fuselage
|
|

  |
|
09-10-2009
|
0.10
|
Lance-Chief of Security
|
|

  |
|
09-10-2009
|
2.50
|
Instrument Top Skin Work
|
Details
|


|
|
09-09-2009
|
6.00
|
Visitor/Drilled Support Arm/Riveted Bracket
|
Details
|


|
|
09-09-2009
|
0.10
|
Photos-The Drilled Bolt Holes for Roll Bar/Support
|
|


|
|
09-09-2009
|
0.10
|
Photos 3-Riveted the Subpanel Corners
|
|


 |
|
09-09-2009
|
0.10
|
Photos 2-Doubler Riveted to Center Rib
|
|


|
|
09-08-2009
|
0.10
|
Placed Wedges under the Canopy Roll Bar
|
Details
|


|
|
09-08-2009
|
0.10
|
Photos-Wedge inserted betw/Center Rib & Bracket
|
|


|
|
09-08-2009
|
0.10
|
Photos 3-Wedge inserted betw/Center Rib & Bracket
|
|
  |
|
09-08-2009
|
0.10
|
Photos 2-Wedge inserted betw/Center Rib & Bracket
|
|


|
|
09-08-2009
|
4.00
|
Inserted Wedge for Center Rib
|
Details
|
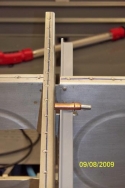
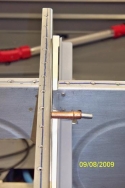

|
|
09-06-2009
|
2.00
|
Started Trimming Aft Top Skin
|
Details
|


|
|
09-04-2009
|
4.50
|
Heat Box Pilot Hole/Aft Top Skin Trimming
|
Details
|
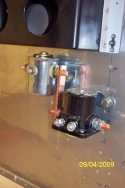

 |
|
09-03-2009
|
0.50
|
Swapped Canopy Roller Screws
|
Details
|
   |
|
09-03-2009
|
0.10
|
Photos-Firewall Doubler, Battery Box
|
|


|
|
09-03-2009
|
0.10
|
Photos 4-Manifold Transducer
|
|

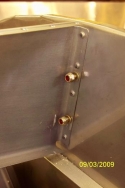
 |
|
09-03-2009
|
0.10
|
Photos 3-Battery Box/Brake Doubler
|
|
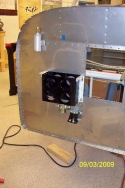


|
|
09-03-2009
|
0.10
|
Photos 2-Battery Box and Brackets
|
|


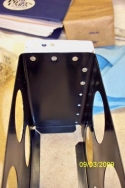
|
|
09-03-2009
|
6.00
|
Painted Battery Box/Firewall Work
|
Details
|


|
|
08-29-2009
|
3.00
|
Master/Starter Relays
|
Details
|


|
|
08-28-2009
|
6.00
|
Worked on Firewall/Relays/Battery Box
|
Details
|


|
|
08-28-2009
|
4.00
|
Battery Box Lightening Holes/Positioning
|
Details
|


 |
|
08-27-2009
|
0.10
|
Photos-Firewall Recess/Rudder Pedal Bracket
|
|
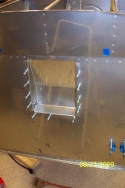

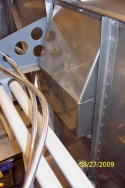
|
|
08-27-2009
|
0.10
|
Photos 2-Rudder Pedal Bracket Modified
|
|


 |
|
08-27-2009
|
4.50
|
Dimpled Top Skin/Modified Pedal Bracket
|
Details
|


|
|
08-25-2009
|
0.10
|
Received Plenum
|
Details
|


|
|
08-22-2009
|
3.00
|
Canopy Handle and Latch
|
Details
|

  |
|
08-21-2009
|
2.00
|
Canopy Rollers Modified
|
Details
|
   |
|
08-15-2009
|
1.50
|
Riveted Canopy Slide Rail/Track
|
Details
|


|
|
08-14-2009
|
5.00
|
Lightening Holes in Canopy Skirts
|
Details
|


 |
|
08-13-2009
|
3.80
|
Drilled Center Rib Bracket/Riveted Canopy Rail
|
Details
|


 |
|
08-12-2009
|
2.60
|
Gave Drawings to Conway/Canopy Tracks
|
Details
|
   |
|
08-11-2009
|
2.50
|
Reworked Canopy Tracks
|
Details
|
   |
|
08-09-2009
|
2.50
|
Drilled Doubler to Firewall/Riveted
|
Details
|
   |
|
08-05-2009
|
3.00
|
Drilled Fuel Pump Firewall Doubler
|
Details
|


 |
|
08-04-2009
|
2.00
|
Trimmed 1" off WD-643 Roll Bar Brace
|
Details
|

|
|
08-04-2009
|
0.10
|
Photos-Doubler on Center Rib
|
|


|
|
08-04-2009
|
0.10
|
Gap betw/Instrument Center Rib/Bracket
|
Details
|
 |
|
08-03-2009
|
2.00
|
Put Away OSH Purchases/Panel Offset Bracket
|
Details
|
   |
|
07-30-2009
|
0.10
|
Van's Signature on Map Box Door
|
Details
|

  |
|
07-28-2009
|
0.30
|
Talked with Darryl-Van's re Offset Center Rib
|
Details
|
   |
|
07-21-2009
|
2.50
|
Trimmed Instrument Subpanel for Bracket
|
Details
|
   |
|
07-17-2009
|
2.50
|
Dimpled Instrument Panel Ribs/Subpanel
|
Details
|
   |
|
07-16-2009
|
1.00
|
Dimpled the F-6112 Skin/Drilled Brackets for Panel
|
Details
|


 |
|
07-15-2009
|
5.00
|
Canopy Spacers & Roll Bar/Fuselage Bracket
|
Details
|


|
|
07-14-2009
|
1.00
|
Deburred F-6106 Top Skin/Installed Icom in Panel
|
Details
|
   |
|
07-13-2009
|
3.00
|
Back-drilled Fuselage Ribs to Top Skin
|
Details
|


|
|
07-08-2009
|
0.10
|
Received Icom A-210 after Factory Upgrade
|
Details
|
   |
|
07-07-2009
|
2.50
|
Clamped F-6106 Top Skin to Fuselage
|
Details
|


|
|
07-06-2009
|
3.00
|
Tested Battery/Worked on F-6106 Top Skin
|
Details
|


 |
|
07-05-2009
|
2.50
|
Worked on Forward Top Skin and Ribs
|
Details
|


|
|
07-05-2009
|
0.30
|
Assisted with Cutting the Windshield
|
Details
|
   |
|
06-25-2009
|
2.50
|
Bent Canopy Roll Bar
|
Details
|
   |
|
06-25-2009
|
1.00
|
Assisted Bending Canopy Roll Bar
|
Details
|
   |
|
06-24-2009
|
3.00
|
Drilled Canopy Deck Pilot Holes
|
Details
|
   |
|
06-23-2009
|
1.00
|
Started Work on the Canopy Roll Bar
|
Details
|
   |
|
06-18-2009
|
3.00
|
Installed Fuel Line into Pump/Doubler on Rib
|
Details
|


|
|
06-17-2009
|
3.00
|
Positioned Fuel Pump on Firewall/Static Line
|
Details
|


 |
|
06-16-2009
|
3.00
|
Reinstalled/Remade Fuel Tank Tubes
|
Details
|


|
|
06-16-2009
|
0.10
|
Photos-Reinstalled/Remade Fuel Tank Tubes
|
|


 |
|
06-15-2009
|
0.10
|
Photos-Bonaco Brake Lines Routing Thru Bracket
|
|

  |
|
06-15-2009
|
3.00
|
Installed Brake Reservoir/Bonaca Brake Lines
|
Details
|


|
|
06-12-2009
|
3.00
|
Reinstalled Vent Tubings w/Adel Clamps
|
Details
|


|
|
06-12-2009
|
0.10
|
Photos-Fuel Vent Tubing-Visitors-Merle and Sue
|
Details
|


|
|
06-05-2009
|
0.10
|
Spacers Added to outside of Fuel Vent Tube on Fuse
|
Details
|

  |
|
06-05-2009
|
6.50
|
Right Fuel Vent Tube/Aux Fuel Pump Doubler
|
Details
|
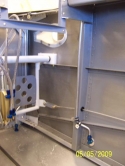
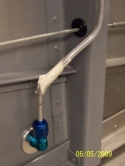

|
|
06-05-2009
|
0.10
|
Left Fuel Vent Tube Reworked/Adel Clamps Drilled
|
|

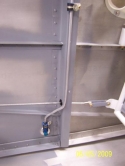

|
|
06-04-2009
|
0.10
|
Started to make a new Fuel Vent Tube
|
Details
|
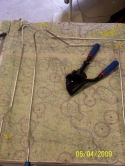


|
|
06-04-2009
|
5.50
|
Snap Bushings for Rudder Cables
|
Details
|


|
|
05-30-2009
|
0.50
|
Cut out the F-601Z Aux Fuel Pump Doubler
|
Details
|

  |
|
05-29-2009
|
0.10
|
Photos-Right Fuel Tube
|
|

  |
|
05-29-2009
|
6.50
|
Fuel Tube Bending/Strobe Power Supply Wire/Firewal
|
Details
|


|
|
05-28-2009
|
4.00
|
Fuel Tube Bending
|
Details
|


 |
|
05-27-2009
|
4.00
|
Rearranged Rudder Cable Washers/Fuel Tubing
|
Details
|
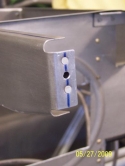


|
|
05-26-2009
|
5.00
|
Torqued Flap Actuator & Rudder Pedal Bolts
|
Details
|
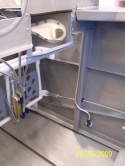
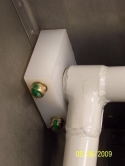

|
|
05-26-2009
|
0.10
|
Photos-Rudder Cables Attached to Pedals
|
|


 |
|
05-24-2009
|
0.10
|
Photos-Painted Interior/Riveted Baggage Floors
|
|


|
|
05-24-2009
|
0.10
|
Photos 2-Painted Interior/Riveted Baggage Floor
|
|


|
|
05-24-2009
|
4.00
|
Painted Fuselage Interior
|
Details
|


|
|
05-23-2009
|
4.50
|
Painted Interior Pieces and Fuselage Interior
|
Details
|


|
|
05-22-2009
|
0.10
|
Photos-Painted Interior Pieces
|
|


 |
|
05-22-2009
|
4.50
|
Painted Interior Pieces
|
Details
|
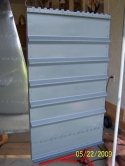


|
|
05-21-2009
|
2.50
|
Primed and Painted Interior Pieces
|
Details
|
   |
|
05-20-2009
|
5.50
|
Started to Paint Fuselage Pieces
|
Details
|


 |
|
05-19-2009
|
0.10
|
Radomir Zaric and Thane States-RV-10
|
Details
|


|
|
05-19-2009
|
0.50
|
Picked up Prop at Medina Airport
|
Details
|


|
|
05-19-2009
|
2.00
|
Attached the Andair Fuel Selector in Position
|
Details
|

  |
|
05-18-2009
|
0.10
|
Photo-Nutplate installed on the Left Floor Panel
|
|

  |
|
05-18-2009
|
2.00
|
Installed Nutplates in Floor for Fuel Selector Cov
|
Details
|


|
|
05-17-2009
|
0.10
|
Photos-Fuel Selector Cover/F-699 Brackets
|
|


|
|
05-17-2009
|
4.50
|
Finished Assembling the Fuel Selector Cover/Primed
|
Details
|


|
|
05-16-2009
|
0.10
|
Photos-Fuel Selector Cover Drilled to the Floor Pa
|
|


|
|
05-16-2009
|
5.50
|
Drilled the Fuel Selector Cover to the Floor Panel
|
Details
|


|
|
05-15-2009
|
0.10
|
Photos-Fuel Selector Cover Pieces
|
|


|
|
05-15-2009
|
3.00
|
Cut out the Fuel Selector Cover Pieces
|
Details
|


|
|
05-14-2009
|
3.00
|
Started Work on the Fuel Selector Cover Pieces
|
Details
|

  |
|
05-08-2009
|
2.00
|
Made Cardboard Box Simulating Fuel Sel. Cover
|
Details
|


|
|
05-07-2009
|
2.00
|
Sent Check for the Prop/Polished Bolts for Wing In
|
Details
|


|
|
05-06-2009
|
2.00
|
Fuel Selector Cover Decisions/Floor Bracket
|
Details
|


 |
|
05-06-2009
|
3.00
|
Decided to Buy Used Sensenich Prop w/Metal Spinner
|
Details
|


|
|
05-05-2009
|
1.50
|
Properly Installed Headset Jacks/Map Box Supports
|
Details
|

|
|
05-05-2009
|
3.00
|
Photos-Map Box Support Brackets Riveted in place
|
|


 |
|
05-04-2009
|
2.00
|
Map Box Support Brackets/Antenna Jacks
|
Details
|


 |
|
05-04-2009
|
4.50
|
Change Angle of Panel-Modifying Cutouts
|
Details
|


|
|
05-03-2009
|
3.50
|
Positioned Steel Straps to Pedals/Inst Subpanel Wo
|
Details
|


|
|
05-03-2009
|
1.00
|
Photos-Inst Panel Brackets/Headset Jacks
|
|


|
|
05-02-2009
|
0.10
|
Photos-Rudder Cable/Pedal Attach Straps
|
|


 |
|
05-02-2009
|
2.50
|
Enlarged Control Stick Openings/Rudder Cable Strap
|
Details
|


|
|
04-29-2009
|
4.00
|
Checked the Range of Movement of Stick/Elevators
|
Details
|
   |
|
04-28-2009
|
0.10
|
Photos-Riveted NACA Vents
|
|


|
|
04-28-2009
|
0.10
|
Photos 2-Riveted NACA Vents
|
|

  |
|
04-28-2009
|
3.00
|
Finished work on Control Rod/Riveted NACA Vents
|
Details
|


|
|
04-27-2009
|
1.50
|
Primed Floor Panels/Control Rod F-689 Work
|
Details
|


|
|
04-24-2009
|
1.00
|
Tapered Floor Panel/Stopped @ Hobby Hangar
|
Details
|
   |
|
04-23-2009
|
1.00
|
Modified the Right Floor Panel
|
Details
|

  |
|
04-22-2009
|
0.10
|
Rainbow after a Rain Shower
|
|


|
|
04-22-2009
|
6.50
|
Almost Completed Working the New Floor Panel
|
Details
|


|
|
04-21-2009
|
5.50
|
Drilled Screw Holes in New Right Floor Panel
|
Details
|


 |
|
04-20-2009
|
2.50
|
Finished Working on the New Left Floor Panel
|
Details
|


 |
|
04-18-2009
|
6.50
|
Continued Working on the Left Floor Panel
|
Details
|


|
|
04-17-2009
|
3.50
|
Started Locating/Drilling Screw Holes in Left Floo
|
Details
|


 |
|
04-16-2009
|
5.00
|
Started Working on Replacement Floor Panels
|
Details
|


 |
|
04-15-2009
|
3.00
|
Started work on Floor Pans/Drilled out Nutplates
|
Details
|


|
|
04-14-2009
|
1.70
|
Trimmed Empennage Fairings
|
Details
|


|
|
04-14-2009
|
0.10
|
Photos-Empennage Fairings Inserted in Place
|
|


|
|
04-14-2009
|
0.30
|
Cut out Wing Profile out of Insulation
|
Details
|
  |
|
04-13-2009
|
0.10
|
Wing Tip Outlined on Insulation
|
Details
|
 |
|
04-13-2009
|
1.00
|
Trimmed Empennage Fairings
|
Details
|


|
|
04-09-2009
|
0.50
|
Positioned Empennage Fairings/Rick's Visit
|
Details
|
   |
|
04-08-2009
|
1.00
|
Bent brackets for Inst Panel/Drill out skin rivet
|
Details
|

  |
|
04-07-2009
|
0.10
|
Photos-Top Skin/Forward Canopy Pieces
|
|

 |
|
04-07-2009
|
0.10
|
Photos-Instrument Panel Angle-Top Skin Marked
|
|

|
|
04-07-2009
|
4.00
|
Instrument Panel needs to be set at 8 degrees
|
Details
|


|
|
04-06-2009
|
1.00
|
Cleaned edges of top skin/photos of Dynon D100
|
Details
|


|
|
04-01-2009
|
0.10
|
Photos-Rudder attached to VS and Cables Attached
|
|

 |
|
04-01-2009
|
0.10
|
Photos-Aileron Trim Bracket
|
|


|
|
04-01-2009
|
0.10
|
Photos 2-Aileron Trim Bracket in position
|
|


 |
|
04-01-2009
|
6.00
|
Completed the Aileron Trim Bracket
|
Details
|


|
|
03-31-2009
|
0.10
|
Photos-Instrument Panel Inserted into Fuselage
|
Details
|


|
|
03-31-2009
|
0.10
|
Photos 3-Instrument Panel and Subpanel that needs
|
|


|
|
03-31-2009
|
0.10
|
Photos 2-Instrument Panel in Fuselage
|
|


|
|
03-31-2009
|
0.50
|
Helped insert panel into fuselage
|
Details
|


|
|
03-31-2009
|
5.00
|
Aileron Trim Bracket/Inserted Instrument Panel
|
Details
|


|
|
03-30-2009
|
0.80
|
Started work on the Aileron Trim Bracket
|
Details
|

  |
|
03-24-2009
|
0.10
|
Photos-Glued Washers to Elevator Horns
|
|


|
|
03-24-2009
|
0.10
|
Photo-Both Stabilizers Temporarily Bolted to Fusel
|
|

  |
|
03-24-2009
|
3.00
|
Drilled out Rivet in Hor Stab/Countersunk Rivet
|
Details
|


|
|
03-23-2009
|
0.10
|
Photos-Nutplates Riveted to Brackets
|
|


|
|
03-23-2009
|
0.10
|
Photos 3-Brackets and Center Rib Cutout
|
|


|
|
03-23-2009
|
0.10
|
Photos 2-Brackets Screwed to the Panel
|
|


|
|
03-23-2009
|
4.00
|
Attaching Screw Holes Drilled in Panel
|
Details
|


|
|
03-22-2009
|
0.50
|
Riveted Nutplates
|
Details
|


|
|
03-22-2009
|
2.00
|
Drilled Instrument Panel Brackets for Nutplates
|
Details
|
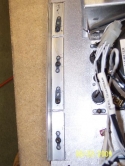


|
|
03-18-2009
|
0.10
|
Photos-Instrument Panel Angle Brackets
|
|


|
|
03-18-2009
|
0.10
|
Photos 3-Bracket Around CB's
|
|

  |
|
03-18-2009
|
0.10
|
Photos 2-Instrument Panel Angle Brackets
|
|


|
|
03-18-2009
|
3.50
|
Cut More Indents out of the Angle Brackets
|
Details
|


|
|
03-17-2009
|
0.80
|
Worked on More Angle Brackets
|
Details
|

  |
|
03-16-2009
|
1.50
|
Worked on Instrument Panel Brackets
|
Details
|

  |
|
03-16-2009
|
2.50
|
Worked on Angle Brackets for Instrument Panel
|
Details
|


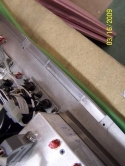
|
|
03-14-2009
|
1.50
|
Cut out Subpanel for Radio Stack
|
Details
|


|
|
03-13-2009
|
4.00
|
Started to Lay Out Bracket for Attaching Panel
|
Details
|


 |
|
03-13-2009
|
5.50
|
Rudder Pedal Cotter Pins/Inst Subpanel Cutout
|
Details
|


|
|
03-12-2009
|
0.10
|
Riveted Arm Rests to Fuselage
|
Details
|


|
|
03-12-2009
|
0.10
|
Photos-Armrests Riveted/Rudder Pedal Bolt
|
|


 |
|
03-12-2009
|
3.50
|
Installed Springs on Brake Master Cylinders
|
Details
|


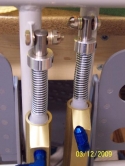
|
|
03-12-2009
|
0.50
|
Installed Bolts in Corners of VS Forward Spar
|
Details
|
   |
|
03-11-2009
|
4.00
|
TruTrak SB Compliance/Rudder Pedal Bolts/Visitors
|
Details
|


|
|
03-11-2009
|
0.10
|
Photos-Rudder Pedal Bolts
|
|


|
|
03-11-2009
|
2.00
|
Cork and Aluminum Covers for Aileron Control Boots
|
Details
|

  |
|
03-09-2009
|
2.00
|
TruTrak SB Compliance/Rudder Pedal Bracket
|
Details
|


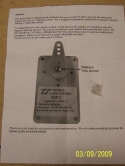
|
|
03-04-2009
|
4.00
|
Rudder Pedal Correction/Reposition Comm Antenna
|
Details
|

|
|
03-04-2009
|
0.10
|
Photos-Right Rudder Pedal Bracket Replaced
|
|


 |
|
03-04-2009
|
2.00
|
Made Cork Cut-outs for Aileron Control Rod Boots
|
Details
|

  |
|
03-03-2009
|
0.10
|
Photos-Left Fuel Vent Tubing/Fittings
|
|


|
|
03-03-2009
|
0.10
|
Photos 4-Right Fuel Vent Tubing
|
|


|
|
03-03-2009
|
0.10
|
Photos 3-Right Side Fuel Vent Tubing
|
|


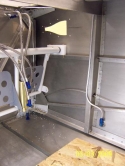
|
|
03-03-2009
|
0.10
|
Photos 2-Right Fuel Vent Tubing
|
|


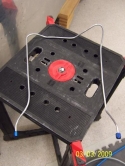
|
|
03-03-2009
|
5.50
|
Made Fuel Vent Tubing/Installed Fuel Vents
|
Details
|


|
|
03-02-2009
|
3.50
|
Sanded Nav Light Openings
|
Details
|


|
|
03-02-2009
|
0.10
|
Photos-Static Line Routing
|
|
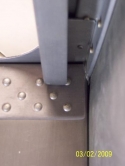


|
|
03-02-2009
|
0.10
|
Photos-Nav Light Extensions Installed
|
|


 |
|
03-02-2009
|
0.10
|
Drilled Holes for Static Line Routing
|
Details
|
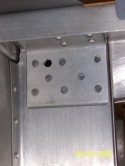


|
|
03-02-2009
|
3.00
|
Added Microballoons to Nav Light Extensions
|
Details
|


|
|
02-27-2009
|
1.50
|
Fiberglass Lesson
|
Details
|

  |
|
02-27-2009
|
2.50
|
Drilled NACA Vents/Fiberglassed Nav Lt Extensions
|
Details
|


|
|
02-26-2009
|
4.00
|
Worked on installing Nav/Strobe Lights
|
Details
|


|
|
02-26-2009
|
0.10
|
Photos-Nav/Strobe Lights in Wingtips
|
|


|
|
02-26-2009
|
0.10
|
Photos 5-Both Wingtips and Lights
|
|


|
|
02-26-2009
|
0.10
|
Photos 4-Nav Lights and Wingtips
|
|


|
|
02-26-2009
|
0.10
|
Photos 3-Nav Lights and Wingtips
|
|


|
|
02-26-2009
|
0.10
|
Photos 2-Nav Lights and Extensions
|
|


|
|
02-25-2009
|
0.80
|
Worked on Cutting Holes in Wingtips
|
Details
|

|
|
02-25-2009
|
5.00
|
Tapped Roll Servo Control Rod/Wingtips
|
Details
|


|
|
02-25-2009
|
0.50
|
Helped Tap the Roll Servo Control Rod
|
Details
|

  |
|
02-24-2009
|
2.00
|
Riveted Fuselage Floor/Elevator Bellcrank
|
Details
|


|
|
02-24-2009
|
1.00
|
Brake Line Bushings
|
Details
|

  |
|
02-23-2009
|
2.50
|
Leading Edge of Elevator/Antenna/Roll Servo
|
Details
|


 |
|
02-23-2009
|
1.00
|
Assisted with Positioning the Roll Servo
|
Details
|
   |
|
02-22-2009
|
2.50
|
Decided to Move Comm #1 Bracket
|
Details
|
   |
|
02-22-2009
|
0.50
|
Assisted with Deciding to Move Comm 1 Bracket
|
Details
|
   |
|
02-20-2009
|
0.10
|
Photos-Bushing for OAT Wire/Shoulder Harness
|
Details
|

|
|
02-20-2009
|
4.00
|
Bolted Shoulder Harness Cables/Enlarged Stick Hole
|
Details
|


|
|
02-19-2009
|
0.10
|
Attempted to Work-Vertigo Kicked In
|
Details
|
   |
|
02-18-2009
|
3.50
|
Riveted the Left Side of the Aft Skin
|
Details
|


|
|
02-18-2009
|
0.10
|
Photos-Bolted Shoulder Harnesses on Longeron
|
Details
|


 |
|
02-18-2009
|
1.50
|
Assisted Gary with Riveting Aft Top Skin
|
Details
|


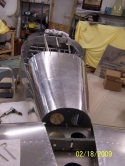
|
|
02-17-2009
|
8.00
|
Positioned Flap Cam & AOA Sensor/Rivet Top Skin
|
Details
|


|
|
02-17-2009
|
2.00
|
Assisted with Riveting Aft Top Skin
|
Details
|


|
|
02-17-2009
|
3.50
|
Assisted with Installing AOA Flap Sensor
|
Details
|


|
|
02-16-2009
|
5.50
|
Riveted Most of the Remaining Rivets-Aft Top Skin
|
Details
|
   |
|
02-16-2009
|
2.00
|
Assisted with Riveting Aft Top Skin
|
Details
|
   |
|
02-11-2009
|
4.00
|
Started to Rivet Aft Top Skin to Fuselage
|
Details
|


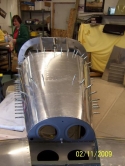
|
|
02-11-2009
|
2.00
|
Assisted with Riveting Aft Top Skin
|
Details
|

  |
|
02-10-2009
|
1.50
|
Worked on Aft Top Skins
|
Details
|


|
|
02-10-2009
|
0.10
|
Photos-Priming Aft Top Skin & Rivet Lines on Fuse
|
|


|
|
02-10-2009
|
0.10
|
Photos 2-Fuse Rivet Line for Top Skins Primed
|
|


|
|
02-09-2009
|
0.10
|
Need to enlarge F-639/640 control stick holes
|
Details
|


|
|
02-09-2009
|
4.00
|
Drilled Remote Compass Bracket
|
Details
|


|
|
02-09-2009
|
0.10
|
Drilled Brake Reservoir Hole in FW/Primed Top Skin
|
Details
|


|
|
02-08-2009
|
0.10
|
Rivet on HS interferring with Elevator movement
|
Details
|


 |
|
02-08-2009
|
0.10
|
Installed OAT in F-612 Bulkhead/C'wts in elevator
|
Details
|


|
|
02-08-2009
|
7.00
|
Corrected interference of control rod by bulkheads
|
Details
|


|
|
02-07-2009
|
5.00
|
Worked on the length of the F-690 Control Rod
|
Details
|


|
|
02-07-2009
|
0.10
|
Photos-Trim Cable in place
|
|


|
|
02-07-2009
|
0.10
|
Photos 4-Trim cable thru the aft bulkheads
|
|


|
|
02-07-2009
|
0.10
|
Photos 3-Trim Cable run thru Fuselage
|
|


|
|
02-07-2009
|
0.10
|
Photos 2-Trim Cable run thru Fuselage
|
|
|
|
02-06-2009
|
4.50
|
Riveted Control Rod Bearings/Brake Plate Drilled
|
Details
|


|
|
02-05-2009
|
0.10
|
Photos-Prepared Brake Plate for Firewall
|
|


 |
|
02-05-2009
|
3.00
|
Drilled NACA Vents into position/Brake plate drill
|
Details
|


|
|
02-04-2009
|
3.00
|
Finished Shaping the Right NACA Vent
|
Details
|

  |
|
02-02-2009
|
0.10
|
Photos-Right NACA Vent work
|
|


 |
|
02-02-2009
|
2.50
|
Cut out Left NACA Vent and started Right Vent
|
Details
|


|
|
02-01-2009
|
0.10
|
Photos-Rudder Pedal Bracket Bolts Drilled in Place
|
|


 |
|
02-01-2009
|
3.00
|
Installed Bolts in Rudder Pedal Brackets
|
Details
|


|
|
01-31-2009
|
3.00
|
Drilled Rudder Pedal Brackets in Place
|
Details
|


|
|
01-30-2009
|
2.00
|
Riveted VS Forward Spar Spacers/Set Rudder Pedals
|
Details
|


 |
|
01-29-2009
|
4.00
|
Riveted Tubing Nutplates/F-611 Spacer/Installed El
|
Details
|


|
|
01-29-2009
|
0.10
|
Photos-Control Sticks/Primed parts/F-690 Control R
|
|


|
|
01-29-2009
|
0.10
|
Photos 3-HS and Elevators in place/Control Rod & E
|
|


 |
|
01-29-2009
|
0.10
|
Photos 2-F-611 Spacer/Elevator Bellcrank/HS
|
|


|
|
01-27-2009
|
0.10
|
Photos-Changed tubing for wire runs in fuselage
|
|

  |
|
01-27-2009
|
4.00
|
Changed tubing in floor for wire runs
|
Details
|


|
|
01-26-2009
|
2.00
|
Decided to Change Tubing under Seats/Floor
|
Details
|
   |
|
01-25-2009
|
1.50
|
|
|
   |
|
01-19-2009
|
1.00
|
|
|
   |
|
01-17-2009
|
1.00
|
Attached Elevators to HS
|
Details
|
   |
|
01-13-2009
|
0.10
|
Finished laying ceiling insulation
|
Details
|
   |
|
01-12-2009
|
0.10
|
Laid more ceiling insulation
|
Details
|
   |
|
01-07-2009
|
0.10
|
Installed Ceiling Insulation
|
Details
|
   |
|
01-07-2009
|
0.10
|
Assisted with laying ceiling insulation
|
Details
|
   |
|
12-31-2008
|
0.10
|
Photo-HS rear spar cutouts for down elevator
|
|

  |
|
12-31-2008
|
2.00
|
Cleaned up HS rear spar cutouts/riveted HS
|
Details
|


|
|
12-30-2008
|
0.10
|
Photo-Right elevator horn and HS rear spar/spacer
|
|

  |
|
12-30-2008
|
1.50
|
Finished down angles of elevators
|
Details
|


|
|
12-29-2008
|
4.00
|
Worked on down motion of elevators
|
Details
|


|
|
12-29-2008
|
2.00
|
Installed the rudder stop on the VS
|
Details
|


|
|
12-23-2008
|
4.50
|
Finished riveting canopy deck/Elevators' range
|
Details
|


|
|
12-23-2008
|
3.00
|
Assisted with setting elevators' range of motion
|
Details
|
   |
|
12-22-2008
|
0.50
|
Assisted with drilling VS rear spar bolt
|
Details
|
  |
|
12-22-2008
|
6.00
|
Assembled entire Emp/Riveted Rt Canopy Deck Deck
|
Details
|


|
|
12-19-2008
|
2.50
|
Finished Drilling HS/VS Spars-3rd VS Bolt Hole
|
Details
|

|
|
12-19-2008
|
0.50
|
Assisted Gary
|
Details
|
   |
|
12-19-2008
|
0.50
|
Assisted Gary
|
Details
|
   |
|
12-18-2008
|
2.50
|
Drilled front spar brace to VS/HS-2nd bolt hole
|
Details
|


|
|
12-17-2008
|
0.10
|
Photos-Aligning/Drilling VS Rear Spar Bolt Holes
|
|
|
|
12-17-2008
|
0.10
|
Photos 2-Drilling VS Rear Spar Bolt Holes
|
|


 |
|
12-17-2008
|
4.50
|
Drilled 1st bolt hole in VS Rear Spar/Spacer
|
Details
|


|
|
12-16-2008
|
5.00
|
Trimmed VS forward spar/Marked Rear Spar
|
Details
|


|
|
12-15-2008
|
3.50
|
Photos-Assisted Gary with HS and VS
|
Details
|


|
|
12-15-2008
|
5.00
|
Made Remote Compass Bracket/HS Spacers
|
Details
|


|
|
12-15-2008
|
0.50
|
Assisted Gary with HS
|
Details
|
   |
|
12-13-2008
|
2.50
|
Riveted Aft Top Deck/Riveted Right Canopy Deck
|
Details
|


 |
|
12-12-2008
|
0.10
|
Photos-HS rear spar drilled to bolt size
|
|


|
|
12-12-2008
|
0.10
|
Photos 6-F-612B spacer drilled in place
|
|

  |
|
12-12-2008
|
0.10
|
Photos 5-F-612B spacer drilled in place
|
|

|
|
12-12-2008
|
0.10
|
Photos 4-F-612B spacer drilled in place
|
|


|
|
12-12-2008
|
0.10
|
Photos 3-Comparison of Cross-Bracket Replaced
|
|


|
|
12-12-2008
|
0.10
|
Photos 2-HS Forward Spar Drilled in place
|
|

|
|
12-12-2008
|
5.50
|
Made F-612B Spacer/Drilled in place
|
Details
|


|
|
12-11-2008
|
0.10
|
Photos-Drilled HS to Longeron
|
|


|
|
12-11-2008
|
0.10
|
Photos 2-Drilled HS To Longeron
|
|

  |
|
12-11-2008
|
4.00
|
Drilled HS to Longeron
|
Details
|


|
|
12-10-2008
|
5.00
|
Drilled Aft Top Deck Off/Replaced Cross-Bracket
|
Details
|


|
|
12-10-2008
|
4.00
|
Drilled Aft Top Deck Off/Replaced Cross-Bracket
|
Details
|

  |
|
12-09-2008
|
2.50
|
Cut Push-Pull Tube/Riveted Nut to Trim Access Pane
|
Details
|


 |
|
12-08-2008
|
5.00
|
Cut Elevator Control Rod/Wood Legs
|
Details
|


|
|
12-07-2008
|
0.10
|
Photos-Cross-Bracket that Needs to be Replaced
|
|


|
|
12-07-2008
|
3.00
|
Found Problem with Cross-Bracket under Aft Top Dec
|
Details
|


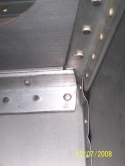
|
|
12-02-2008
|
0.10
|
Photos-Drilling Horiz Stab to Fuselage
|
|


|
|
12-02-2008
|
5.00
|
Drilled Bottom of Horns/HS to Fuselage
|
Details
|


|
|
12-02-2008
|
2.00
|
Assisted Gary with Drilling HS to Fuselage
|
Details
|


|
|
12-01-2008
|
0.10
|
Photos-Elevator Horns Drilled/Spacers
|
|

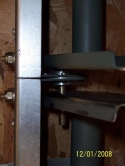

|
|
12-01-2008
|
0.10
|
Photos 2-Gap between Elevator Horns
|
Details
|

  |
|
12-01-2008
|
3.00
|
Drilled Elevator Horns to HS Bearing
|
Details
|


|
|
11-28-2008
|
1.50
|
Worked on Alignment Pins/Received Drill Bushing
|
Details
|
   |
|
11-25-2008
|
0.10
|
Photos-Elevators Aligned with Horiz Stab
|
|
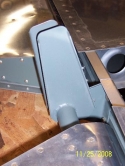
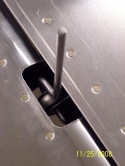

|
|
11-25-2008
|
4.50
|
Aligned Elevators with Horizontal Stabilizer
|
Details
|


|
|
11-24-2008
|
2.50
|
Rod-End Bearings into Elevators
|
Details
|


 |
|
11-19-2008
|
1.00
|
Worked on Remote Compass Bracket
|
Details
|

  |
|
11-19-2008
|
2.00
|
Complied w/Van SB 4/11/07-Flap Motor Safetying
|
Details
|
   |
|
11-18-2008
|
1.00
|
Worked on Right Canopy Deck
|
Details
|
   |
|
11-17-2008
|
0.50
|
Organized Tools
|
Details
|
   |
|
11-06-2008
|
4.00
|
Trimmed Right Canopy Deck
|
Details
|


|
|
11-06-2008
|
1.50
|
Making Remote Compass Bracket
|
Details
|

  |
|
11-05-2008
|
5.50
|
Safetied/Riveted Pitch Servo
|
Details
|


|
|
11-05-2008
|
1.50
|
Riveted One End of Control Rod F-690
|
Details
|

  |
|
11-05-2008
|
0.10
|
Photos-Pitch Servo Bracket
|
|

|
|
11-05-2008
|
0.10
|
Photos 4-Trimmed Aft End of Right Canopy Deck Rail
|
|


 |
|
11-05-2008
|
0.10
|
Photos 3-Pitch Servo
|
|
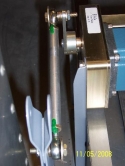

|
|
11-05-2008
|
0.10
|
Photos 2-Pitch Servo Bracket
|
|


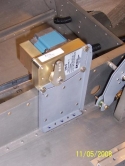
|
|
11-04-2008
|
0.10
|
Photos-Pitch Servo Bracket
|
|


|
|
11-04-2008
|
0.10
|
Photos 2-
|
|

 |
|
11-04-2008
|
3.00
|
Drilled Pitch Servo Bracket/Moved Elevator Bellcra
|
Details
|


|
|
11-03-2008
|
0.10
|
Photos-Smoke System Vent
|
|


|
|
11-03-2008
|
0.10
|
Photos 4-Smoke System Nutplates in Ribs
|
|


|
|
11-03-2008
|
0.10
|
Photos 3-Smoke System
|
|


|
|
11-03-2008
|
0.10
|
Photos 2-Smoke System Vent Riveted in Place
|
|


|
|
11-03-2008
|
5.00
|
Installed Components for Smoke Reservoir Installat
|
Details
|


|
|
11-02-2008
|
1.50
|
Trimmed Baggage Side Panels for Flap Rod
|
Details
|


|
|
11-02-2008
|
0.10
|
Photos-Smoke Reservoir Installation
|
|


|
|
11-02-2008
|
0.10
|
Photos 2-Smoke Reservoir Installation
|
|

 |
|
10-31-2008
|
3.00
|
Baggage Side Covers Cut Out for Flap Actuator
|
Details
|


|
|
10-28-2008
|
1.50
|
Riveted Antenna Brackets in Place
|
Details
|

  |
|
10-28-2008
|
1.50
|
Dimpled and Riveted Antenna Brackets in Place
|
Details
|
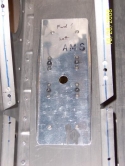
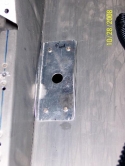
|
|
10-27-2008
|
3.00
|
Primed Fuselage/Riveted Rudder Cable Fairings
|
Details
|

|
|
10-27-2008
|
0.10
|
Photos-Rudder Cable Fairings Riveted to Fuselage
|
|


 |
|
10-24-2008
|
0.10
|
Photos-Static Line Holes Drilled
|
|


|
|
10-24-2008
|
0.10
|
Photos-Control Rod Interference w/Rod End Bearing
|
|


 |
|
10-24-2008
|
0.10
|
Photos-Conduit in Fuselage/ELT Placement
|
|


|
|
10-24-2008
|
3.00
|
Cleaned Fuselage/Drilled Fuselage for Conduit
|
Details
|

|
|
10-23-2008
|
4.00
|
MB Bracket Drilled into Fuselage
|
Details
|


|
|
10-22-2008
|
0.10
|
Photos-Made Antenna Brackets
|
|


|
|
10-22-2008
|
0.10
|
Photos 2-Made Antenna Brackets
|
|

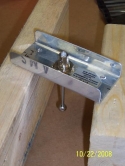

|
|
10-22-2008
|
0.10
|
Photos 1-Made Antenna Brackets
|
|
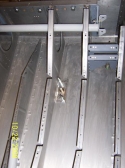

|
|
10-22-2008
|
3.70
|
Made Antenna Brackets
|
Details
|

|
|
10-21-2008
|
0.10
|
Photos-Made Comm Antenna Brackets
|
|

 |
|
10-21-2008
|
2.00
|
Made Comm Antenna Brackets
|
Details
|


|
|
10-16-2008
|
3.00
|
Drilled Power Supply Brackets to Floor
|
Details
|


|
|
10-16-2008
|
1.50
|
Dimpled Floor Skin/Cut out Antenna Doublers
|
Details
|

  |
|
10-15-2008
|
0.10
|
Photos-Strobe Power Supply Brackets
|
|


|
|
10-15-2008
|
4.00
|
Made Brackets for Strobe Power Supply
|
Details
|


|
|
10-14-2008
|
2.50
|
Trimmed/Drilled Left Flap Cover
|
Details
|
 |
|
10-09-2008
|
3.50
|
Trimmed/Drilled Right Flap Cover in Place
|
Details
|
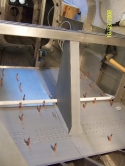


|
|
10-09-2008
|
0.10
|
Photos-Flap Covers Trimmed/Drilled in Place
|
|
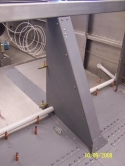


|
|
10-09-2008
|
0.10
|
Photos 2- Flap Covers Trimmed/Drilled in Place
|
|

  |
|
10-08-2008
|
0.10
|
Photos-Center Bearing Block/Flap Cover
|
|


|
|
10-08-2008
|
0.10
|
Photo-Cockpit Floors in Place with Flap Channels
|
|

  |
|
10-08-2008
|
3.50
|
Doublers for Flap Bearing Blocks/Flap Covers
|
Details
|


|
|
10-07-2008
|
1.00
|
Prepped Top Skin for Priming
|
Details
|
   |
|
10-07-2008
|
0.10
|
Photos-Flap Bearing Blocks in Place
|
|
|
|
10-07-2008
|
0.10
|
Photos-Flap Bearing Blocks
|
Details
|

 |
|
10-07-2008
|
5.00
|
Drilled Bearing Blocks to Proper Size Holes
|
Details
|

|
|
10-06-2008
|
2.00
|
Electrical Practice
|
Details
|
   |
|
10-02-2008
|
0.10
|
Photos-Flap Actuator Bearing Blocks Drilled in Pla
|
|
|
|
10-02-2008
|
4.00
|
Installed Nutplates on EF-601 Channel
|
Details
|


|
|
10-01-2008
|
3.50
|
Trimmed Flap Side Covers/Static Line
|
Details
|

|
|
10-01-2008
|
0.10
|
Photos-Static Line Affixed to Bulkhead
|
|


|
|
09-27-2008
|
3.00
|
Static Lines/Control Sticks/Rudder Cable Fuse Cove
|
Details
|


|
|
09-27-2008
|
0.10
|
Photos-Rudder Cable Fairings/Static Line
|
|


|
|
09-26-2008
|
3.00
|
Riveted Nutplates/Rivet CS/Rib Brackets to Ribs
|
Details
|


|
|
09-26-2008
|
0.10
|
Photos-Brackets Riveted in Place
|
|


|
|
09-26-2008
|
0.10
|
Photos 2-Brackets Riveted in Place/Visiting Cat
|
|

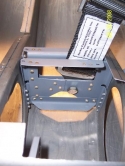

|
|
09-25-2008
|
3.50
|
Primed/Riveted Crotch Strap Components
|
Details
|


|
|
09-25-2008
|
0.10
|
Photos-Primed Cutouts in Floors
|
|

|
|
09-25-2008
|
0.10
|
Photos 2-Primed Flap Cover Side Panels
|
|

  |
|
09-24-2008
|
0.10
|
Photos-Finished Crotch Strap Brackets/Hole in Floo
|
|
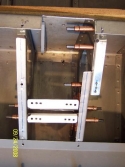


|
|
09-24-2008
|
0.10
|
Photos 4-Finished Brackets/Hole in Floor
|
|
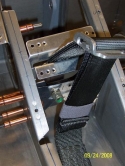
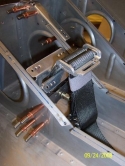
 |
|
09-24-2008
|
0.10
|
Photos 3-Finished Brackets/Hole in Floor
|
|


|
|
09-24-2008
|
0.10
|
Photos 2-Finished Brackets/Hole in Floor
|
|


|
|
09-24-2008
|
6.00
|
Finished Crotch Strap Brackets/Hole in Floor
|
Details
|


|
|
09-23-2008
|
2.00
|
Drilled Right Crotch Strap Brackets in Place
|
Details
|


 |
|
09-22-2008
|
1.00
|
Drilled Right Crotch Strap Brackets to Ribs
|
Details
|

  |
|
09-17-2008
|
0.10
|
Photos-Enlarged Cutout for Crotch Strap
|
|


|
|
09-17-2008
|
0.10
|
Photos 2-Enlarged Crotch Strap Hole in Floor
|
|


|
|
09-17-2008
|
2.00
|
Enlarged Cutout in Floor for Left Crotch Strap
|
Details
|


|
|
09-16-2008
|
4.00
|
Worked on Left Crotch Strap Brackets
|
Details
|


|
|
09-16-2008
|
0.10
|
Installed Left Crotch Strap
|
|


|
|
09-16-2008
|
3.00
|
Determined Location of Sub-Panel Cutouts
|
Details
|

  |
|
09-15-2008
|
0.10
|
Left Rib Bracket and Crotch Strap Brackets Drilled
|
Details
|


 |
|
09-15-2008
|
3.00
|
Drilled Left Crotch Strap Brackets in Place
|
Details
|


|
|
09-14-2008
|
4.00
|
Modified Crotch Strap Brackets/Met w/Walt Hallaron
|
Details
|


|
|
09-14-2008
|
0.10
|
Left Crotch Strap Brackets Ready for Drilling
|
|

  |
|
09-13-2008
|
0.10
|
Modified Crotch Strap Brackets
|
|

  |
|
09-13-2008
|
2.00
|
Cleaned up Bending Brake
|
Details
|


|
|
09-12-2008
|
2.00
|
Cleaned up Fuselage
|
Details
|
   |
|
09-11-2008
|
4.00
|
Started to Make New Crotch Strap Brackets
|
Details
|


|
|
09-11-2008
|
0.10
|
Photos-Started to Make New Crotch Strap Brackets
|
|
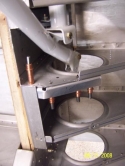
  |
|
09-11-2008
|
3.00
|
EAA Chapter Visit
|
Details
|
   |
|
09-10-2008
|
7.00
|
Worked on modifying Crotch Strap Brackets
|
Details
|
   |
|
09-10-2008
|
2.00
|
Assisted Gary
|
Details
|
   |
|
09-09-2008
|
4.00
|
Trimmed seat ribs/floor for stick movement
|
Details
|


|
|
09-09-2008
|
0.10
|
Photos-Control Sticks with Floor Cutouts
|
|


|
|
09-09-2008
|
2.00
|
Measured Cutouts in Floor for Stick Cutouts
|
Details
|


|
|
09-08-2008
|
1.50
|
Painted Interior Panel-Test Piece for Interior Pai
|
Details
|


 |
|
09-08-2008
|
1.00
|
Installed Control Stick/Trimmed Seat Ribs
|
Details
|

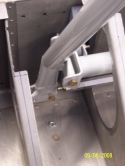
 |
|
09-07-2008
|
2.50
|
Made Instrument Panel Cardboard Mockup
|
Details
|
   |
|
09-06-2008
|
7.00
|
Shop Tour
|
Details
|


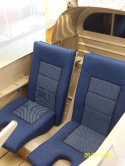
|
|
09-05-2008
|
4.00
|
Cleaned Shop/Installed Floors and Seats
|
Details
|
   |
|
09-04-2008
|
0.10
|
Primed Floors and Armrest Components
|
Details
|

  |
|
09-04-2008
|
5.00
|
Primed and Riveted Armrests
|
Details
|


|
|
09-04-2008
|
0.10
|
Photos 5-Riveting Armrests with Seat Cushions
|
|
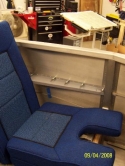
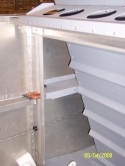
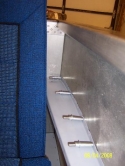
|
|
09-04-2008
|
0.10
|
Photos 4-Riveting Armrests
|
|


|
|
09-04-2008
|
0.10
|
Photos 3-Armrests Riveted Together
|
|


|
|
09-04-2008
|
0.10
|
Photos 2-Trim Tab Installed
|
|


|
|
09-04-2008
|
0.10
|
Photos 2-Riveting Armrests
|
|


|
|
09-04-2008
|
0.10
|
Photo 3-Trim Tab Installed on Left Elevator
|
|
  |
|
09-04-2008
|
2.00
|
Installed Trim Tab on Left Elevator
|
Details
|


|
|
09-03-2008
|
2.00
|
Transported Engine to Shop
|
Details
|
   |
|
09-03-2008
|
1.00
|
Transported Engine to Shop
|
Details
|
   |
|
09-03-2008
|
2.00
|
Moved Engine from Doug's House to Shop
|
Details
|
   |
|
09-03-2008
|
0.50
|
Installed Engine on Engine Stand
|
Details
|
   |
|
09-03-2008
|
2.00
|
Drilled Hinge to Trim Tab
|
Details
|


|
|
09-02-2008
|
0.10
|
Photos-Hinge Drilled to Trim Tab
|
|


 |
|
09-02-2008
|
0.10
|
Photos-Drilled Hinge to Trim Tab
|
|


|
|
09-02-2008
|
1.00
|
Drilled Trim Tab Apart and Drilled Hinge in Place
|
Details
|


|
|
08-31-2008
|
0.10
|
Scott Brown Visits
|
Details
|
   |
|
08-27-2008
|
5.50
|
Riveted Trim Tab
|
Details
|


 |
|
08-27-2008
|
0.10
|
Riveted Static Ports to Fuselage
|
Details
|


|
|
08-27-2008
|
0.10
|
Photos-Riveted Static Ports
|
|

|
|
08-26-2008
|
0.10
|
Photos-Static Ports Clecoed in Position
|
|


|
|
08-26-2008
|
0.10
|
Photos 2-Right Static Port Clecoed in Place
|
|


 |
|
08-26-2008
|
2.00
|
Drilled Static Ports in Fuselage
|
Details
|


|
|
08-25-2008
|
0.10
|
Photos-Removeable Seat Rib w/Nutplate
|
Details
|


 |
|
08-25-2008
|
3.50
|
Control Sticks Drilled/Static Ports/Seat Rib
|
Details
|


|
|
08-21-2008
|
1.50
|
Trimmed Control Stick Openings/Removed Seat Rib
|
Details
|


|
|
08-20-2008
|
0.10
|
Photo-Rib and Spar Coutout for Right Control Stick
|
|

  |
|
08-20-2008
|
2.50
|
Modified Seat Ribs and Spar Flanges for Control St
|
Details
|


|
|
08-19-2008
|
0.10
|
Photos-Control Tube and Elevator Bellcrank
|
|


|
|
08-19-2008
|
0.10
|
Photos 2-Control Tube and Elevator Bellcrank
|
|


 |
|
08-19-2008
|
0.50
|
Finished Assembling Engine Stand
|
Details
|


 |
|
08-19-2008
|
1.50
|
Elevator Control Tube Off-Center from Bellcrank
|
Details
|


|
|
08-18-2008
|
3.00
|
Cut and Reamed out Pipe for Engine Stand
|
Details
|
   |
|
08-18-2008
|
0.50
|
Assembled Engine Stand
|
Details
|
   |
|
08-12-2008
|
2.00
|
Cut Spacers for Pitch Servo/Dimpled Fuselage Bulkh
|
Details
|
   |
|
08-07-2008
|
5.00
|
Trimmed Top Skins/Dimpled Skins and Stringers
|
Details
|


|
|
08-07-2008
|
0.10
|
Photos-Trimmed Top Skins/Dimpled Skins and Stringe
|
|

|
|
08-07-2008
|
0.10
|
Photos 3-Trimmed Top Skins/Dimpled Skins and Strin
|
|


|
|
08-07-2008
|
0.10
|
Photos 2-Trimmed Top Skins/Dimpled Skins and Strin
|
|


|
|
08-07-2008
|
0.10
|
Dimple Die Rounded Off
|
Details
|


 |
|
08-06-2008
|
3.50
|
Trimmed Top Skins
|
Details
|

 |
|
08-05-2008
|
1.50
|
Powered up Instrument Pane 1st Time/Trimmed Top Sk
|
Details
|

  |
|
07-15-2008
|
0.10
|
Photos-Marked Left Side of Top Skins for Trimming
|
Details
|


|
|
07-10-2008
|
2.50
|
Rounded out Top Skin Bulkhead Flanges
|
Details
|


|
|
07-10-2008
|
1.00
|
Marked Right Side of Top Skins for Trimming
|
Details
|


|
|
07-07-2008
|
3.00
|
Trimmed Aft Top Skin
|
Details
|


 |
|
07-03-2008
|
0.10
|
Photo-Deburred Top Skins
|
|

  |
|
07-03-2008
|
3.00
|
Deburred Top Skins/Cleaned up Fuselage
|
Details
|


|
|
07-02-2008
|
0.10
|
Photo-Drilling Forward Top Skin
|
|

  |
|
07-02-2008
|
4.00
|
Finished Drilling Top Skin
|
Details
|


|
|
07-02-2008
|
4.00
|
Drilled Top Skin
|
Details
|


|
|
07-02-2008
|
1.00
|
Assisted with Drilling Top Skin
|
Details
|


|
|
06-28-2008
|
2.00
|
Sat in Cockpit/Drilled Forward Top Skin
|
Details
|


|
|
06-28-2008
|
2.50
|
Sat in Cockpit
|
Details
|


|
|
06-28-2008
|
0.10
|
Photos-Seats in Place
|
|


|
|
06-28-2008
|
0.10
|
Drilled Forward Top Skin
|
Details
|


|
|
06-27-2008
|
4.50
|
Worked on Setup for Drilling Forward Skin
|
Details
|


|
|
06-27-2008
|
4.00
|
Drilled Rib and Stringers to Aft Forward Top Skin
|
Details
|


 |
|
06-26-2008
|
4.50
|
Drilled Stringers/Ribs to Aft Forward Skin
|
Details
|


|
|
06-26-2008
|
3.00
|
Drilled Stringers/Ribs to Aft Forward Skin
|
Details
|


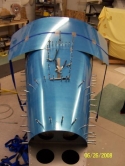
|
|
06-24-2008
|
3.50
|
Drilled Pilot Holes in Stringers for Aft Forward S
|
Details
|


|
|
06-24-2008
|
3.50
|
Cleaned up Fuselage/Pilot Holes in Stringers
|
Details
|


|
|
06-23-2008
|
0.10
|
Photos-Exterior View of Shop
|
|


 |
|
06-23-2008
|
0.10
|
Photos-Drilled Aft Top Skin to Bulkheads/Stringers
|
|


|
|
06-23-2008
|
0.10
|
Photos #3-Aft Top Skin to Bulkheads/Stringers
|
|


|
|
06-23-2008
|
0.10
|
Photos #2-Aft Top Skin to Bulkheads/Stringers
|
|


|
|
06-23-2008
|
5.50
|
Drilled Aft Top Skin to Bulkheads and Stringers
|
Details
|

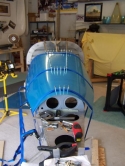

|
|
06-23-2008
|
3.00
|
Drilled Aft Top Skin to Bulkheads and Stringers
|
Details
|
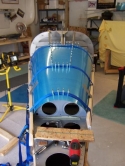


|
|
06-20-2008
|
6.00
|
Readied Bulkheads F-607/-608, Stringers for Drilli
|
Details
|


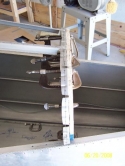
|
|
06-20-2008
|
3.00
|
Readied Bulkheads F-607/-608, Stringers for Drilli
|
Details
|


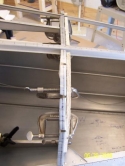
|
|
06-20-2008
|
0.10
|
Photos-Readying Aft Top Skin for Drilling
|
|


|
|
06-20-2008
|
0.10
|
Photos-Readying Aft Top Skin for Drilling
|
|


|
|
06-20-2008
|
0.10
|
Photos-Readying Aft Top Skin for Drilling
|
|


|
|
06-19-2008
|
3.50
|
Riveted Nutplates to Floor Ribs on Right Side
|
Details
|


|
|
06-19-2008
|
3.50
|
Drew Centerline on F-6112 Top Skin/Fluted F-608 Bu
|
Details
|
   |
|
06-13-2008
|
5.00
|
Drilled Right Front Floor Panel to Ribs
|
Details
|

  |
|
06-13-2008
|
3.00
|
Drew Centerlines on Fuselage Bulkheads/Stringers
|
Details
|


 |
|
06-12-2008
|
1.50
|
Prepared Aft Top Skin/Floor Panels
|
Details
|


 |
|
06-12-2008
|
4.00
|
Nutplates for Left Forward Floor/Trimmed Right Fwd
|
Details
|


|
|
06-11-2008
|
1.50
|
Left Armrest/Left Forward Floor Panel
|
Details
|


 |
|
06-11-2008
|
5.50
|
Dimpled Armrests/Drilled Left Forward Floor Panel
|
Details
|


|
|
06-10-2008
|
0.10
|
Photos-Left Armrest and Visitors: Tom/Corbin
|
Details
|


 |
|
06-10-2008
|
5.00
|
Drilled Left Armrest to Fuselage and Dimpled
|
Details
|


|
|
06-09-2008
|
0.10
|
Photos-Armrest Reinforcements
|
Details
|


|
|
06-09-2008
|
0.10
|
Photos-Armrest Reinforcements
|
Details
|

  |
|
06-09-2008
|
2.50
|
Armrest Reinforcement Angles
|
Details
|


|
|
06-02-2008
|
0.50
|
Cut Short Angle Bracket for Armrest
|
Details
|
   |
|
06-01-2008
|
3.00
|
Shaped Left Armrest
|
Details
|

  |
|
06-01-2008
|
1.50
|
Cut Brackets for Underside of Armrests
|
Details
|

  |
|
05-30-2008
|
3.00
|
Cut out Armrest from Stock/Engine Stand Components
|
Details
|


|
|
05-29-2008
|
3.50
|
Trimmed Right Corner of Right Forward Seat Floor
|
Details
|


|
|
05-29-2008
|
0.10
|
Attempt at Fitting Right Crotch Strap Bracket
|
Details
|


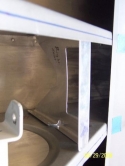
|
|
05-28-2008
|
0.10
|
Trimmed Left Forward Seat Floor-Photo
|
|

  |
|
05-28-2008
|
4.00
|
Trimmed Left Forward Seat Floor
|
Details
|

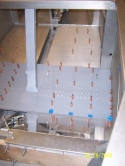

|
|
05-28-2008
|
0.10
|
Hung Spitire Artwork
|
Details
|


 |
|
05-28-2008
|
0.10
|
Dropped of Flap Actuator for Bob Sprang to Rebend
|
Details
|
   |
|
05-24-2008
|
1.50
|
Drilled out Armrest/Fitted VA-114 in Place
|
Details
|

  |
|
05-24-2008
|
3.00
|
Bent Flap Rod/Armrest/Fwd Left Seat
|
Details
|


|
|
05-23-2008
|
3.50
|
Riveted Back Stop Brackets/Flap Rod Bent
|
Details
|


 |
|
05-23-2008
|
0.10
|
Hung Patches on Wall
|
|

  |
|
05-22-2008
|
3.00
|
Riveted Seat Back Components Together
|
Details
|
   |
|
05-21-2008
|
3.50
|
Drilled Back Stop Brackets in Place/Primed Parts
|
Details
|


|
|
05-20-2008
|
4.00
|
Made More Components for Seat Back Brace Stops
|
Details
|


|
|
05-19-2008
|
3.50
|
Made Seat Back Brace Stop Components
|
Details
|


|
|
05-15-2008
|
0.10
|
Photos-Drilled Seat Back Components-2
|
|


|
|
05-15-2008
|
0.10
|
Photos-Drilled Seat Back Components-1
|
|


|
|
05-15-2008
|
4.00
|
Drilled Seat Back Components
|
Details
|


|
|
05-14-2008
|
0.10
|
Riveted Flap Motor Brackets
|
Details
|


|
|
05-14-2008
|
6.50
|
Riveted Electric Flap Components Together
|
Details
|

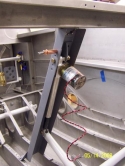

|
|
05-14-2008
|
0.10
|
Drilled Seat Brackets
|
Details
|


 |
|
05-13-2008
|
2.50
|
Ordered Smoke System/Riveted Seat Hinges to Seat F
|
Details
|


|
|
05-09-2008
|
4.00
|
Cleaned and Primed More Flap and Seat Components
|
Details
|


 |
|
05-07-2008
|
0.10
|
Widened Seat Belt Openings in Seat Floors
|
Details
|


|
|
05-07-2008
|
4.00
|
Cleaned and Primed Flap and Seat Components
|
Details
|


 |
|
05-06-2008
|
0.10
|
Photos-Front Side of F-605's for Flap Bushing Bloc
|
|
|
|
05-06-2008
|
0.10
|
Photo-Drilled EF-606 Bracket
|
|
  |
|
05-06-2008
|
5.00
|
Drilled EF-606 Bracket
|
Details
|


|
|
05-06-2008
|
0.10
|
Checked Flap Bushing Block Positioning
|
Details
|
|
|
05-05-2008
|
2.50
|
Drilled Electric Flap Motor Brackets
|
Details
|

  |
|
05-01-2008
|
1.50
|
Riveted Nutplates on Seat Interior Ribs
|
Details
|


|
|
05-01-2008
|
0.10
|
Photos-Dimpled Holes Flattened Out
|
|


 |
|
04-30-2008
|
2.00
|
Installed Nutplates in Seat Interior Ribs
|
Details
|


|
|
04-29-2008
|
1.00
|
Finished Drilling Aft Seat Floors to Ribs
|
Details
|
   |
|
04-28-2008
|
0.10
|
Photos-EF-601 Clecoed to Floor/Flap Actuator Posit
|
Details
|


|
|
04-28-2008
|
0.10
|
Photo-Flap Motor next to EF-606 Bracket
|
Details
|

 |
|
04-28-2008
|
3.50
|
Drilled EF-603 to EF-601/Floor/F-605C
|
Details
|


|
|
04-25-2008
|
1.00
|
Trimmed Top of EF-601
|
Details
|


 |
|
04-24-2008
|
1.50
|
Template for Left Flap Brace Cover
|
Details
|
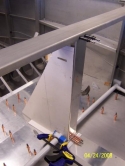
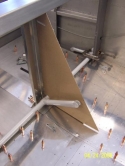
|
|
04-23-2008
|
0.10
|
Photos-Flap Actuator in Place
|
Details
|


|
|
04-23-2008
|
0.10
|
Photos-F-661EF Bushing Blocks in Place
|
Details
|


|
|
04-23-2008
|
4.50
|
Made Flap Actuator Brackets
|
Details
|


|
|
04-22-2008
|
0.10
|
Photos-Flap Brace and Nutplates
|
Details
|


|
|
04-22-2008
|
4.00
|
Drilled Aft Flap Brace/Installed Baggage Center Co
|
Details
|


|
|
04-21-2008
|
5.50
|
Drilled Seat Hinges to Floor/Drilled Flap Bushing
|
Details
|


|
|
04-18-2008
|
0.30
|
Conversation w/John-Smoking Airplanes.com
|
Details
|

  |
|
04-17-2008
|
1.00
|
Drilled Pilot Holes in Seat Floor Hinges
|
Details
|

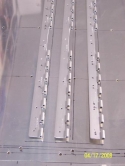

|
|
04-16-2008
|
0.10
|
Redrilled Inboard Ribs for F-648 Plate-Photos
|
|


 |
|
04-16-2008
|
3.50
|
Redrilled Inboard Ribs for F-648 Plate
|
Details
|


|
|
04-15-2008
|
0.10
|
Drilled F-642 Right Seat Floor to Ribs-Photos
|
Details
|


 |
|
04-15-2008
|
4.70
|
Drilled F-642 Right Seat Floor to Ribs
|
Details
|

|
|
04-14-2008
|
2.00
|
Trimmed F-642 Right Seat
|
Details
|


|
|
04-08-2008
|
3.50
|
Drilled F-642 Left Seat Floor to Ribs
|
Details
|


|
|
04-07-2008
|
3.50
|
Finished Trimming F-642 Left Floor
|
Details
|


|
|
04-02-2008
|
3.50
|
Trimmed F-642 Left Seat Floor
|
Details
|


|
|
04-01-2008
|
3.50
|
Riveted Nutplates at Aft Baggage Flange
|
Details
|

|
|
03-27-2008
|
4.00
|
Cut out Cardboard Pattern for Seat Floor/Flap Brac
|
Details
|

|
|
03-26-2008
|
3.00
|
Installed Nutplates in Baggage Ribs
|
Details
|


|
|
03-25-2008
|
1.00
|
Drilled F-648 Baggage Center Plate
|
Details
|


|
|
03-25-2008
|
0.10
|
Aft Baggage Floor/Misaligned Hole in Baggage Bulkh
|
Details
|

|
|
03-24-2008
|
2.50
|
Installed Baggage Center Plate/Rotary Buckle Repla
|
Details
|

  |
|
03-20-2008
|
2.50
|
Reamed Out Holes in Baggage Floor
|
Details
|
  |
|
03-19-2008
|
0.10
|
Swapped Roll Servo for Pitch Servo-Photos
|
|

|
|
03-19-2008
|
2.50
|
Swapped Roll Servo for Pitch Servo
|
Details
|


|
|
03-18-2008
|
5.50
|
Route Rudder Cable/Cut Hole in Left Side of Fusela
|
Details
|


|
|
03-17-2008
|
0.10
|
TruTrak Pitch Servo/Rudder Cables Installed-Photos
|
|

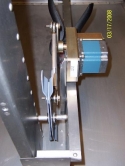
|
|
03-17-2008
|
0.10
|
TruTrak Pitch Servo/Rudder Cables Installed-Photos
|
|


|
|
03-17-2008
|
5.30
|
TruTrak Pitch Servo/Rudder Cables Installed
|
Details
|


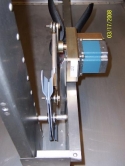
|
|
03-17-2008
|
0.10
|
Rudder Cables Installed-Photos
|
|


|
|
03-14-2008
|
1.00
|
Positioned Pitch Servo and Bracket
|
Details
|

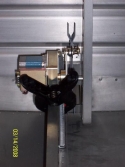

|
|
03-13-2008
|
0.10
|
Modifying Elevator Bellcrank for TruTrak Pitch Ser
|
Details
|
   |
|
03-13-2008
|
3.50
|
Inserted AN3-56 Bolts in Right Rudder Pedals
|
Details
|


 |
|
03-12-2008
|
4.50
|
Drill Left Side of Pedals to Master Brake Cylinder
|
Details
|
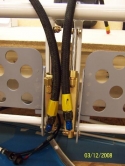


|
|
03-11-2008
|
2.00
|
Colored Blueprint Drawings
|
Details
|


 |
|
03-06-2008
|
0.10
|
Rudder Pedal Assemblies-Photos
|
Details
|

|
|
03-06-2008
|
3.50
|
Rudder Pedal Assemblies
|
Details
|


|
|
03-04-2008
|
4.00
|
Drilled Pedal Bearing Blocks/Positioned Rudder Tor
|
Details
|


|
|
03-03-2008
|
3.50
|
Corrected Rivets on Rudder Pedals/Bolted Pedals to
|
Details
|


 |
|
03-02-2008
|
3.50
|
Riveted Rudder Pedal Components Together
|
Details
|


|
|
03-01-2008
|
6.00
|
Finished Rotating Fuselage Stand/Primed Rudder Ped
|
Details
|


|
|
02-28-2008
|
1.00
|
Drilled Holes in Rotating Fuselage Bracket
|
Details
|

 |
|
02-24-2008
|
2.00
|
Set up Rotating Engine Stand
|
Details
|


|
|
02-23-2008
|
2.50
|
Made Fuselage Rotating Stand Brackets
|
Details
|
   |
|
02-23-2008
|
1.50
|
Drilled Brackets to Rudder Pedals
|
Details
|
   |
|
02-22-2008
|
2.50
|
Made Rudder Pedal Brackets
|
Details
|
   |
|
02-20-2008
|
3.00
|
Work on Rudder Pedals
|
Details
|
   |
|
02-19-2008
|
0.10
|
Completed Storing Tools and Parts
|
Details
|
   |
|
02-16-2008
|
0.10
|
Hung Another Shop Light over Work Bench
|
Details
|
   |
|
02-15-2008
|
0.10
|
Hung Shop Light
|
Details
|
   |
|
02-14-2008
|
0.10
|
Photos-Wall Decorations
|
|


 |
|
02-14-2008
|
0.10
|
Decorated Walls/Disassembled Longeron Crate
|
Details
|


|
|
02-13-2008
|
0.10
|
Photo-Shelves in Place
|
Details
|

  |
|
02-13-2008
|
0.10
|
Hung Shorter Shelf/Cleaned up Shop/Set up Plans
|
Details
|


|
|
02-12-2008
|
0.10
|
Finished Small Work Table/Hung 2nd Cupboard on Wal
|
Details
|

 |
|
02-11-2008
|
0.10
|
Built Smaller Work Table and Set up Workbench Acce
|
Details
|

 |
|
02-08-2008
|
0.10
|
Finished 2nd Workbench and Set Up Tables against W
|
Details
|

  |
|
02-07-2008
|
0.10
|
First Workbench Built
|
Details
|

  |
|
02-06-2008
|
0.10
|
Cupboard Hung and Took Compressor to Shop
|
Details
|


|
|
02-05-2008
|
0.10
|
Put up Shelving Units and Pegboards
|
Details
|

 |
|
01-30-2008
|
0.10
|
Photos-Shelving and Wall Decorations
|
|


 |
|
01-30-2008
|
0.10
|
Hung Wall Shelves for Tail/Control Surfaces
|
Details
|


|
|
01-29-2008
|
0.10
|
Photos-After Move-in
|
|


|
|
01-29-2008
|
0.10
|
Moved Aircraft from Old to New Shop
|
Details
|


|
|
01-28-2008
|
0.10
|
Took Tools/Supplies from Home/Tool Chest
|
Details
|


|
|
01-27-2008
|
0.10
|
Prepared Shop for Moving
|
Details
|
   |
|
01-22-2008
|
0.10
|
Painted Walls and Ceilings
|
Details
|
   |
|
01-21-2008
|
0.10
|
Finished Walls and Electrical Plugs/Hung Flouresce
|
Details
|


|
|
01-17-2008
|
0.10
|
Put up Ceiling and Started on Walls
|
Details
|
   |
|
01-16-2008
|
0.10
|
Insulation, Hung Ceiling and Heater
|
Details
|


|
|
01-15-2008
|
0.10
|
Insulation and Electrical
|
Details
|


|
|
01-14-2008
|
0.10
|
Installed Wall Framing
|
Details
|


|
|
01-11-2008
|
0.10
|
Poured Concrete Floor
|
Details
|
   |
|
01-11-2008
|
3.00
|
Drilled Engine Mount to Firewall
|
Details
|


 |
|
01-09-2008
|
0.10
|
Spread Gravel Prior to Laying Concrete
|
Details
|
   |
|
01-08-2008
|
0.10
|
Clean up Shop
|
Details
|


 |
|
01-07-2008
|
0.10
|
Met w/Jeff Paden re New Shop
|
Details
|
   |
|
01-07-2008
|
0.50
|
Filed Edges of Bulkhead F-610
|
Details
|
   |
|
12-19-2007
|
0.50
|
Lightening Hole in Bulkhead F-610
|
Details
|
   |
|
12-19-2007
|
2.00
|
Drilled Bolt Holes in Rudder Brace/Lightening Hole
|
Details
|
   |
|
12-13-2007
|
2.50
|
Modifying Crotch Straps Attach Brackets
|
Details
|
   |
|
12-11-2007
|
0.50
|
Smooth Edges of Crotch Strap Attach Brackets
|
Details
|
   |
|
12-06-2007
|
3.00
|
Lighening Holes in Seat Back Braces/Seat Cushions
|
Details
|


|
|
12-04-2007
|
0.10
|
Photos-Radio Stack Construction-Aerotronics
|
Details
|


|
|
12-04-2007
|
0.10
|
Photo-Dynon EFIS Mounting Bracket
|
|

  |
|
12-04-2007
|
0.10
|
Photo-Baggage Floor Panels after Tack Rivets Remov
|
|

  |
|
12-04-2007
|
3.00
|
Drilled out Tack Rivets in Baggage Area/Cleaned up
|
Details
|


|
|
12-03-2007
|
2.50
|
Worked on Fuselage Bulkhead F-609/Drilled Hole in
|
Details
|


|
|
12-03-2007
|
0.80
|
Dried Out Dessicant Plugs
|
Details
|


|
|
11-30-2007
|
0.10
|
Fuselage Hole that Needs to be Drilled out/Dimpled
|
Details
|


|
|
11-30-2007
|
3.00
|
Drilled Shoulder Harness Anchors/Worked on Fuselag
|
Details
|


 |
|
11-29-2007
|
3.00
|
Primed/Riveted Elevator Bellcrank
|
Details
|


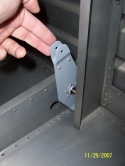
|
|
11-29-2007
|
0.10
|
Photos-Primed/Riveted Elevator Bellcrank
|
|
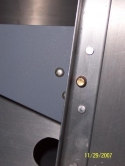
  |
|
11-28-2007
|
0.80
|
Talked with Isaac-Aerotronics re Panel Changes
|
Details
|
   |
|
11-27-2007
|
3.00
|
Started Work on Elevator Bellcrank
|
Details
|

  |
|
11-26-2007
|
0.10
|
Photos-Poster Board in Position
|
Details
|


|
|
11-26-2007
|
0.10
|
Photos-Poster Board in Position
|
Details
|


|
|
11-26-2007
|
0.10
|
Photos-Poster Board in Position
|
Details
|

  |
|
11-26-2007
|
1.50
|
Final Trimming of Plastic Panel/Shipped Plastic Pa
|
Details
|


|
|
11-23-2007
|
2.00
|
Riveted Template to Right Side of Plastic Panel
|
Details
|


 |
|
11-16-2007
|
0.10
|
Photo-Lower Portion of Template on Left Side
|
|
  |
|
11-16-2007
|
1.50
|
Make Template for Left Side of Instrument Panel
|
Details
|


|
|
11-15-2007
|
0.30
|
Jason-Aerotronics-WigWag, Avionics Switch, ELT swa
|
Details
|
   |
|
11-10-2007
|
3.00
|
Placed 2nd Plastic Panel in Place to Check for Fit
|
Details
|


|
|
11-10-2007
|
0.10
|
Photos-Plastic Panel Clamped in Place/Cardboard Pa
|
|


|
|
11-08-2007
|
0.10
|
Received Second Plastic Panel
|
Details
|
   |
|
11-07-2007
|
4.00
|
Riveted Control Mount Brackets to Main Spar
|
Details
|

|
|
11-07-2007
|
0.10
|
Photos-Filed Seat Ribs for Control Stick Clearance
|
|


|
|
11-07-2007
|
0.10
|
Photos-Filed Seat Ribs for Control Movement/Forwar
|
|


|
|
11-07-2007
|
0.10
|
Photo-Right Seat Pan with Excess Cutout
|
Details
|

  |
|
11-06-2007
|
3.00
|
Control Stick Assembly Connected in Fuselage/Drill
|
Details
|

|
|
11-02-2007
|
3.00
|
Took Wood Spar out of Fuselage
|
Details
|


|
|
11-01-2007
|
2.00
|
Control Stick Assembly in Fuselage/Hung Canopy in
|
Details
|


 |
|
10-30-2007
|
2.00
|
Control Stick Assembly
|
Details
|


|
|
10-29-2007
|
1.00
|
Organized Drawings
|
Details
|
   |
|
10-26-2007
|
0.10
|
Checked Fit of Instrument Panel in Fuselage-Photos
|
Details
|

|
|
10-26-2007
|
0.10
|
Checked Fit of Instrument Panel in Fuselage-Photos
|
Details
|


|
|
10-26-2007
|
1.00
|
Checked Fit of Instrument Panel in Fuselage
|
Details
|


|
|
10-25-2007
|
2.00
|
Decided Upon Position of TruTrak Pilot II in Panel
|
Details
|
   |
|
10-24-2007
|
3.50
|
Prosealed Right Fuel Tank Cover Plate in Place
|
Details
|

|
|
10-22-2007
|
0.50
|
Fit Plastic Panel in Fuselage
|
Details
|


|
|
10-20-2007
|
0.10
|
Received First Plastic Cutout of Instrument Panel
|
Details
|
   |
|
10-14-2007
|
1.00
|
Swept Out Fuselage
|
Details
|


|
|
10-10-2007
|
3.00
|
Prosealed Left Fuel Tank Cover Plate
|
Details
|
 |
|
10-09-2007
|
1.00
|
Drilled Trim Spar to New Trim Tab
|
Details
|
   |
|
10-08-2007
|
1.00
|
Cleaned Fuel Tank w/MEK--Reprimed Trim Tab Attach
|
Details
|
   |
|
10-03-2007
|
0.10
|
Tested Fuel Sending Units
|
Details
|


|
|
10-03-2007
|
2.00
|
Reworked Trim Tab
|
Details
|


 |
|
10-02-2007
|
4.00
|
Proseal Right Baffle Rivets
|
Details
|


|
|
10-02-2007
|
0.10
|
Proseal Corner of Tank-Photo
|
Details
|
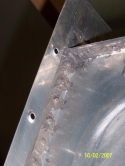
  |
|
10-02-2007
|
0.10
|
Primed Replacement Trim Tab
|
Details
|

  |
|
10-01-2007
|
3.00
|
Prosealed Rivet Heads on Right Baffle
|
Details
|


|
|
10-01-2007
|
0.10
|
Photo-Left and Right Baffles with Rivets Prosealed
|
Details
|


|
|
09-25-2007
|
6.50
|
Riveted Baffle to Left Tank
|
Details
|


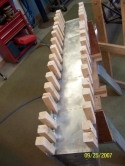
|
|
09-25-2007
|
2.00
|
Riveted Baffle to Left Tank
|
Details
|


|
|
09-25-2007
|
0.10
|
Left Tank Interior Photos
|
Details
|
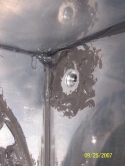
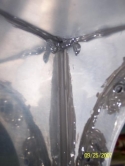
 |
|
09-25-2007
|
0.10
|
Left Outboard End Rib-Photos
|
Details
|


|
|
09-24-2007
|
0.10
|
Ready Left Tank/Baffle for Riveting-Photos
|
Details
|


|
|
09-24-2007
|
2.00
|
Prosealed Left Inboard Rib/Check Left Tank
|
Details
|


|
|
09-24-2007
|
0.10
|
Photos-Ready Left Tank/Baffle for Riveting
|
Details
|

  |
|
09-23-2007
|
7.50
|
Riveted Baffle to Right Fuel Tank/Fixed Ding
|
Details
|


|
|
09-23-2007
|
2.00
|
Riveted Baffle to Right Fuel Tank
|
Details
|
   |
|
09-18-2007
|
2.00
|
Notched Clamping Boards for Tank Baffle/Skin
|
Details
|
   |
|
09-16-2007
|
0.50
|
Cut Clamping Boards for Fuel Tanks
|
Details
|
   |
|
09-12-2007
|
1.00
|
Left Fuel Tank Inboard Rib
|
Details
|
   |
|
09-11-2007
|
3.50
|
Riveted Left Tank-Inboard Rib
|
Details
|

|
|
09-08-2007
|
4.00
|
Left & Right Tank Vent Lines
|
Details
|
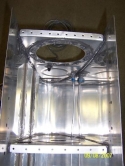
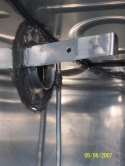
 |
|
09-07-2007
|
5.00
|
Right Tank-Riveted Inboard End Rib
|
Details
|


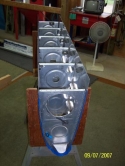
|
|
09-07-2007
|
0.10
|
Photos-Right Inboard Rib
|
Details
|
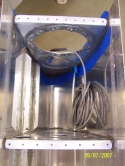

|
|
09-06-2007
|
0.10
|
Workshop Set-up for Prosealing
|
Details
|


|
|
09-06-2007
|
4.50
|
Left & Right Tank Outboard Ribs Riveted
|
Details
|


|
|
09-05-2007
|
5.00
|
Left Tank-Riveted Outboard End Rib
|
Details
|
|
|
09-04-2007
|
5.00
|
Riveted Ribs 1 & 4-Left Tank
|
Details
|


|
|
08-29-2007
|
3.30
|
Rib 2 Riveted to Left Tank
|
Details
|

|
|
08-29-2007
|
0.10
|
Photos-Ribs 2 and 3 in Left Tank after Riveting
|
Details
|
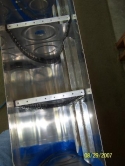
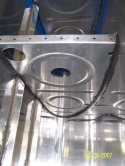
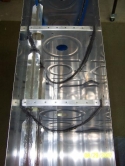
|
|
08-28-2007
|
4.00
|
Riveted Rib 3 into Left Fuel Tank
|
Details
|
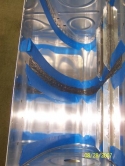
|
|
08-28-2007
|
0.10
|
Rib 3 in Position in Left Tank
|
Details
|
  |
|
08-27-2007
|
0.80
|
Right Tank, Rib 1-Check Pushed-Over Rivet
|
Details
|
   |
|
08-25-2007
|
5.00
|
Riveted Ribs 1 & 2 to Right Tank #1
|
Details
|

|
|
08-25-2007
|
0.10
|
Photos-Riveted Ribs 1 & 2 to Right Tank #3
|
Details
|
|
|
08-25-2007
|
0.10
|
Photos-Riveted Ribs 1 & 2 to Right Tank #2
|
Details
|
|
|
08-25-2007
|
0.10
|
Photo-Riveted Ribs 1 & 2 to Right Tank #4
|
Details
|
  |
|
08-24-2007
|
0.80
|
Touchup Proseal on Ribs 3 & 4-Right Tank
|
Details
|
  |
|
08-21-2007
|
3.50
|
Finish Riveting Ribs 3 & 4-Right Tank
|
Details
|


|
|
08-21-2007
|
0.10
|
Finish Riveting Ribs 3 & 4-Right Tank
|
Details
|


|
|
08-19-2007
|
2.50
|
Drilled Out Two Rivets in Tank Ribs
|
Details
|


|
|
08-19-2007
|
2.00
|
Drilled Out Two Rivets in Tank Ribs
|
Details
|
  |
|
08-17-2007
|
7.50
|
Rivet Half of Two Ribs (3 & 4) on Left Tank
|
Details
|


|
|
08-17-2007
|
3.50
|
Rivet First Rib to Left Tank
|
Details
|

 |
|
08-16-2007
|
3.50
|
Prep Work-Riveting Ribs to Tank Skins
|
Details
|


|
|
08-16-2007
|
0.10
|
Prep Work-Riveting Ribs to Tank Skins
|
Details
|


|
|
08-11-2007
|
0.50
|
Dry Out Dessicant Plugs in Engine
|
Details
|
   |
|
08-11-2007
|
0.50
|
Dry Out Dessicant Plugs
|
Details
|
   |
|
08-07-2007
|
5.50
|
Rivet Misc. Stuff on Outboard Ribs
|
Details
|


|
|
08-07-2007
|
0.10
|
Photos-Prosealing End Ribs/Tank Covers
|
Details
|


|
|
08-02-2007
|
5.50
|
Rivet Outboard Tank Ribs Misc. Stuff
|
Details
|


|
|
08-02-2007
|
0.10
|
Rivet Outboard Tank Ribs Misc. Stuff
|
Details
|


|
|
08-02-2007
|
0.10
|
Rivet Outboard Tank Ribs Misc. Stuff
|
Details
|


|
|
08-02-2007
|
0.10
|
Rivet Outboard Tank Ribs Misc. Stuff
|
Details
|


 |
|
08-01-2007
|
3.00
|
Rivet Right Filler Vent and Vent Fitting
|
Details
|


|
|
07-23-2007
|
2.00
|
Meeting with Gary Wirrell-Aerotronics
|
Details
|
   |
|
07-18-2007
|
3.50
|
Rivet Left Filler Vent/Both Fuel Drains
|
Details
|


|
|
07-18-2007
|
0.10
|
Photos-Right Fuel Drain/Exterior Filler Vent
|
Details
|


|
|
07-16-2007
|
0.10
|
Rivet Remaining Tank Stiffeners-Photo Sequence #3
|
Details
|


|
|
07-16-2007
|
0.10
|
Rivet Remaining Tank Stiffeners-Photo Sequence #2
|
Details
|


|
|
07-16-2007
|
5.00
|
Rivet Remaining Tank Stiffeners-Photo Sequence #1
|
Details
|


|
|
07-16-2007
|
0.10
|
Left Tank-Completed Tank Stiffeners Riveted-Photo
|
Details
|


|
|
07-10-2007
|
0.10
|
Prosealing Stiffeners to Left/Right Tanks
|
Details
|


|
|
07-10-2007
|
6.50
|
ProSeal Eight Stiffeners to Left/Right Tanks
|
Details
|


|
|
07-10-2007
|
0.10
|
Prep Work-Prosealing Stiffeners to Left Tank
|
Details
|


|
|
07-10-2007
|
0.10
|
Prep Work-Left Tank Stiffeners
|
Details
|


|
|
07-09-2007
|
4.00
|
Prosealed Four Stiffeners to Right Tank
|
Details
|


|
|
07-09-2007
|
2.00
|
Help with Initial ProSealing
|
Details
|


|
|
07-02-2007
|
2.50
|
Countersunk Left Tank Skin/Baffle
|
Details
|


|
|
06-27-2007
|
2.50
|
Scuffed Tank Baffles, Stiffeners, Ribs
|
Details
|


|
|
06-26-2007
|
1.50
|
Scuff Tank Ribs, Skins & Baffles
|
Details
|


|
|
06-25-2007
|
2.00
|
Left Aileron Gap Fairing to Spar--LW Complete!
|
Details
|


 |
|
06-24-2007
|
0.50
|
Tank Vent Holders, Enlarged Tank Vent Holes
|
Details
|
   |
|
06-23-2007
|
1.50
|
Tank Reinforcement Rib Drilled to Rib
|
Details
|
   |
|
06-21-2007
|
0.50
|
Countersink Holes in Fuel Sender Covers
|
Details
|
   |
|
06-08-2007
|
1.00
|
Drilled Tank Anti-Rotational Brackets to Cover
|
Details
|
   |
|
06-05-2007
|
3.00
|
Fuel Tank Float Sensor Rods-Replaced
|
Details
|
   |
|
06-04-2007
|
1.00
|
Fuel Tanks-Fuel Guardian Sensor Holes
|
Details
|
   |
|
05-31-2007
|
2.00
|
Riveted Aileron Gap Fairing to Left Top Skin
|
Details
|


|
|
05-30-2007
|
3.50
|
Riveted Top Outboard Skin to Ribs
|
Details
|


|
|
05-30-2007
|
3.50
|
Riveted Top Outboard Skin to Ribs
|
Details
|
  |
|
05-22-2007
|
0.50
|
Fuel Tank Interior Vent Holes
|
Details
|
   |
|
05-09-2007
|
0.50
|
Drilled to Fuel Tank Inboard Rib
|
|
   |
|
05-02-2007
|
3.00
|
Riveting Outboard Left Top Skin
|
Details
|
  |
|
05-02-2007
|
4.00
|
Redid Pitot Tubing/Riveting Outboard Top Left Skin
|
Details
|


|
|
04-26-2007
|
2.00
|
Pitot Tubing Routing/Priming of Left Outboard Top
|
Details
|


 |
|
04-25-2007
|
3.50
|
Pitot Tube and Tubing
|
Details
|


|
|
04-24-2007
|
3.00
|
Riveted Inboard Left Skin to Ribs 6 & 7
|
Details
|


|
|
04-24-2007
|
0.00
|
More Pictures on Left Top Inboard Skin
|
Details
|


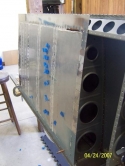
|
|
04-23-2007
|
3.00
|
Riveted Inboard Left Wing Skin to Spars
|
Details
|


|
|
04-19-2007
|
2.50
|
Riveted Left Top Skin and Doubler to Ribs 1-4
|
Details
|
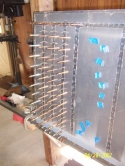
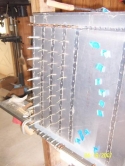
|
|
04-18-2007
|
2.00
|
Begin to Rivet Left Inboard Top Skin
|
Details
|

 |
|
04-16-2007
|
3.00
|
Rivet Flap Brace and Aileron Hinge Bracket
|
Details
|
  |
|
04-15-2007
|
1.00
|
Rivet Flap Brace to Skin
|
Details
|
  |
|
04-14-2007
|
0.50
|
Bent Hook into Flap Hinge Pin
|
Details
|

  |
|
04-14-2007
|
2.50
|
Aileron Control Rod Spacer/Aileron Movement
|
Details
|
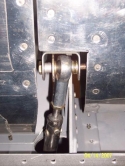
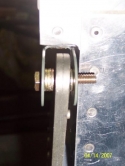
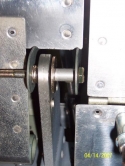
|
|
04-02-2007
|
0.50
|
Made Spacer for Aileron Hinge Bracket
|
Details
|

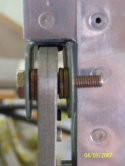
 |
|
04-01-2007
|
1.50
|
Trimmed Corner of Flap Brace
|
Details
|

|
|
03-26-2007
|
1.50
|
Aileron Range of Movement
|
Details
|


|
|
03-24-2007
|
1.50
|
Completed Work on Aileron Control Rod
|
Details
|

  |
|
03-17-2007
|
1.50
|
Riveted Outboard Aileron Hinge Bracket
|
Details
|


|
|
03-16-2007
|
1.50
|
Flap Brace Trimming/Clean up Corrosion
|
Details
|


 |
|
03-14-2007
|
2.00
|
Hole for Aileron Control Rod
|
Details
|

 |
|
03-11-2007
|
1.50
|
Drilled Aileron Gap Seal to Spar
|
Details
|


|
|
03-04-2007
|
3.50
|
Drilled Aileron to Inboard Hinge
|
Details
|
|
|
03-04-2007
|
3.50
|
Drilled Aileron to Inboard Hinge
|
Details
|


 |
|
03-03-2007
|
2.50
|
Left Aileron Gap Seal
|
Details
|


 |
|
03-02-2007
|
2.00
|
Pick Up Engine-Yellow Freight
|
Details
|

 |
|
03-02-2007
|
1.50
|
Left Inboard Aileron Hinge Bracket
|
Details
|

  |
|
03-02-2007
|
2.00
|
Help Pick Up Engine
|
Details
|
   |
|
03-01-2007
|
3.00
|
Left Flap Brace
|
Details
|


|
|
02-22-2007
|
0.20
|
Final Payment-Engine
|
Details
|
   |
|
02-21-2007
|
2.50
|
Left Flap Brace
|
Details
|

  |
|
02-20-2007
|
2.00
|
Right Rear Spar/Left Flap Brace
|
Details
|


|
|
02-19-2007
|
3.50
|
Left Flap on Spar
|
Details
|

|
|
02-19-2007
|
0.20
|
Engine Order
|
Details
|
   |
|
02-17-2007
|
1.50
|
Left Spar on Jig
|
Details
|


|
|
02-16-2007
|
1.50
|
Leveling Left Spar/Aileron Bracket
|
Details
|

 |
|
02-16-2007
|
0.00
|
Engine Construction
|
Details
|
   |
|
02-13-2007
|
2.00
|
Left Outboard Aileron Bracket
|
Details
|
   |
|
02-12-2007
|
1.00
|
Visit Superior Air Parts
|
Details
|


|
|
02-10-2007
|
1.00
|
Pitot Tubing Clamps
|
Details
|

  |
|
02-10-2007
|
1.70
|
Flap Brace Modified/Aileron Bracket W-413 Modified
|
Details
|


 |
|
02-09-2007
|
1.00
|
Pitot Tubing
|
Details
|


 |
|
02-08-2007
|
1.00
|
Turned Left Wing over in Jig
|
Details
|
   |
|
02-07-2007
|
3.00
|
Riveted Left Bottom Outboard Skins
|
Details
|
   |
|
02-07-2007
|
4.00
|
Finished Riveting Left Bottom Outboard Skin
|
Details
|
   |
|
02-06-2007
|
3.00
|
Riveted Left Inboard Bottom Skin
|
Details
|
   |
|
02-05-2007
|
2.00
|
Finished Left LE Skin Riveting/Started Bottom Skin
|
Details
|
   |
|
02-04-2007
|
2.00
|
Rivet Left LE Skin to Spar
|
Details
|
|
|
02-02-2007
|
2.00
|
Attach Left LE to Spar
|
Details
|
   |
|
02-02-2007
|
2.00
|
Attach LE Skin to Spar
|
Details
|
   |
|
01-27-2007
|
2.00
|
Left Leading Edge Skin
|
Details
|
   |
|
01-25-2007
|
0.50
|
Engine Order Modification
|
Details
|
   |
|
01-24-2007
|
1.00
|
Engine Order
|
Details
|

  |
|
01-23-2007
|
3.00
|
Pitot Tubing
|
Details
|
   |
|
01-23-2007
|
4.00
|
Pitot Tubing
|
Details
|
   |
|
01-19-2007
|
2.00
|
Order Superior Engine
|
Details
|

  |
|
01-04-2007
|
0.50
|
Fuel Tank Covers
|
Details
|
   |
|
01-02-2007
|
2.00
|
Fuel Tank Anti-Rotation Brackets/Quantity Tabs
|
Details
|
   |
|
12-20-2006
|
1.50
|
Pitot Tubing
|
Details
|
   |
|
12-19-2006
|
1.50
|
Pitot Tube
|
Details
|
|
|
12-16-2006
|
3.00
|
Pitot Tube Bracket
|
Details
|

  |
|
11-17-2006
|
3.00
|
Pitot Tube Bracket
|
Details
|
   |
|
11-16-2006
|
2.00
|
Pitot Tube Bracket
|
Details
|
   |
|
11-09-2006
|
2.00
|
Pitot Tube Bracket
|
Details
|
   |
|
04-07-2006
|
1.00
|
Main Spar
|
Details
|
   |
|
02-17-2006
|
1.50
|
Main Spar Cleanup
|
Details
|
   |
|
01-13-2006
|
2.50
|
Camloc Order/W-425 Rib/Spacers
|
Details
|
   |
|
01-11-2006
|
1.00
|
W-425 Rib
|
Details
|
   |
|
10-30-2005
|
1.00
|
Rib 9A/Rear Spar
|
Details
|

  |
|
10-12-2005
|
5.00
|
Doublers-LW Spar
|
Details
|


|
|
10-11-2005
|
1.00
|
Doublers-LW Spar
|
Details
|


 |
|
10-05-2005
|
0.50
|
Fuel Tank Anti-Rotational Brackets
|
Details
|
   |
|
09-30-2005
|
0.50
|
Fuel Tank Anti-Rotational Brackets
|
Details
|
   |
|
09-28-2005
|
1.50
|
Doublers-Left Wing Spar
|
Details
|
   |
|
09-21-2005
|
1.00
|
Doublers-LW Spar
|
Details
|
   |
|
09-20-2005
|
1.00
|
Doublers-LW Spar
|
Details
|
   |
|
08-20-2005
|
1.50
|
Doublers-Left Wing Spar
|
Details
|
   |
|
04-01-2005
|
2.00
|
Doublers-Left Wing Spar
|
Details
|
   |
|
03-19-2005
|
2.00
|
Inventory
|
Details
|
   |
|
03-18-2005
|
2.50
|
Left Wing Spar
|
Details
|
   |
|
03-09-2005
|
1.50
|
Inventory
|
Details
|
   |
|
03-09-2005
|
1.50
|
Inventory
|
Details
|
   |
|
03-02-2005
|
1.00
|
Inventory
|
Details
|
   |
|
03-02-2005
|
1.00
|
Inventory
|
Details
|
   |
|
03-01-2005
|
0.50
|
Inventory parts
|
Details
|
   |
|
02-17-2005
|
3.50
|
Inventory Kit
|
Details
|
   |
|
02-06-2005
|
2.00
|
Move part of Finish Kit
|
Details
|
   |
|
01-27-2005
|
4.00
|
Delivery of Finish Kit
|
Details
|


 |
|
01-10-2005
|
1.50
|
Nutplates-Left Wing
|
Details
|
   |
|
12-31-2004
|
2.00
|
Nutplates-Left Wing
|
Details
|
   |
|
12-08-2004
|
1.00
|
Nutplates-Left Wing
|
Details
|
   |
|
12-07-2004
|
0.50
|
Left Wing Nutplates
|
Details
|
   |
|
12-02-2004
|
1.00
|
Nutplates-Left Wing
|
Details
|
   |
|
12-01-2004
|
2.00
|
Nutplates-Left Wing
|
Details
|
   |
|
11-30-2004
|
2.00
|
Nutplates-Left Wing
|
Details
|
   |
|
11-27-2004
|
2.50
|
Left Wing Skins
|
Details
|
   |
|
11-22-2004
|
1.50
|
Left Wing Top Skins
|
Details
|
   |
|
11-17-2004
|
1.00
|
Order Finish Kit
|
Details
|
   |
|
11-16-2004
|
1.50
|
LE Skin
|
Details
|
   |
|
11-10-2004
|
1.00
|
LE Skin
|
Details
|
   |
|
11-07-2004
|
1.00
|
LE Ribs
|
Details
|
   |
|
11-02-2004
|
2.00
|
LE Skin/Ribs
|
Details
|
   |
|
11-01-2004
|
1.50
|
LE Skin
|
Details
|
   |
|
06-10-2004
|
2.00
|
Fuel Tank
|
Details
|
   |
|
05-27-2004
|
1.00
|
Fuel Tank
|
Details
|
   |
|
04-20-2004
|
2.00
|
Fuel Tank
|
Details
|
   |
|
03-19-2004
|
1.50
|
Fuel Tank
|
Details
|
   |
|
03-18-2004
|
2.50
|
Fuel Tank
|
Details
|
   |
|
03-14-2004
|
2.50
|
Fuel Tank Skin
|
Details
|
   |
|
03-12-2004
|
2.00
|
Fuel Tank Skin
|
Details
|
   |
|
03-10-2004
|
2.00
|
Fuel Tank Skin
|
Details
|
   |
|
03-09-2004
|
3.00
|
Fuel Tank Skin
|
Details
|
   |
|
03-08-2004
|
2.00
|
Fuel Tank Skins
|
Details
|
   |
|
03-02-2004
|
2.50
|
Drilled LE Skin to Ribs
|
Details
|
   |
|
02-20-2004
|
1.50
|
Drilled LE Skin to Ribs
|
Details
|
   |
|
02-13-2004
|
2.00
|
LE Skin Positioning
|
Details
|
   |
|
02-13-2004
|
0.50
|
LE Skin Positioning
|
Details
|
   |
|
02-11-2004
|
1.50
|
LE Skin Placement
|
Details
|
   |
|
01-17-2004
|
2.50
|
Tank Skin
|
Details
|
   |
|
01-16-2004
|
0.50
|
Tank Brackets
|
Details
|
   |
|
01-16-2004
|
2.50
|
LE/Tank Skins
|
Details
|
   |
|
01-15-2004
|
2.00
|
Tank Skin
|
Details
|
   |
|
01-14-2004
|
1.00
|
Tank Ribs
|
Details
|
   |
|
01-10-2004
|
0.50
|
Taped Nose of Left Wing LE Ribs
|
Details
|


 |
|
01-07-2004
|
1.00
|
Tank Ribs
|
Details
|
   |
|
01-07-2004
|
0.50
|
Fluting Tank Ribs
|
Details
|
   |
|
01-06-2004
|
2.00
|
Tank Skins
|
Details
|
   |
|
01-03-2004
|
2.00
|
Tank Stiffeners
|
Details
|
   |
|
12-27-2003
|
2.00
|
Outboard Skin/Tank Ribs
|
Details
|
   |
|
12-11-2003
|
1.50
|
LE Skin
|
Details
|
   |
|
12-05-2003
|
2.50
|
Rib 8A rework
|
Details
|
   |
|
12-04-2003
|
2.50
|
Nutplates on Skins
|
Details
|
   |
|
12-02-2003
|
2.00
|
Access Panel
|
Details
|
   |
|
12-01-2003
|
2.00
|
Hardware in Bins/ Access Opening
|
Details
|
   |
|
11-29-2003
|
1.00
|
Hardware into Storage Bins
|
Details
|
   |
|
11-26-2003
|
2.50
|
Access Cover
|
Details
|


 |
|
11-25-2003
|
3.00
|
Dimpled Skins
|
Details
|
   |
|
11-24-2003
|
4.00
|
Fuselage Frame/Inventory Kit
|
Details
|


|
|
11-23-2003
|
1.00
|
Clean up QB Crate
|
Details
|
   |
|
11-23-2003
|
1.00
|
Clean up QB Crate
|
Details
|
   |
|
11-23-2003
|
1.00
|
Clean up QB Crate
|
Details
|
   |
|
11-23-2003
|
1.00
|
Clean up QB Crate
|
Details
|
   |
|
11-21-2003
|
1.50
|
Clean up QB Crate
|
Details
|
   |
|
11-20-2003
|
1.50
|
Clean up QB Crate
|
Details
|
   |
|
11-19-2003
|
2.00
|
Picked up Fuselage QB Kit
|
Details
|

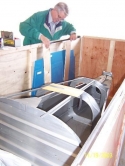

|
|
11-19-2003
|
4.00
|
Picked up Fuselage QB Kit
|
Details
|

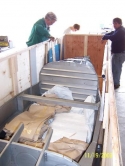

|
|
11-19-2003
|
4.00
|
P/U Fuselage QB Kit
|
Details
|


|
|
11-14-2003
|
1.50
|
Left Wing Skins
|
Details
|
   |
|
11-12-2003
|
2.00
|
Left Rear Spar
|
Details
|
   |
|
11-10-2003
|
0.00
|
Fuselage QB Kit Shipped
|
Details
|
   |
|
11-09-2003
|
1.00
|
Left Skins
|
Details
|
   |
|
11-08-2003
|
1.00
|
Left Wing Deburring
|
Details
|
   |
|
11-07-2003
|
4.50
|
Left Skins
|
Details
|
   |
|
11-07-2003
|
1.50
|
Left Skins
|
Details
|
   |
|
11-07-2003
|
1.50
|
Left Skins
|
Details
|
   |
|
11-05-2003
|
3.00
|
Left Skins
|
Details
|
   |
|
11-04-2003
|
1.00
|
Left Top Skin
|
Details
|
   |
|
11-01-2003
|
1.50
|
Left Aileron Bellcrank/Top Skin
|
Details
|
   |
|
10-31-2003
|
4.00
|
Drilled Left Top Skin to Skeleton/Stub Rib
|
Details
|
   |
|
10-29-2003
|
1.50
|
Drilled Left Top Skin to Skeleton
|
Details
|
   |
|
10-24-2003
|
4.00
|
Drilled Left Bottom Skin to Ribs
|
Details
|
   |
|
10-23-2003
|
2.00
|
Aligned Skeleton/Drilled Skin to Ribs/Spar
|
Details
|
   |
|
10-17-2003
|
2.00
|
Reset Skeleton in Jig
|
Details
|
   |
|
10-16-2003
|
1.00
|
Riveted Left Ribs to Spar
|
Details
|
   |
|
10-15-2003
|
2.00
|
Rivet Left Rear Spar to Ribs
|
Details
|
   |
|
10-14-2003
|
2.00
|
Rivet Left Rear Spar to Ribs
|
Details
|
   |
|
10-04-2003
|
2.00
|
Bolt Left Main Ribs to Spar
|
Details
|


|
|
10-03-2003
|
1.50
|
Left LE Ribs
|
Details
|
   |
|
10-02-2003
|
2.00
|
Aileron Bellcrank Holes/Reference Holes
|
Details
|
   |
|
09-15-2003
|
1.50
|
Left Aileron Bellcrank
|
Details
|


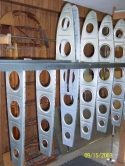
|
|
09-08-2003
|
2.50
|
Left Aileron Bellcrank
|
Details
|


|
|
07-16-2003
|
1.00
|
Left Aileron Bellcrank
|
Details
|
   |
|
07-13-2003
|
2.00
|
Countersinking/Dimpling Holes
|
Details
|
   |
|
07-04-2003
|
0.50
|
Set up Wing Skeleton
|
Details
|
   |
|
06-27-2003
|
2.00
|
How to Correct Drilling Errors on Rear Spar
|
Details
|
   |
|
06-10-2003
|
2.00
|
Left Main Ribs
|
Details
|
   |
|
06-09-2003
|
2.00
|
Left Main Ribs to Spars
|
Details
|
   |
|
06-06-2003
|
1.50
|
Left Main Ribs
|
Details
|
   |
|
06-04-2003
|
2.00
|
Left LE Ribs
|
Details
|
   |
|
06-03-2003
|
1.50
|
Left LE Ribs
|
Details
|
   |
|
05-13-2003
|
1.00
|
Left LE Ribs
|
Details
|
   |
|
04-11-2003
|
1.00
|
Left Main Rib Angle Brackets
|
Details
|
   |
|
04-04-2003
|
1.50
|
Left Leading Edge Ribs
|
Details
|
   |
|
03-25-2003
|
1.50
|
Drilled Left Main Ribs to Rear Spar
|
Details
|
   |
|
03-21-2003
|
1.00
|
Left Main Ribs/Spars
|
Details
|
   |
|
03-19-2003
|
1.50
|
Left Main Ribs
|
Details
|
   |
|
03-18-2003
|
1.50
|
Left Main Ribs
|
Details
|
   |
|
02-26-2003
|
1.50
|
Left Main Spar and Ribs
|
Details
|
   |
|
02-21-2003
|
1.00
|
Left Main Ribs
|
Details
|
   |
|
02-20-2003
|
1.00
|
Started on Left Wing
|
Details
|
   |
|
01-30-2003
|
3.00
|
Right Wing Complete!
|
Details
|
   |
|
01-17-2003
|
1.50
|
Primed Right Wing Parts/Riveted Spar to Skin
|
Details
|
   |
|
01-11-2003
|
7.50
|
Visitor/Riveted Bottom Skins
|
Details
|
   |
|
01-11-2003
|
7.50
|
Riveted Right Bottom Skins
|
Details
|
   |
|
01-09-2003
|
4.50
|
Riveted Right Bottom Outboard Skin
|
Details
|
   |
|
01-09-2003
|
3.00
|
Riveted Bottom Outboard Skin
|
Details
|
   |
|
01-08-2003
|
1.50
|
Tech Counselor Visit
|
Details
|
   |
|
01-06-2003
|
2.50
|
NavAid Bellcrank/Aileron Movement
|
Details
|
   |
|
01-03-2003
|
2.50
|
NavAid Bellcrank
|
Details
|
   |
|
01-01-2003
|
1.00
|
Aileron Movement
|
Details
|
   |
|
12-13-2002
|
1.50
|
NavAid Control Rod
|
Details
|
   |
|
12-11-2002
|
1.50
|
Right Aileron Control Rod
|
Details
|
   |
|
12-10-2002
|
2.00
|
Aileron Movement
|
Details
|
   |
|
12-10-2002
|
0.50
|
Aileron Movement
|
Details
|
   |
|
12-09-2002
|
1.50
|
Right Aileron Bracket
|
Details
|
   |
|
12-07-2002
|
0.50
|
Tap out Wing Dents
|
Details
|
   |
|
12-07-2002
|
0.50
|
Tap out Wing Dents
|
Details
|
   |
|
12-05-2002
|
1.50
|
Right Flap Trailing Edge
|
Details
|
   |
|
11-29-2002
|
3.50
|
Flap Brace Adjustment
|
Details
|
   |
|
11-12-2002
|
0.30
|
Call to Van's re Flap Brace Alignment
|
Details
|
   |
|
11-08-2002
|
2.50
|
Aligned Right Flap/Aileron
|
Details
|
   |
|
11-07-2002
|
1.50
|
Right Flap
|
Details
|
   |
|
11-01-2002
|
2.50
|
Right Flap Brace
|
Details
|
   |
|
10-31-2002
|
1.00
|
Rolled Leading Edge of Flap
|
Details
|
   |
|
10-30-2002
|
2.50
|
Riveted Right Flap Brace to Spar
|
Details
|
   |
|
10-21-2002
|
1.50
|
Aileron Gap Fairing
|
Details
|
   |
|
10-14-2002
|
2.50
|
Right Aileron Bracket
|
Details
|
   |
|
10-08-2002
|
1.00
|
Right Aileron Control Rod
|
Details
|
   |
|
10-07-2002
|
1.00
|
Aileron Control Rod
|
Details
|
   |
|
10-04-2002
|
1.00
|
Right Aileron Control Rod
|
Details
|
   |
|
08-12-2002
|
2.50
|
Aileron Control Rod Hole in Rear Spar
|
Details
|
   |
|
08-06-2002
|
1.00
|
Aileron Control Rod Hole in Rear Spar
|
Details
|
   |
|
05-29-2002
|
1.50
|
Aileron Control Rod Hole in Rear Spar
|
Details
|
   |
|
05-09-2002
|
1.00
|
Aileron Control Rod
|
Details
|
   |
|
04-20-2002
|
1.00
|
Right Aileron Control Rod
|
Details
|
   |
|
04-14-2002
|
1.50
|
Aileron Control Rod Tubes
|
Details
|
   |
|
04-12-2002
|
2.00
|
Right Aileron Bracket
|
Details
|
   |
|
03-23-2002
|
1.50
|
Right Flap Brace
|
Details
|
   |
|
03-16-2002
|
2.50
|
Right Bottom Skins/Flap Brace
|
Details
|
   |
|
02-15-2002
|
1.00
|
Right Fuel Tank Nutplates
|
Details
|
   |
|
02-15-2002
|
0.50
|
Right Fuel Tank Nutplates
|
Details
|
   |
|
01-29-2002
|
4.00
|
Right Flap Positioning
|
Details
|
   |
|
01-26-2002
|
1.50
|
Right Flap Positioning
|
Details
|
   |
|
01-24-2002
|
1.50
|
Aileron Hinge Bracket
|
Details
|
   |
|
01-22-2002
|
1.50
|
Right Aileron Bracket
|
Details
|
   |
|
01-10-2002
|
1.50
|
Right Flap Brace
|
Details
|
   |
|
12-15-2001
|
2.50
|
Aileron Positioning
|
Details
|
   |
|
12-07-2001
|
1.00
|
Aileron Gap Fairing
|
Details
|
   |
|
11-28-2001
|
2.00
|
Aileron Gap Fairing
|
Details
|
   |
|
11-27-2001
|
2.00
|
Aileron Gap Fairing
|
Details
|
   |
|
11-23-2001
|
2.50
|
Aileron Hinge Brackets
|
Details
|
   |
|
11-15-2001
|
2.50
|
Aileron Hinge Brackets
|
Details
|
   |
|
11-10-2001
|
2.00
|
Airfoil Templates
|
Details
|
   |
|
11-09-2001
|
1.50
|
Airfoil Templates
|
Details
|
   |
|
10-29-2001
|
2.00
|
Rear Spar Trimming
|
Details
|
   |
|
10-22-2001
|
2.00
|
Airfoil Templates
|
Details
|
   |
|
10-20-2001
|
1.50
|
Airfoil Templates
|
Details
|
   |
|
10-18-2001
|
2.50
|
NavAid Servo Brackets
|
Details
|
   |
|
10-16-2001
|
2.50
|
NavAid Servo Brackets
|
Details
|
   |
|
10-15-2001
|
2.00
|
NavAid Servo Brackets
|
Details
|
   |
|
10-09-2001
|
1.00
|
NavAid Servo Brackets
|
Details
|
   |
|
10-08-2001
|
2.00
|
NavAid Servo Bracket
|
Details
|
   |
|
09-06-2001
|
0.50
|
Reacquainted with project
|
Details
|
   |
|
05-18-2001
|
2.00
|
Right Wing Back on Jig
|
Details
|
   |
|
05-17-2001
|
1.50
|
Right Wing off Jig
|
Details
|
   |
|
05-03-2001
|
2.00
|
Nutplates on Right Spar
|
Details
|
   |
|
05-02-2001
|
2.00
|
Right Fuel Tank
|
Details
|
   |
|
04-21-2001
|
1.50
|
Right Fuel Tank
|
Details
|
   |
|
11-09-2000
|
1.50
|
Flaps
|
Details
|
   |
|
11-08-2000
|
3.00
|
Flaps
|
Details
|
   |
|
11-03-2000
|
1.50
|
Flaps
|
Details
|
   |
|
11-02-2000
|
1.50
|
Flaps
|
Details
|
   |
|
10-30-2000
|
1.50
|
Flaps
|
Details
|
   |
|
10-21-2000
|
2.00
|
Flaps
|
Details
|
   |
|
10-19-2000
|
2.00
|
Flaps
|
Details
|
   |
|
10-14-2000
|
3.00
|
Wing Doublers
|
Details
|
   |
|
10-08-2000
|
2.00
|
Flaps/Right Wing
|
Details
|
   |
|
09-23-2000
|
3.00
|
Flaps
|
Details
|
   |
|
09-21-2000
|
3.50
|
Flaps
|
Details
|
   |
|
08-25-2000
|
3.00
|
Flaps
|
Details
|
   |
|
08-03-2000
|
0.50
|
Flaps
|
Details
|
   |
|
05-05-2000
|
3.50
|
Flaps
|
Details
|
   |
|
05-04-2000
|
2.00
|
Flap Braces
|
Details
|
   |
|
04-21-2000
|
4.50
|
Flaps
|
Details
|
   |
|
04-21-2000
|
1.20
|
Flaps
|
Details
|
   |
|
04-20-2000
|
0.50
|
Flaps
|
Details
|
   |
|
04-18-2000
|
1.50
|
Flaps
|
Details
|
   |
|
04-08-2000
|
5.00
|
Flaps
|
Details
|
   |
|
04-08-2000
|
2.30
|
Flaps
|
Details
|
   |
|
04-07-2000
|
3.00
|
Flaps
|
Details
|
   |
|
04-06-2000
|
1.50
|
Flaps
|
Details
|
   |
|
04-04-2000
|
0.50
|
Flaps
|
Details
|
   |
|
03-19-2000
|
2.50
|
Flaps
|
Details
|
   |
|
03-18-2000
|
2.00
|
Flaps
|
Details
|
   |
|
02-26-2000
|
2.50
|
Flaps/Aileron Gap Seals
|
Details
|
   |
|
02-25-2000
|
1.50
|
Flaps/Aileron Gap Seals
|
Details
|
   |
|
12-17-1999
|
4.00
|
Flap Braces
|
Details
|
   |
|
12-16-1999
|
1.50
|
Flaps
|
Details
|
   |
|
12-15-1999
|
1.00
|
Flaps
|
Details
|
   |
|
11-19-1999
|
1.50
|
Flaps
|
Details
|
   |
|
11-13-1999
|
3.50
|
Ailerons
|
Details
|
   |
|
11-12-1999
|
5.50
|
Right Aileron Completed
|
Details
|
   |
|
11-11-1999
|
3.00
|
Ribs
|
Details
|
   |
|
11-08-1999
|
1.50
|
Ailerons
|
Details
|
   |
|
11-07-1999
|
3.00
|
Ailerons
|
Details
|
   |
|
11-02-1999
|
4.00
|
Ailerons
|
Details
|
   |
|
11-01-1999
|
1.00
|
Ailerons
|
Details
|
   |
|
10-30-1999
|
3.50
|
Ailerons
|
Details
|
   |
|
10-29-1999
|
3.50
|
Ribs
|
Details
|
   |
|
10-28-1999
|
3.00
|
Ribs
|
Details
|
   |
|
10-27-1999
|
1.50
|
Flaps
|
Details
|
   |
|
10-26-1999
|
3.00
|
Ailerons
|
Details
|
   |
|
10-24-1999
|
1.50
|
Ailerons
|
Details
|
   |
|
10-23-1999
|
1.00
|
Ailerons
|
Details
|
   |
|
10-22-1999
|
3.00
|
Ailerons
|
Details
|
   |
|
10-21-1999
|
3.50
|
Ailerons
|
Details
|
   |
|
10-18-1999
|
2.00
|
Ailerons
|
Details
|
   |
|
10-02-1999
|
1.00
|
Ribs
|
Details
|
   |
|
09-29-1999
|
3.00
|
Ailerons
|
Details
|
   |
|
09-28-1999
|
1.00
|
Ailerons
|
Details
|
   |
|
09-23-1999
|
5.00
|
Ailerons
|
Details
|
   |
|
09-19-1999
|
1.00
|
Ailerons
|
Details
|
   |
|
09-18-1999
|
2.00
|
Ailerons
|
Details
|
   |
|
09-17-1999
|
3.00
|
Ailerons
|
Details
|
   |
|
09-16-1999
|
4.00
|
Skins/Ailerons
|
Details
|
   |
|
09-11-1999
|
5.00
|
Ailerons
|
Details
|
   |
|
09-10-1999
|
3.00
|
Skins
|
Details
|
   |
|
09-09-1999
|
5.00
|
Rear Spars
|
Details
|
   |
|
08-26-1999
|
3.00
|
Ailerons
|
Details
|
   |
|
08-19-1999
|
2.50
|
Rear Spars
|
Details
|
   |
|
08-18-1999
|
1.50
|
Rear Spars
|
Details
|
   |
|
08-12-1999
|
0.20
|
Ribs
|
Details
|
   |
|
08-12-1999
|
1.00
|
Rear Spars
|
Details
|
   |
|
08-11-1999
|
2.00
|
Rear Spars
|
Details
|
   |
|
08-07-1999
|
1.50
|
Rear Spars
|
Details
|
   |
|
03-31-1999
|
28.80
|
Ribs
|
Details
|
   |
|
02-07-1999
|
2.50
|
Ailerons
|
Details
|
   |
|
02-07-1999
|
2.00
|
Ailerons
|
Details
|
   |
|
02-06-1999
|
2.00
|
Ailerons
|
Details
|
   |
|
01-31-1999
|
2.00
|
Ailerons
|
Details
|
   |
|
01-30-1999
|
2.50
|
Ailerons
|
Details
|
   |
|
01-15-1999
|
4.50
|
Spars
|
Details
|
   |
|
01-15-1999
|
2.50
|
Spars
|
Details
|
   |
|
01-08-1999
|
1.00
|
Ailerons
|
Details
|
   |
|
12-27-1998
|
0.50
|
Spars
|
Details
|
   |
|
12-27-1998
|
3.50
|
Ailerons/Wing spars
|
Details
|
   |
|
12-27-1998
|
1.00
|
Ailerons/Wing Spars
|
Details
|
   |
|
12-27-1998
|
2.50
|
Ailerons/Wing Spars
|
Details
|
   |
|
12-20-1998
|
0.50
|
Ailerons
|
Details
|
   |
|
12-11-1998
|
2.50
|
Ailerons
|
Details
|
   |
|
12-04-1998
|
1.50
|
Ailerons
|
Details
|
   |
|
11-18-1998
|
0.50
|
Ailerons
|
Details
|
   |
|
11-17-1998
|
3.00
|
Ailerons
|
Details
|
   |
|
11-13-1998
|
2.00
|
Ailerons
|
Details
|
   |
|
11-12-1998
|
1.00
|
Ailerons
|
Details
|
   |
|
11-11-1998
|
1.50
|
Ailerons
|
Details
|
   |
|
11-05-1998
|
4.00
|
Ribs
|
Details
|
   |
|
11-04-1998
|
1.00
|
Ailerons
|
Details
|
   |
|
10-25-1998
|
2.00
|
Ribs
|
Details
|
   |
|
10-23-1998
|
2.50
|
Ribs
|
Details
|
   |
|
10-18-1998
|
0.50
|
Ailerons
|
Details
|
   |
|
10-17-1998
|
2.50
|
Ribs
|
Details
|
   |
|
10-11-1998
|
0.50
|
Ailerons
|
Details
|
   |
|
10-04-1998
|
2.00
|
Ailerons
|
Details
|
   |
|
09-23-1998
|
1.00
|
Ailerons
|
Details
|
   |
|
09-18-1998
|
1.00
|
Ailerons
|
Details
|
   |
|
09-14-1998
|
4.00
|
Spars
|
Details
|
   |
|
09-14-1998
|
0.50
|
Spars
|
Details
|
   |
|
09-13-1998
|
1.50
|
Ailerons
|
Details
|
   |
|
09-12-1998
|
2.00
|
Ailerons
|
Details
|
   |
|
09-11-1998
|
1.00
|
Ailerons
|
Details
|
   |
|
09-01-1998
|
1.00
|
Spars
|
Details
|
   |
|
09-01-1998
|
0.50
|
Spars
|
Details
|
   |
|
09-01-1998
|
1.00
|
Spars
|
Details
|
   |
|
08-28-1998
|
1.00
|
Spars
|
Details
|
   |
|
08-20-1998
|
4.50
|
Spars
|
Details
|
   |
|
08-18-1998
|
1.50
|
Spars
|
Details
|
   |
|
08-18-1998
|
0.50
|
Spars
|
Details
|
   |
|
08-18-1998
|
0.50
|
Spars
|
Details
|
   |
|
07-22-1998
|
1.50
|
Spars
|
Details
|
   |
|
07-14-1998
|
3.50
|
Spars
|
Details
|
   |
|
07-07-1998
|
1.50
|
Spars
|
Details
|
   |
|
07-03-1998
|
1.50
|
Spars
|
Details
|
   |
|
06-11-1998
|
3.50
|
Spars
|
Details
|
   |
|
06-09-1998
|
2.00
|
Spars
|
Details
|
   |
|
05-28-1998
|
2.00
|
Spars
|
Details
|
   |
|
05-26-1998
|
1.50
|
Spars
|
Details
|
   |
|
05-22-1998
|
2.00
|
Spars
|
Details
|
   |
|
05-14-1998
|
1.50
|
Spars
|
Details
|
   |
|
04-30-1998
|
2.00
|
Spars
|
Details
|
   |
|
04-28-1998
|
2.50
|
Spars
|
Details
|
   |
|
04-28-1998
|
1.50
|
Spars
|
Details
|
   |
|
04-24-1998
|
4.00
|
Spars
|
Details
|
   |
|
02-07-1998
|
3.00
|
Spars
|
Details
|
   |
|
02-07-1998
|
5.00
|
Spars
|
Details
|
   |
|
02-07-1998
|
5.00
|
Spars
|
Details
|
   |
|
02-07-1998
|
2.50
|
Spars
|
Details
|
   |
|
02-05-1998
|
2.50
|
Spars
|
Details
|
   |
|
01-29-1998
|
6.50
|
Tech Counselor Visit/Spars
|
Details
|
   |
|
01-22-1998
|
5.00
|
Spars
|
Details
|
   |
|
01-14-1998
|
4.00
|
Spars
|
Details
|
   |
|
01-10-1998
|
2.50
|
Spars
|
Details
|
   |
|
01-10-1998
|
1.50
|
Spars
|
Details
|
   |
|
01-06-1998
|
5.00
|
Spars
|
Details
|
   |
|
01-05-1998
|
2.50
|
Spars
|
Details
|
   |
|
01-03-1998
|
7.00
|
Spars
|
Details
|
   |
|
01-02-1998
|
2.50
|
Spars
|
Details
|
   |
|
12-30-1997
|
1.50
|
Spars
|
Details
|
   |
|
12-29-1997
|
2.50
|
Spars
|
Details
|
   |
|
12-29-1997
|
1.50
|
Spars
|
Details
|
   |
|
12-20-1997
|
2.00
|
Spars
|
Details
|
   |
|
12-20-1997
|
3.00
|
Spars
|
Details
|
   |
|
12-20-1997
|
4.00
|
Spars
|
Details
|
   |
|
12-19-1997
|
1.50
|
Spars
|
Details
|
   |
|
12-19-1997
|
0.50
|
Spars
|
Details
|
   |
|
12-05-1997
|
3.00
|
Spars
|
Details
|
   |
|
12-03-1997
|
2.50
|
Spars
|
Details
|
   |
|
11-28-1997
|
4.00
|
Spars
|
Details
|
   |
|
11-26-1997
|
2.50
|
Spars
|
Details
|
   |
|
11-21-1997
|
4.00
|
Spars
|
Details
|
   |
|
11-19-1997
|
2.00
|
Trim Tab
|
Details
|
   |
|
11-18-1997
|
2.50
|
Elevators/Trim Tab
|
Details
|
   |
|
11-17-1997
|
3.50
|
Elevators
|
Details
|
   |
|
11-12-1997
|
3.00
|
Inventory
|
Details
|
   |
|
11-07-1997
|
4.00
|
Elevators/Trim Tab
|
Details
|
   |
|
11-05-1997
|
3.50
|
Elevators
|
Details
|
   |
|
11-05-1997
|
1.00
|
Elevators
|
Details
|
   |
|
11-04-1997
|
3.50
|
Elevators
|
Details
|
   |
|
11-03-1997
|
2.00
|
Elevators
|
Details
|
   |
|
10-24-1997
|
2.00
|
Elevators
|
Details
|
   |
|
10-08-1997
|
2.00
|
Elevators
|
Details
|
   |
|
10-06-1997
|
2.50
|
Elevators
|
Details
|
   |
|
10-01-1997
|
2.50
|
Elevators
|
Details
|
   |
|
09-30-1997
|
2.50
|
Elevators
|
Details
|
   |
|
09-22-1997
|
3.00
|
Elevators
|
Details
|
   |
|
09-14-1997
|
1.00
|
Elevators
|
Details
|
   |
|
09-12-1997
|
1.50
|
Elevators
|
Details
|
   |
|
09-09-1997
|
4.50
|
Elevators
|
Details
|
   |
|
08-15-1997
|
1.00
|
Elevators
|
Details
|
   |
|
08-12-1997
|
3.00
|
Elevators
|
Details
|
   |
|
07-23-1997
|
4.00
|
Elevators
|
Details
|
   |
|
07-22-1997
|
3.00
|
Elevators
|
Details
|
   |
|
07-16-1997
|
2.00
|
Elevators
|
Details
|
   |
|
07-15-1997
|
3.00
|
Elevators
|
Details
|
   |
|
07-09-1997
|
2.50
|
Elevators
|
Details
|
   |
|
06-18-1997
|
3.50
|
Elevators
|
Details
|
   |
|
06-04-1997
|
3.50
|
Elevators
|
Details
|
   |
|
06-03-1997
|
2.00
|
Elevators
|
Details
|
   |
|
05-28-1997
|
2.00
|
Elevators/Visitor-Stew Robinson
|
Details
|
   |
|
05-28-1997
|
1.50
|
Elevators
|
Details
|
   |
|
05-27-1997
|
2.00
|
Elevators
|
Details
|
   |
|
05-22-1997
|
2.00
|
Elevators
|
Details
|
   |
|
05-20-1997
|
5.00
|
Elevators
|
Details
|
   |
|
05-18-1997
|
1.00
|
Elevators/Visitors-Dad, Rick Katai
|
Details
|
   |
|
05-09-1997
|
3.00
|
Elevators
|
Details
|
   |
|
05-09-1997
|
0.50
|
Elevators
|
Details
|
   |
|
05-07-1997
|
3.50
|
Elevators/Visitor-Bill Peterseim
|
Details
|
   |
|
05-06-1997
|
4.50
|
Visitors/Elevators
|
Details
|
   |
|
05-06-1997
|
4.00
|
Elevators
|
Details
|
   |
|
04-29-1997
|
4.50
|
Elevators
|
Details
|
   |
|
04-29-1997
|
3.50
|
Elevators
|
Details
|
   |
|
04-25-1997
|
2.00
|
Elevators
|
Details
|
   |
|
04-23-1997
|
2.50
|
Elevators
|
Details
|
   |
|
04-23-1997
|
0.50
|
Elelvators
|
Details
|
   |
|
04-18-1997
|
2.50
|
Elevators
|
Details
|
   |
|
04-16-1997
|
3.50
|
Elevators
|
Details
|
   |
|
04-16-1997
|
0.50
|
Elevators
|
Details
|
   |
|
04-15-1997
|
4.00
|
Elevators
|
Details
|
   |
|
04-14-1997
|
4.00
|
Elevators
|
Details
|
   |
|
02-26-1997
|
3.50
|
Elevators
|
Details
|
   |
|
02-19-1997
|
3.50
|
Elevators
|
Details
|
   |
|
02-18-1997
|
5.00
|
Rudder Complete/Elevators
|
Details
|
   |
|
02-12-1997
|
3.50
|
Right Elevator
|
Details
|
   |
|
02-11-1997
|
4.00
|
Rudder/Right Elevator
|
Details
|
   |
|
02-06-1997
|
3.50
|
Rudder
|
Details
|
   |
|
02-06-1997
|
2.50
|
Rudder
|
Details
|
   |
|
01-17-1997
|
4.50
|
Rudder
|
Details
|
   |
|
01-17-1997
|
1.00
|
Rudder
|
Details
|
   |
|
01-10-1997
|
0.50
|
Rudder
|
Details
|
   |
|
01-10-1997
|
1.50
|
Rudder
|
Details
|
   |
|
01-08-1997
|
5.00
|
Rudder
|
Details
|
   |
|
01-03-1997
|
4.00
|
Rudder
|
Details
|
   |
|
12-31-1996
|
4.00
|
Rudder
|
Details
|
   |
|
12-31-1996
|
2.50
|
Rudder
|
Details
|
   |
|
12-29-1996
|
1.00
|
Inventory of Wing Kit
|
Details
|
   |
|
12-29-1996
|
1.00
|
Inventory
|
Details
|
   |
|
12-29-1996
|
1.00
|
Inventory
|
Details
|
   |
|
12-29-1996
|
1.00
|
Inventory
|
Details
|
   |
|
12-26-1996
|
4.00
|
Rudder/Wing Kit Delivery
|
Details
|
   |
|
12-26-1996
|
4.00
|
Rudder
|
Details
|
   |
|
12-21-1996
|
0.10
|
Shop Visit
|
Details
|
   |
|
12-20-1996
|
4.00
|
Rudder
|
Details
|
   |
|
12-13-1996
|
3.00
|
Rudder
|
Details
|
   |
|
12-11-1996
|
5.00
|
Rudder
|
Details
|
   |
|
12-06-1996
|
5.00
|
Rudder
|
Details
|
   |
|
12-04-1996
|
4.00
|
Rudder
|
Details
|
   |
|
11-27-1996
|
3.50
|
Rudder
|
Details
|
   |
|
11-20-1996
|
4.50
|
Rudder
|
Details
|
   |
|
11-19-1996
|
3.50
|
Rudder
|
Details
|
   |
|
11-17-1996
|
2.00
|
Rudder
|
Details
|
   |
|
11-13-1996
|
4.00
|
Vertical Stabilizer Completed/Rudder
|
Details
|
   |
|
11-06-1996
|
1.50
|
Vertical Stablilizer
|
Details
|
   |
|
11-06-1996
|
3.00
|
Vertical Stabilizer
|
Details
|
   |
|
11-05-1996
|
3.50
|
Vertical Stabilizer
|
Details
|
   |
|
10-30-1996
|
4.00
|
Vertical Stabilizer
|
Details
|
   |
|
10-29-1996
|
5.00
|
Vertical Stabilizer
|
Details
|
   |
|
10-22-1996
|
4.00
|
Vertical Stabilizer
|
Details
|
   |
|
10-18-1996
|
2.00
|
Vertical Stabilizer
|
Details
|
   |
|
10-16-1996
|
3.50
|
Vertical Stabilizer
|
Details
|
   |
|
10-15-1996
|
4.00
|
Vertical Stabilizer
|
Details
|
   |
|
10-09-1996
|
2.50
|
Vertical Stabilizer/Horizontal Stab Complete!
|
Details
|
   |
|
10-08-1996
|
5.50
|
Vertical Stabilizer
|
Details
|
   |
|
09-29-1996
|
2.00
|
Vertical Stabilizer
|
Details
|
   |
|
09-27-1996
|
3.00
|
Vertical Stabilizer
|
Details
|
   |
|
09-19-1996
|
3.00
|
Horizontal Stabilizer
|
Details
|
   |
|
09-13-1996
|
0.50
|
Horizontal Stabilizer
|
Details
|
   |
|
09-12-1996
|
4.50
|
Horizontal Stabilizer-Out of Jig!
|
Details
|
   |
|
09-12-1996
|
1.50
|
Horizontal Stabilizer
|
Details
|
   |
|
09-05-1996
|
4.00
|
Horizontal Stabilizer
|
Details
|
   |
|
09-05-1996
|
2.00
|
Horizontal Stabilizer
|
Details
|
   |
|
09-05-1996
|
1.50
|
Horizontal Stabilizer
|
Details
|
   |
|
08-23-1996
|
2.00
|
Horizontal Stabilizer
|
Details
|
   |
|
08-22-1996
|
4.50
|
Horizontal Stabilizer
|
Details
|
   |
|
08-22-1996
|
4.50
|
Horizontal Stabilizer
|
Details
|
   |
|
08-22-1996
|
1.00
|
Horizontal Stabilizer
|
Details
|
   |
|
08-21-1996
|
4.00
|
Horizontal Stabilizer
|
Details
|
   |
|
08-21-1996
|
0.50
|
Horizontal Stabilizer
|
Details
|
   |
|
08-14-1996
|
3.00
|
Horizontal Stabilizer
|
Details
|
   |
|
08-02-1996
|
3.00
|
Horizontal Stabilizer
|
Details
|
   |
|
07-31-1996
|
4.00
|
Horizontal Stabilizer
|
Details
|
   |
|
07-24-1996
|
3.00
|
Horizontal Stabilizer
|
Details
|
   |
|
07-16-1996
|
4.00
|
Horizontal Stabilizer
|
Details
|
   |
|
07-16-1996
|
1.00
|
Horizontal Stabilizer
|
Details
|
   |
|
07-12-1996
|
2.00
|
Horizontal Stabilizer
|
Details
|
   |
|
07-10-1996
|
2.50
|
Horizontal Stabilizer
|
Details
|
   |
|
07-02-1996
|
3.50
|
Horizontal Stabilizer
|
Details
|
   |
|
07-02-1996
|
0.50
|
Horizontal Stabilizer
|
Details
|
   |
|
06-29-1996
|
3.50
|
Horizontal Stabilizer
|
Details
|
   |
|
06-20-1996
|
3.50
|
Horizontal Stabilizer
|
Details
|
   |
|
06-20-1996
|
2.50
|
Horizontal Stabilizer
|
Details
|
   |
|
06-20-1996
|
1.00
|
Horizontal Stabilizer
|
Details
|
   |
|
06-19-1996
|
1.50
|
Horizontal Stabilizer
|
Details
|
   |
|
06-19-1996
|
0.50
|
Horizontal Stabilizer
|
Details
|
   |
|
06-18-1996
|
2.50
|
Horizontal Stabilizer
|
Details
|
   |
|
06-17-1996
|
2.00
|
Horizontal Stabilizer
|
Details
|
   |
|
06-15-1996
|
2.00
|
Horizontal Stabilizer
|
Details
|
   |
|
06-11-1996
|
4.50
|
Horizontal Stabilizer
|
Details
|
   |
|
06-07-1996
|
3.00
|
Horizontal Stabilizer
|
Details
|
   |
|
06-05-1996
|
4.00
|
Horizontal Stabilizer
|
Details
|
   |
|
06-05-1996
|
1.00
|
Horizontal Stabilizer
|
Details
|
   |
|
05-16-1996
|
4.50
|
Horizontal Stabilizer
|
Details
|
   |
|
05-16-1996
|
2.00
|
Horizontal Stabilizer
|
Details
|
   |
|
05-08-1996
|
4.00
|
Horizontal Stabilizer
|
Details
|
   |
|
05-08-1996
|
1.50
|
Horizontal Stabilizer
|
Details
|
   |
|
05-06-1996
|
3.00
|
Horizontal Stabilizer
|
Details
|
   |
|
05-06-1996
|
4.00
|
Horizontal Stabilizer
|
Details
|
   |
|
04-19-1996
|
2.00
|
Horizontal Stabilizer
|
Details
|
   |
|
04-18-1996
|
3.00
|
Horizontal Stabilizer
|
Details
|
   |
|
04-16-1996
|
2.50
|
Horizontal Stabilizer
|
Details
|
   |
|
04-16-1996
|
1.00
|
Horizontal Stabilizer
|
Details
|
   |
|
04-12-1996
|
2.00
|
Horizontal Stabilizer
|
Details
|
   |
|
04-11-1996
|
4.50
|
Horizontal Stabilizer
|
Details
|
   |
|
04-11-1996
|
2.00
|
Horizontal Stabilizer
|
Details
|
   |
|
04-01-1996
|
1.00
|
Horizontal Stabilizer
|
Details
|
   |
|
04-01-1996
|
2.00
|
Horizontal Stabilizer
|
Details
|
   |
|
03-28-1996
|
1.00
|
Horizontal Stablilizer
|
Details
|
   |
|
03-27-1996
|
1.50
|
Priming
|
Details
|
   |
|
03-27-1996
|
1.00
|
Priming
|
Details
|
   |
|
03-25-1996
|
4.00
|
Horizontal Stabilizer
|
Details
|
   |
|
03-25-1996
|
1.00
|
Horizontal Stabilizer
|
Details
|
   |
|
03-20-1996
|
1.50
|
Horizontal Stabilizer
|
Details
|
   |
|
03-20-1996
|
1.50
|
Horizontal Stabilizer
|
Details
|
   |
|
03-15-1996
|
1.50
|
Horizontal Stabilizer
|
Details
|
   |
|
03-15-1996
|
1.50
|
Horizontal Stabilizer
|
Details
|
   |
|
03-06-1996
|
3.50
|
Steel Parts/Horizontal Stablilizer
|
Details
|
   |
|
03-06-1996
|
2.50
|
Steel parts, Horizontal Stabilizer
|
Details
|
   |
|
02-22-1996
|
5.00
|
Inventory of Kit
|
Details
|
   |

