Brief Description: Completed the Aileron Trim Bracket
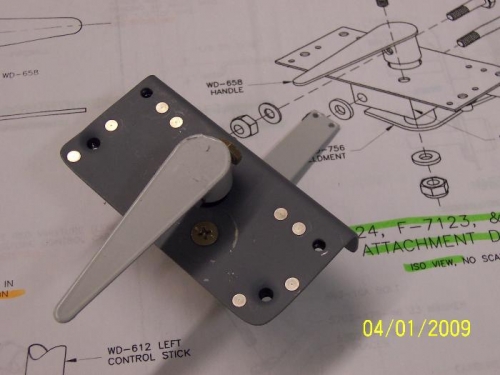
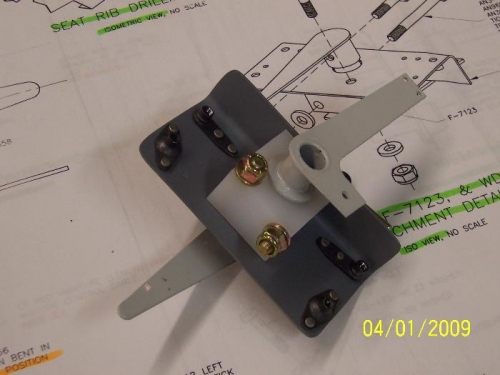
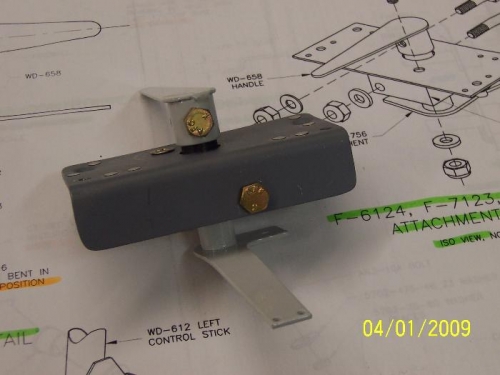
Continued working on the aileron trim bracket. Clecoed the bracket to the right seat panel and drilled a 9/16" hole in the seat panel. Drilled #19 holes in the trim bracket and the ribs for the aft holes. Drilled holes in bracket for the nutplates. Positioned the handle in the block and marked where the cotter pin should be located. Drilled this hole. Clamped both handles together and drilled #12 hole bor the connecting bolt thru both handles. Countersunk and dimpled the necessary holes. Primed the bracket and then riveted the nutplates in place. Bolted the block and handle in place on the bracket. Reinserted the entire control system in place in the fuselage and then positioned the trim bracket. I found that the bracket was located too far forward on the ribs and the leading tip of the lower handle hits the control rod. The bracket needs to be moved aft 2-3 inches for clearance. However, the seat panel has been drilled with the large hole, so if the trim bracket is moved aft, either the hole is left, covered over, or the seat panel is replaced.
I installed the rudder on the VS and screwed the Adel clamps in place on the side of the fuselage. These clamps hold the plastic tube for the rudder cables exiting the fuselage. The rudder cables were temporarily attached to the rudder. The rudder pedals were also positioned in place.