Brief Description: Begun attaching air seals, some metal work
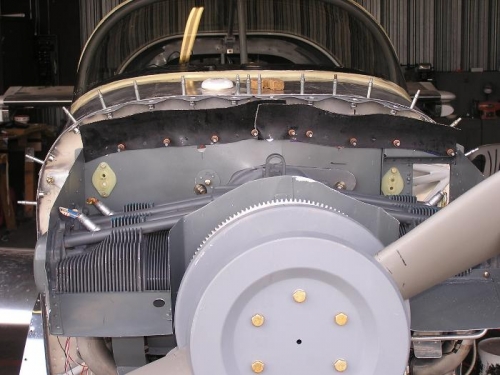
Yesterday after all the baffles were in their permanent place, we found a gap under the right front baffle that was too large to fill with RTV so we made a template and duplicated it on aluminum and then riveted it in place. Now there is only a 1/8" gap over the front of the crank case. I ordered a cartridge of red RTV today so that now I think all the other gaps around the engine can be filled with this. Image #1 shows that the next thing we did after putting the baffles in place was to cut a pattern and the cut 2 strips of air seal material and drill them to the back baffles. We made the strips 3 inches wide and have 2" of material above the baffle. We overlapped the seals in the middle for about 2 inches and when all was drilled clecoed the seals into place. We left clamps on the edges of the material to bend it down towards the front so that it will have a natural tendency to slide in under the cowl. In Image #1, you can also see the white Teflon star shaped grommets that we installed yesterday for the spark plug wires. Tomorrow we will work on around the baffles with the air seals.