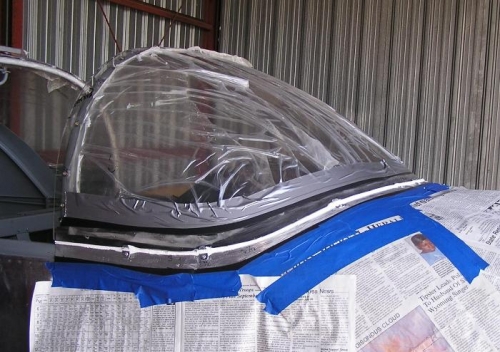
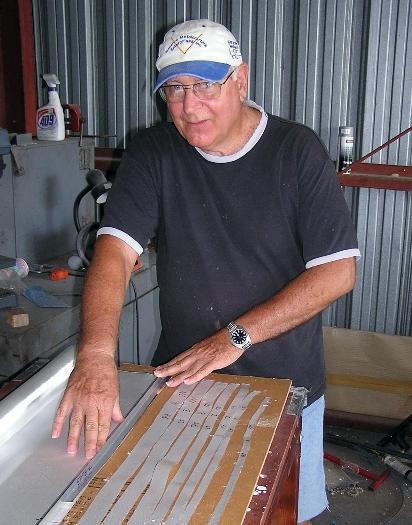
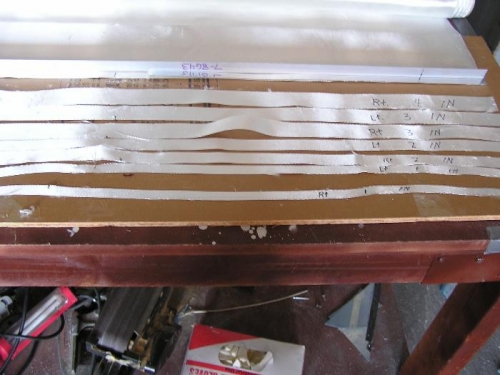
Today we mixed up a batch of West Epoxy and micro balloons using the slow hardener rather than the fast. We then placed a small fillet of this mixture to the base of the wind screen in the area that had been taped off yesterday. We found that the curved end of a tongue depressor had the proper radius for application. When the mixture was still malleable, we removed the electrician's tape. We then went riding our bikes while it set. On return, we were able to sand this fillet down fairly smooth using the 3/4" PVC pipe as a sanding block. Image #1 shows the white fillet of micro balloons around the base of the wind screen and you can also see the black electrician's tape that will act as a guide when we lay-up the fiber glass. We then laid out our fiber glass cloth and cut it starting with a strip that was 1/2" wide and increasing it 1/4" as we cut further strips. We also tapered the strips so that the last strip, strip #7 was 2" wide in the center and tapered to 3" wide at the sides. We have strips that are half the length of wind screen and we will butt splice the strips in the center and we will have a fairing that is 7 thicknesses of fiber glass. We next took some scrap fiber glass and practiced doing lay-ups. We found that wetting the first lay-up was the trickiest. After that, the lay-ups would stick to the previous layer and actually soak up the excess epoxy. We covered the top layer of practice piece with peal ply. Tomorrow we will see how our practice lay-up went and if OK we will probably do the REAL thing.