
|

|
|
|
Cleve's Web Site
|
Date: 3-26-2007
|
Number of Hours: 3.50
|
Manual Reference:
|
Brief Description: Installed ELT-Drilled firewall for P leads, alt, &
|
|
We had a time installing the Van's plate for the ELT because the lower flange that was drilled for pop rivets was so close to the side of the fuse that our pop rivet gun would not fit. After a futile search all over town for a smaller gun, we were stumped as what to do. A fellow builder, Curtis Patton, happened by and showed us how we could bend the shank on the rivet so that the gun would stand off but still pull the rivets. With this trick, the plate "jumped on" and the ELT mounted with no further difficulty. Now we have the antenna on the unit. We will install an external antenna if the DAR requires it. The unit is now behind the baggage bulkhead on the right side. The phone cable wire will run up the left side of the fuse and under the arm rest. The run will also contain the AOA flap switch wires, and possibly a GPS antenna wire.
We then decided to drill the firewall with a Unibit for a 5/8 inch snap bushing with a 1/2 inch ID. You can see in Image #2 that the hole is just under the battery box and between the relay doubler and the angle on the firewall. We plan to run our battery power wire (8 gauge) our battery switch wire (18 gauge), 2 P leads (shielded 18 gauge), the alternator wire (8 gauge) and the alternator J5 wire (shielded 18 gauge) through this hole. We will have to wait a few days for the proper size bushing and some shielded wire to come from Van's. I also ordered some 3/4 inch angle to construct a shelf for the AHRS and cooling fan and also the AOA unit. I went ahead and ordered a battery so we could power up the panel to check it out before riveting the forward skin in place.
|
|
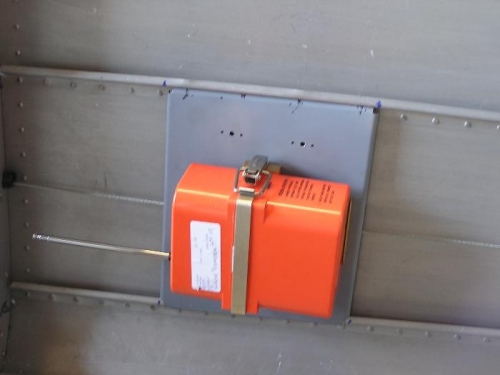
ELT installed
|
|
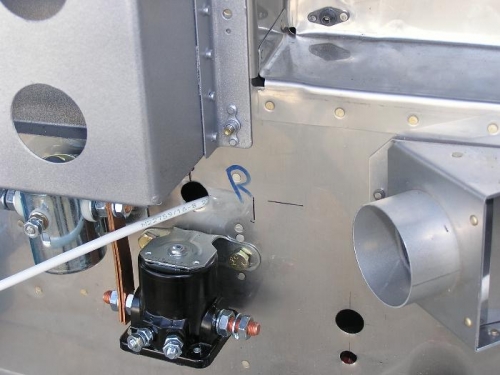
Hole for P leads, Alt, Battery
|
|
|
|
|
|
|
|
|
Copyright © 2001-2024 Matronics. All Rights Reserved.
|