Brief Description: Installed brake lines, engine mount, & nose gear
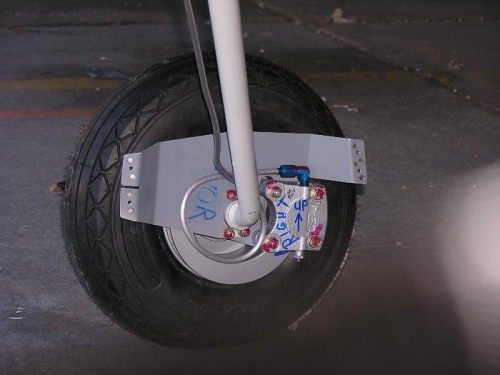
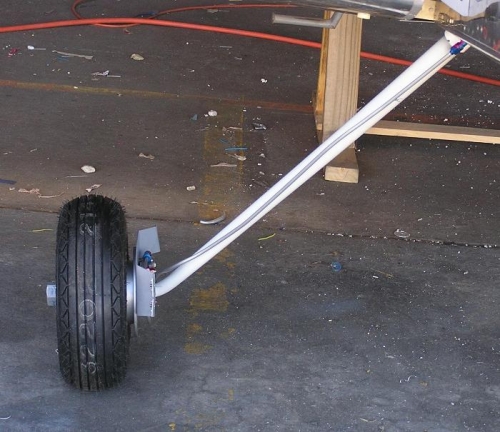
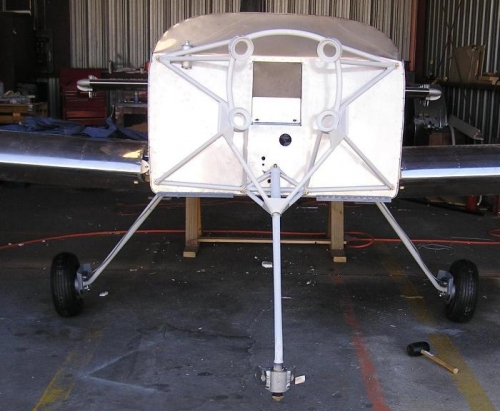
We installed both brake calipers and torqued them down. Then we wrapped a piece of scrap tubing around axle to use as a pattern. Then using some thick wall 1/4" tubing and a spring tube bender, I wrapped the tube around the axle as seen in Image #1. It was not a difficult to do the bends as I thought it might be. Image #2 shows the completed line flared and fitted to the fuse fitting. We then did the same to the left leg. We then hooked the plastic lines up to the brake reservoir and tightened all connections. We are now ready to add brake fluid to the system and see if we have any leaks........We then put the motor mount back on after checking to make sure that we could do all the necessary riveting with it in place. You recall that we had removed the mount so that we could rivet the lower cowl hinges in place..... We then had to enlarge the hole in the motor mount to allow the AN bolt to pass through the mount, nose gear leg and the back side of the mount. Yesterday, we had drilled a hole in the firewall to allow us to pass an AN5 bolt through the firewall and through the mount and leg. The completed mount with nose gear leg in place is seen in Image #3. The nose gear axle and fittings need some buffing with crocus cloth before they will go together. This we will save for tomorrow.