
|

|
|
|
Christopher's Web Site
|
Date: 5-21-2016
|
Number of Hours: 3.00
|
Manual Reference:
|
Brief Description: Oil Cooler and Cooler Hood
|
|
I clamped the oil cooler in place, and once I was sure of all of the clearances, I drilled pilot holes, clecoed in place, upsized the holes one at a time, deburred, and finally bolted and cotter pinned in place. Now I can place the cooler hood and measure for the attachment points.
I just got the hood back from the paint shop and I’m ready to install. Unfortunately, I didn’t have this built when the and there was no practical way to guess how this was going to mount to the top of the engine shroud, especially once the oil cooler was mounted. As such, I could only locate where the nut plates needed to be installed now that everything is installed, including the cooler. Not my favorite thing to do, but I drilled and installed the nut plates on the painted surface, and it actually came out very clean.
As I mentioned in the last log (I think), I want to make sure that the fan shroud is really secure, especially since the clearance to the fan is so minimal. As you can see in the last photo, I secured the bottom of the shroud to the frame with adel clamps. I will do the same thing with the cooler hood. The shroud is as solid as a rock.
|
|
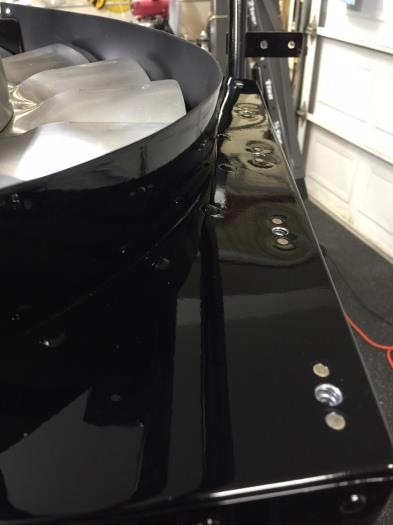
Nut plates riveted in place
|
|
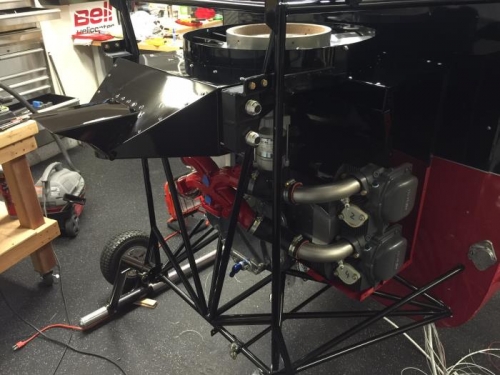
Oil cooler hood and oil cooler
|
|
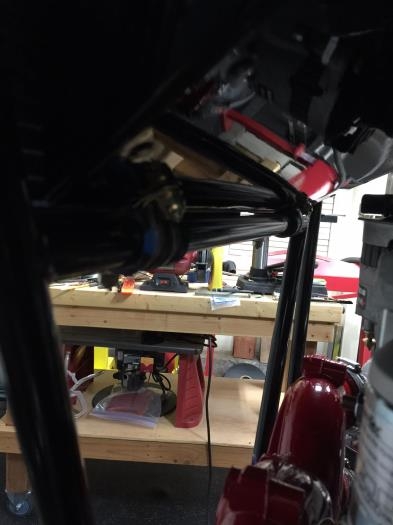
Adel clamps under cooler hood
|
|
|
|
|
|
|
|
|
Copyright © 2001-2024 Matronics. All Rights Reserved.
|