Brief Description: Horizontal Stabilizer Front Strut Part 6
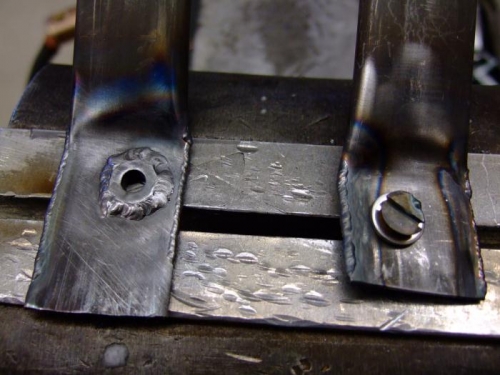
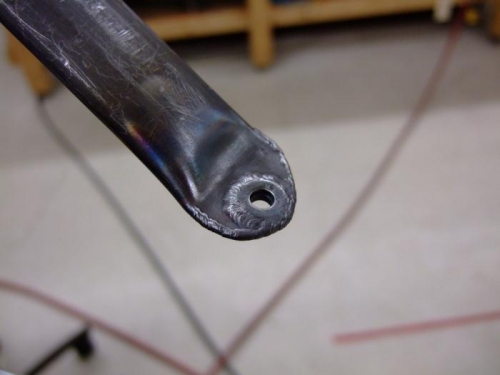
Good day today as I finished the struts! I reviewed the April/May/June 2005 BearTracks for the engineering change. I installed the struts and located the hole location on the top end, keeping the front of the strut even with the front of the stab. The hole ends up a little off-center, but at the widest chord of the tubing. I clamped it in place while using the stab bushing as a guide and drilled the holes.
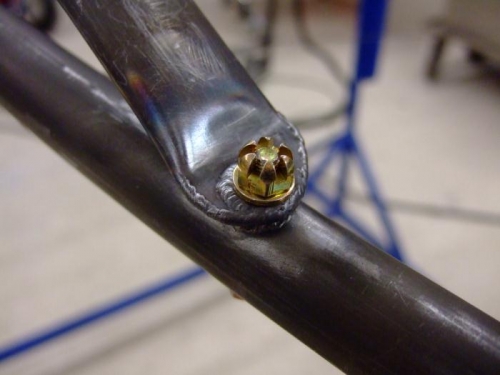
Bob says to weld a 960 washer at the location of the hole. I first took my scotchbrite wheel and cleaned the cad plating off the washer. It was a little difficult because they are so tiny, but I don't need to contaminate the weld and breathe that stuff. I used a countersink screw and nut to hold the washer in place to weld. The conical shape of the head aligned the washer and was out of the way while welding. he last thing I wanted to do is weld the screw to the washer! It also helped clamp the two sides together.
Once that was done, I shaped the end as described in the BearTracks and Eric Newton's manual. Once that was done I edge-welded the area that was exposed by shaping. It turned out great and they aligned nicely on the strut. On to the elevator!