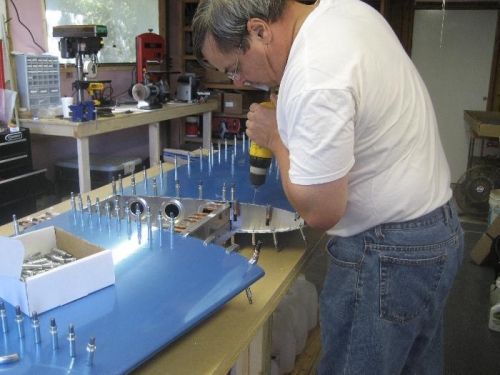
Started today by clamping the four center ribs in place and drilling the skin-to-rib holes. Put clecos in all of those holes and then drilled the holes for the four rib-to-spar flanges. Then I drilled all of the skin-to-skeleton holes, moved the clecos, drilled those holes, then flipped the HS and repeated for the other side.
Now the whole thing has to be taken apart so that every hole can be deburred on each side of the hole. Then every skin-to-skeleton hole has to be dimpled, both on the skin and the associated attachment piece (rib or spar). Then each piece has to be cleaned and primed with self-etching primer before it can all be reassembled and riveted together.
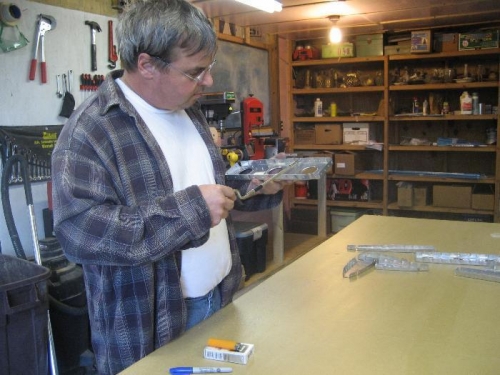
Took everything apart and deburred both sides of each hole in the spars and ribs. Too tuckered out to deburr the holes in the skins so I'll do that next time. I did take a soldering gun and melted the protective plastic on both sides of each row of holes and removed the plastic around the skin holes so I can deburr and dimple them. The remaining plastic will stay on to help protect the skin from scratches.
Match drilling all the skin-to-skeleton holes on both sides of the HS
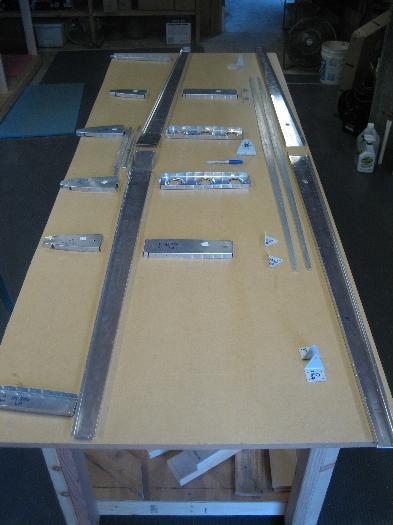
Then had to pull the clecos and take it all apart again. Here's the skeleton of the HS
Had to debur every hole in the spars and ribs. It seemed like thousands of holes.