I have a 12' sheet of .032 T3 for the inboard wing skins and the fuel tank covers. I cut the following sizes:
(2) 9" x 99" wing inboard skins (2) 27" x 46" main fuel tank cover (2) 16" x 34" aux fuel tank cover
These used up most of the sheet and the rest I'll use for inspection plate backing rings. I cut these out with hand snips so it took a little while. I've been using hand snips for most of my panel trimming lately and I like the outcome a lot better than the dremel tool. My hand gets tired but I getting a stronger grip with more use.
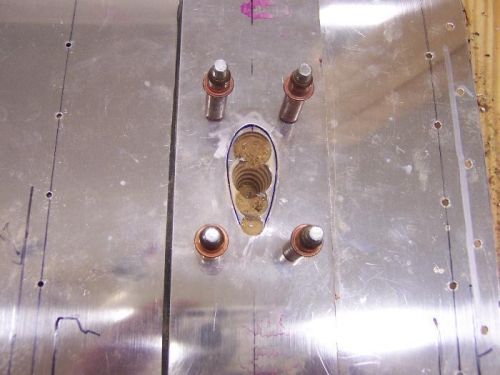
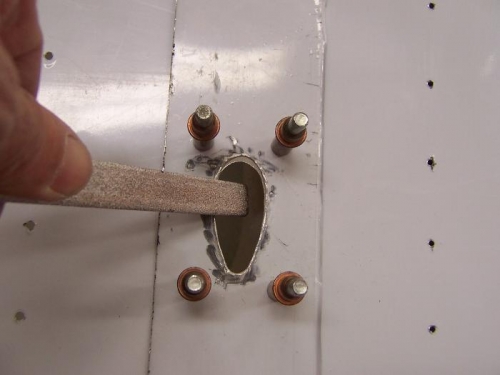
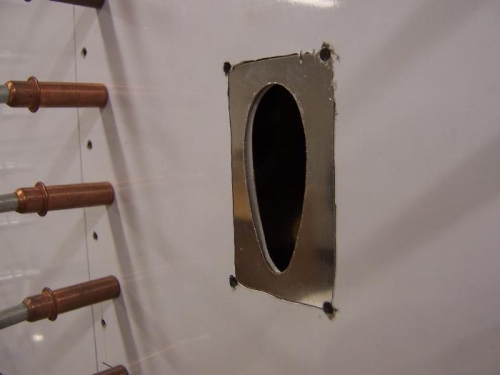
Before taking the other panels off the wing I marked where the pitot bracket and the strut attach brackets are on the skin. After I took the panels off I trimmed the panel holes for these items. For the pitot hole the template worked great. I marked where the screw hole were on the panel then drilled and clecoed the template to the panel. I drilled out as much as I could with a step drill then filed it down to the edge. Another discovery I made is that a tile file works great on filing aluminum. It has a flat edge and a round edge. It makes a nice clean edge that needs very little deburring. I put the panel back on the wing to do the final filing. I did the 'ol "file and fit and file and fit," until it was right.
Next I used the vacuum tube to form the nose on the inboard panel. I started laying out the panel then I got to wondering if the center rib doubler at the inboard of the wing is riveted on both ribs for a double row or just a single row is correct. I asked the Bearhawk group for some guidance.
I put in a full day without a whole lot of progress but progress non the less... (and no steps backwards!)