Brief Description: Rolling the right elevator leading edge.
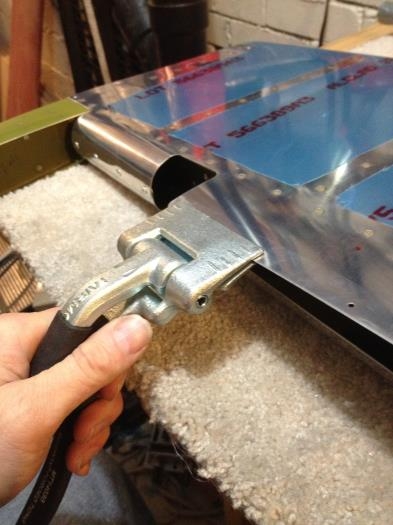
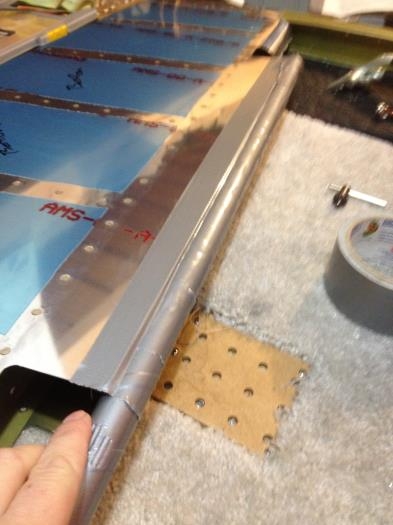
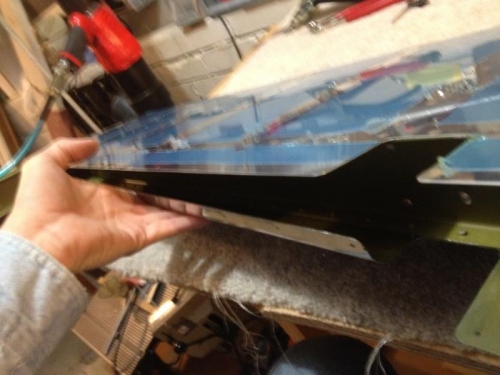
Next was rolling the leading edge of the right elevator. This just shows the steps I did to roll it. First as the manual said, I tried pre-bending the outer edge of the flange to give it a better fit once rolled. I'm not sure if that worked as well as I liked it to, but again, this will be hidden on the completed aircraft. I used the seamer to grip the edge and gave it a few degree bend in about the last 1/4 to 1/2 inch of the flange. Then the duct tap on the edge of the flange was attached to the magic rolling boormstick! It was a lot hard this time since the elevator skin was a lot thicker than the rudder skin, so it took a few tries and a bit of muscle to get it rolled to the right point. Again, nothing really that hard or scary as guys in the forums have talked and complained about, it just took some time and a little cussing. I rolled the bottom part first since I wanted the top to overlap for rain water diversion. I'm pretty sure it wouldnt' really matter much which surface was rolled first since you would still have a chance to overlap them the right way. The fingers and Scotch-brite still need to be run through there for some deburring on the inside surface after match-drilling the holes.