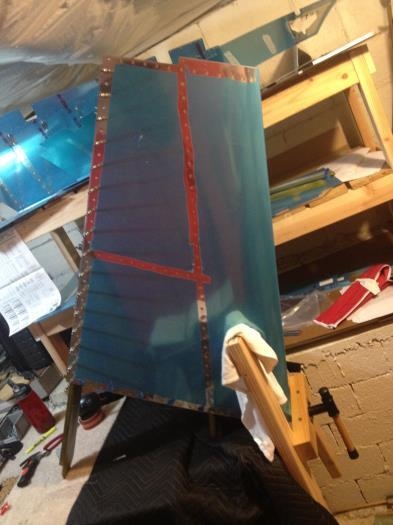
Brief Description: Riveting the skin to the vertical stabilizer skele
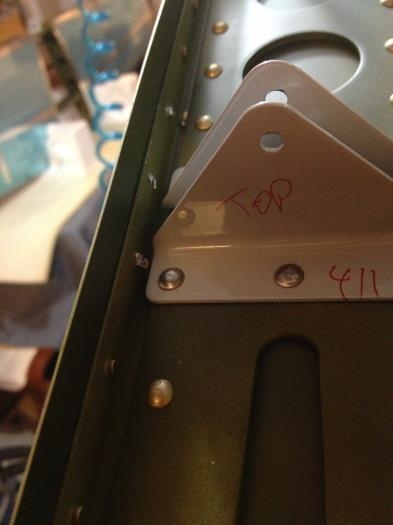
I've got large but flexible hands, so it wasn't too hard to reach inside the stabilizer with the bucking bar and back rivet from the outside. I did have to remove a few rivets in the process that went in funky, but practice makes perfect and I can now get those out nicely in just a few minutes and not elongate the hole, or enlarge it too much! Some scuffing of the primer seems unavoidable with the bar in there, but it won't show and priming is optional anyway, so all is fine there. Then the rear spar is clekoed in place when all the skin rivets are in, look good on both sides and then realize they won't be seen again (hopefully not!). I found that squeezing the rivets for the rear spar was super easy with the squeezer other than a few around the hinges. There isn't a lot of space to get the shop head looking very nice with the squeezer. I removed them and slept on it overnight to think about a different approach. I used the skinny bucking bar and stuck in in as close to the rivet as I coul and pounded it in place. It turned out better, not perfect, but good enough. Just a hard place to reach, and others have commented on this area as being tough also. Good not to be alone with this project!
Backrivets all went in well and proper sized.
Rear spar is in place and ready for rivets.
The infamous rib/skin/hinge area tight fit for riveting. This was my first ugly attempt.