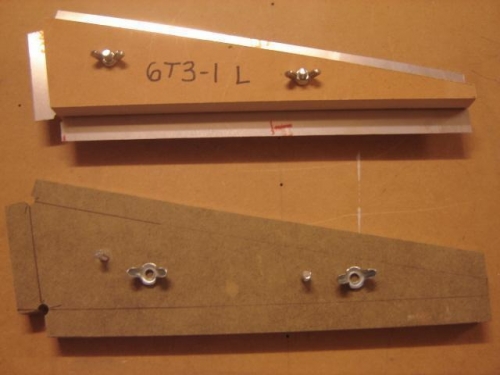
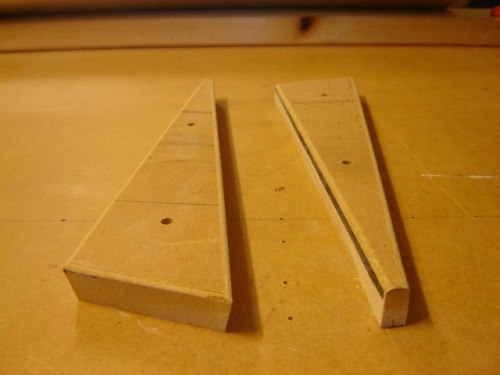
Cut froms from scrap MDF, drilled and countersunk 1/4" clamping-bolt holes, netted out edges to profile lines with belt sander. Routed opposing block face edges with 1/8" rounding bit. Used form blocks to create blanking blocks by match drilling the clamping-bolt holes into pieces of the dense 1/4" green board then tracing a line 18mm out from each edge. Finished form blocks with a trick from Larry Winger; used wide marker to darken the flange face at the tangent of each routed edge. Sanded a 10 degree spring-back angle onto the edges using the disappearing black line as a completion indicator.
Note from 11/06/11: Since two of these ribs will be installed on the exposed ends of the elevator other builders may want to consider a method to blank and form them without the holes.
Used roughed-out blank forms to draw blank profiles onto the strip of 0.020" (substituted for the 0.016" specified) left over from the stabilizer skin cut-out. Scored each line with the Olfa then bent off each blank. Aligned blanks between blocks and match drilled the clamping holes. Clamped the 6 blanks between the forms in a sandwich and cut along lines with band saw. Sanded edges up to the traced lines. Drilled the 5/16" relief holes then cut out the corners. Note: Each flange end should be marked perpendicular to it's respective bend line. I got in a hurry and neglected to do this on the bottom rear. Should have done the same on the top front (not shown this way on drawing). No big deal, just leaves angled flange ends when bent over.