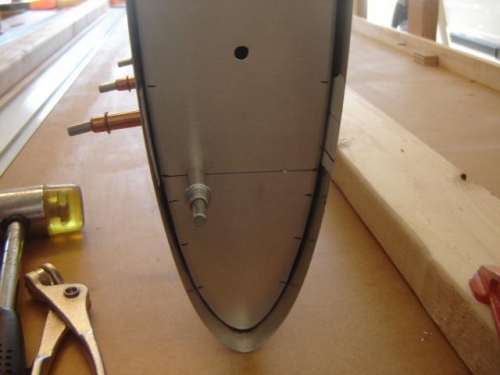
Positioning end ribs and spacing rivets took a bit more planning than anticipated. The first step was to extend the L-bracket center lines onto the skins. Then put the elevator on it's nose and tapped the ribs down firmly to ensure they conformed as closely as possible to the skin profile. Marked the bracket-attach lines and drilled 4 pilot holes equally spaced. Trimmed off the extra material along the rear of each rib to match the trailing skin edges.
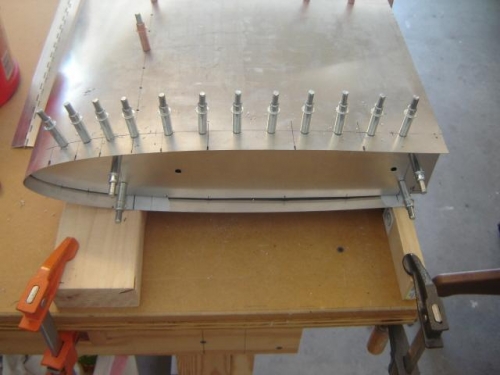
After trimming the top trailing skin edge and establishing a hinge rivet line I spaced 10 rivets evenly between the front and rear spar rivet lines on the top skin. This yielded a pitch of about 32mm with none of the holes falling on a rib crimp. The three rivets forward of the front spar were spaced equally using 25mm pitch to avoid the crimps and still get as far forward on the rib flange as possible (same spacing used for these 3 on the bottom).
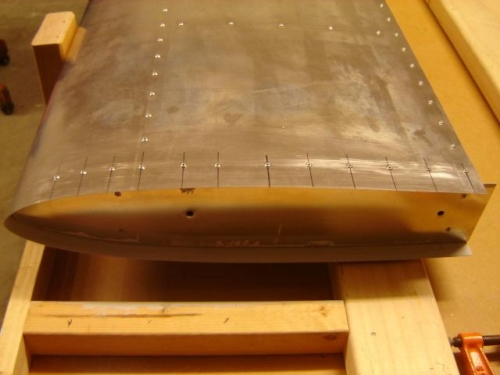
Since the bottom spar distance is about 18mm shorter than the top it was only necessary to locate and drill 9 holes (inclusive of the spars) on the rib bottoms. However, it was not possible to achieve equal spacing without landing on a crimp so one of the holes was moved forward by about 5mm creating unequal spacing. Not aesthetically pleasing but since this row is on the bottom it will only be seen when washing and/or inspecting the plane.