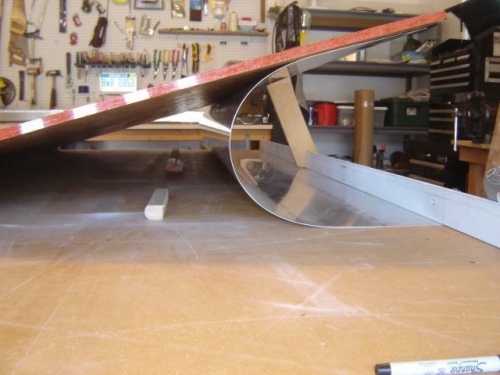
Bent skin using a modified version of Ron Lendon's process. I didn't have any extra sheets of plywood, MDF or OSB so I picked up a sheet of OSB from Home Depot to serve as a bend former.
Flushed up top edge of skin with edge of bench and marked lines 25mm from edge Placed edge of angle iron (from bending brake) along the marked lines and clamped to bench Attached 2 pieces of plywood on opposide edge of bench extending about 3" above bench top to serve as stops/pivots for OSB Clamped pieces of wood against ends of OSB (along pivot) to prevent it from sliding sideways Marked vertical lines up back of angle iron from ends of skin then up to edge of OSB Cut 3 spacer stops from some wood stair nosing that was 25mm thick - 1mm more than spec Created a prop stick from MDF to hold OSB and skin for alignment and taping Curled up bottom edge of skin and mated it with edge of OSB, ensuring ends aligned with marks Taped skin to OSB, placed 3/4" boards along back of angle iron as stops, removed prop stick Started bend by pressing down on board by hand Finished bend by standing on a 2x4 placed over the gap between the bend nose and spacers Note: Bench was 1" wider than OSB sheet so I had room for it and the angle iron.
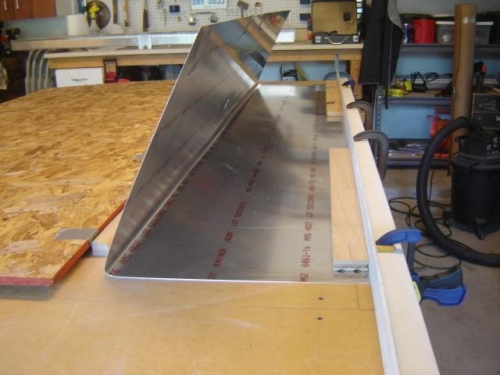
The end result is a perfectly straight bend at with a radius that should match design intent. I did a trial fit over the bottom of the skeleton just to ensure the fit looks right. When the skelton is sqared the skin should fit perfectly.