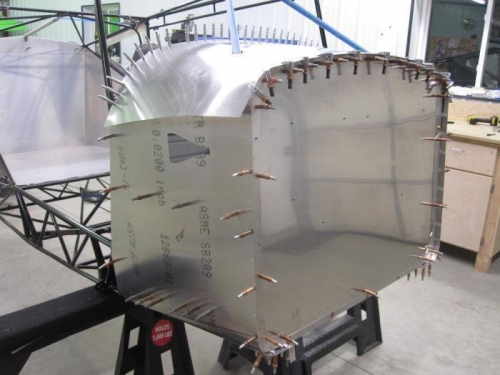
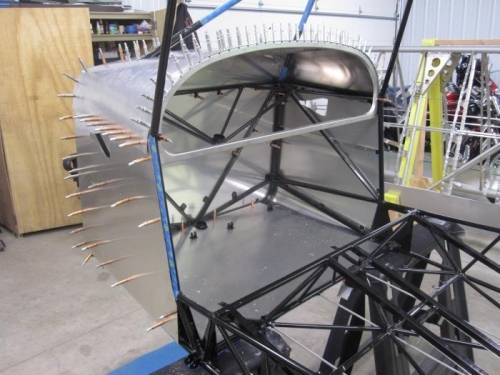
* The hardest part about this part of the project was figuring out how to keep everything lined up when drilling the first few holes. I cleko'd the center skin to the instrument panel frame and made sure it was centered. I used cleko clamps on the firewall side to keep it in place. Then I cleko'd one of the side skins to the instrument panel frame. Using a combination of hand force and cleko clamps I formed the side skin around the corners and made sure it was flush with the front of both the center and side skins. I made a mark to locate the top side skin on the center skin. At this point I repeated the steps on the other side and made sure everything was centered. Then I removed the clekos from the top side skin except for the inner most on the panel frame, which allowed the skins to lay flat on each other. Then I drilled and cleko'd the top side skins to the center skin. Once this was finished, I reinstalled the cleko's to fasten the top side to the panel frame, and I used a bar clamp and a small piece of wood to hold the rear corner of the top side skin. With everything double checked I pulled the front of the top side skin around the corner and drilled the front lower hole. Next I removed the bar clamp and drilled through the top of the side skin and cleko's as I went. In the end I was happy with how it all turned out.
* I ended up using 1/8" spacers between the frame and instrument panel frame to get everything to fit well. This is driven by the side skins.
* I had to trim the instrument panel frame and instrument panel to fit the fuselage frame. The instrument panel frame also needed new mounting holes.
* When bending the rear corner of the top side skin the last tab on the instrument panel frame put a little dinger in the skin. I trimmed the corner off this tab and tapped the dingers out with a small hammer.
* I left the firewall shim strips out until I had all the drilling done, which worked well.