
|

|
|
|
Steve & Nancy Riffe
|
Date: 4-18-2017
|
Number of Hours: 2.00
|
Manual Reference:
|
Brief Description: Install Transponder & b.u. battery
|
|
I received my transponder and backup battery yesterday. So, back to the hangar. I located where I wanted to mount the battery on the fold down avionics access door, and drilled a couple of #12 holes. The battery is mounted at a slight angle to allow clearance for the door to open and close. I secured with two #8 screws, then secured the wires going to the battery. (darn, forgot to get a pic of the batt!) Some years back, I had made a panel which I’ll mount the transponder on. This panel screws to nutplates in two longerons behind the baggage compartment. I removed the panel and match drilled holes for the transponder bracket. I secured the bracket to the panel with #8 screws, then installed the panel in the plane with four #8 screws. I checked the plug which I had made up seems like many years ago to be sure the power and ground pins were in the correct holes, then plugged in the cable and also screwed on the antenna connection. I started up the Dynon—it found the transponder and I configured it in just a few minutes. Next, I installed the rear baggage shelf and the panel that seals off the rear of the fuselage. I installed the rear seat, rear stick, vent housing and seat cushions. I believe the plane is ready to be weighed. I borrowed some race-car scales from a good friend. He had ramps already built to match the height of the scales, so I won’t have to build up anything. Other than leveling the plane, should be an easy task. So, tomorrow will be the big weigh-in event!
|
|
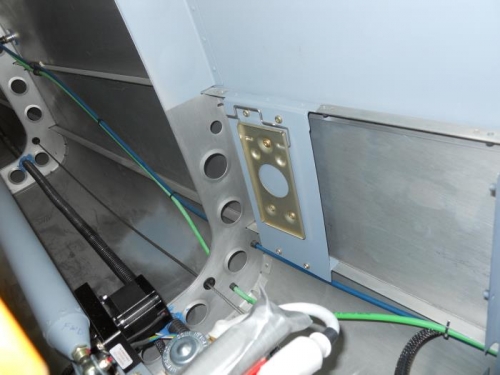
Mount for transponder
|
|
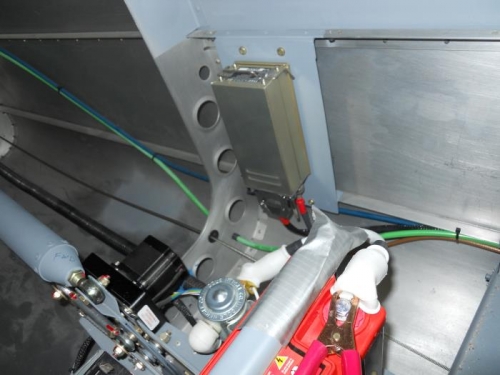
SV261 Transponder installed
|
|
|
|
|
|
|
|
|
Copyright © 2001-2025 Matronics. All Rights Reserved.
|