
|

|
|
|
Jims Web Site
|
Date: 2-19-2010
|
Number of Hours: 3.50
|
Manual Reference: 6ZU4
|
Brief Description: Installed aileron stop
|
|
The aileron stop support cannot be completely installed until the wings are installed, and the control cables hooked up. However, it would be difficult to drill the holes at that time, since much of the closeout work would have been completed. It was decided to drill the mounting holes, install such rivets as possible, and cleo the remainder in place, so it can be trimmed to the correct size when the control cables are in place.
1. Marked rivet locations to rivet control stop (6ZU4-1) to mount on stop support (6ZU4-2).
2. Center punched and drilled with #40 bit.
3. Clamped stop to support, and back drilled with #40 bit. Clecoed.
4. Opened holes just drilled with #20 bit for A5 rivets.
5. Drilled out center five rivets at floor mounting location of rivet stop support.
6. Marked center line on stop support.
7. Positioned on floor, under stiffner.
8. Clecoed stop to support.
9. Determined area to be riveted on stop to existing structure.
10. Marked, center punched rivet locations on stop.
11. Drilled with #40 bit.
12. Reclecoed to stop supprt, and clamped to exiting structure.
13. Back drilled stop to existing structure with #40 bit.
14. Removed stop and support.
15. Cut two "L" angles to stiffen exiting support.
16. Clamped "L"s to support.
17. Back drilled "L" through support.
18. Using hole in "L"s, located rivets to fasten same to existing structure.
19. Center punched, and drilled with #40 bit.
20. Positioned "L"s on front of existing structure, Clecoed to existing hole, aligned and clamped.
21. Back drilled all but bottom hole with #40 bit, and clecoed.
22. Opened holes with #30 bit, except mounting hole for aileron stop.
23. Clecoed.
24. Reinstalled stop support.
25. Back drilled stop to floor with #20 bit and clecoed.
26. Reinstalled stop, and clecoed.
27. Back drilled stop to existing structure with #20 bit for A5 rivets.
28. Removed parts, cleaned, deburred, and primed mating surfaces with zinc chromate primer.
29. Reinstalled "L" angles, and riveted all but stop mounting hol
|
|
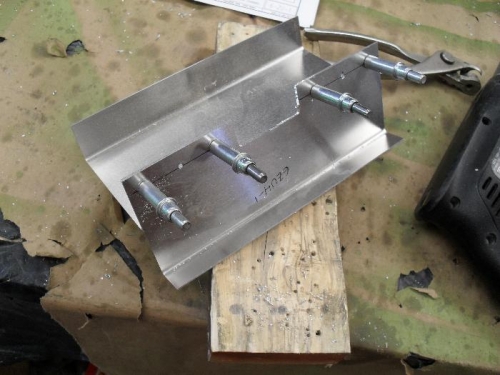
Stop support clecoed to stop
|
|
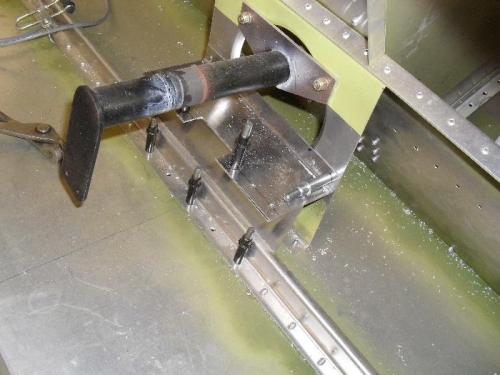
stop support and stop in place
|
|
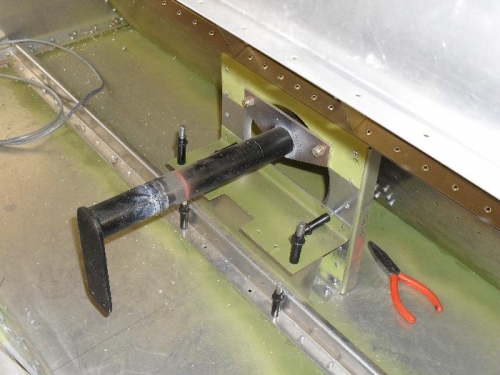
stop support, stop, and stiffners in place
|
|
|
|
|
|
|
|
|
Copyright © 2001-2024 Matronics. All Rights Reserved.
|