
|

|
|
|
Jims Web Site
|
Date: 3-5-2012
|
Number of Hours: 2.10
|
Manual Reference: (none)
|
Brief Description: Installed alternator & tachometer drive assembly
|
|
After careful evaluation, I decided to use the Plane Power EX14-50 alternator. It has an internal regulator, and has a mating gear available which is much less expensive than Continental's. Although available only for experimental aicraft, it appears to be based on the STC'd unit available from the same company.
All work was done in accordance with the EX14-50 installation inscrutions supplied by Plane Power, and page 2-21 of the Continental IPB.
1. Installed gear ER14-GR on the end of the alternator shaft.
2. Torqued to 180 inch pounds, per Plane Power instrructions, and installed cotter pin.
2. Slipped gasket on mounting bolts. Gasket is shared by the tach drive.
3. Slipped alternator into place, rocking it until the gears meshed.
4. Installed mounting nuts and washers on alternator.
5. Torqued nuts to 200 inch pounds, per Plane Power instructions.
6. Cut alternator electrical cable to length, and lugged with #4 lug.
7. Installed cable on alternator, and torqued 50 inch pounds, per Plane Power instructions
8. Connected control cable to alternator, and routed the red wire , which will go to the circuit breaker, to the interior of the aircraft.
9. Cut the white wire, which would drive an alternator failure lamp, and capped the end. The voltage and current gauges already installed perform the same task, and provide additional information.
10. Slipped the tachomter drive into position, and installed using appropriate washers and nuts.
11. Torqued per Continental service limits table.
|
|
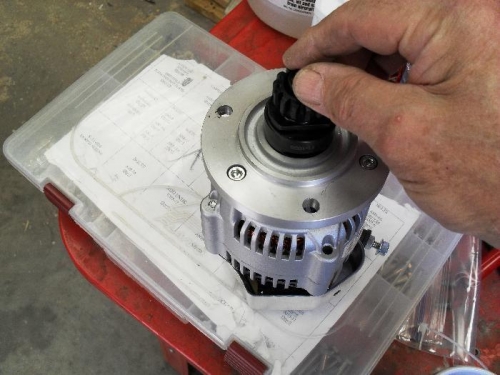
Installing 11-1002 nut
|
|
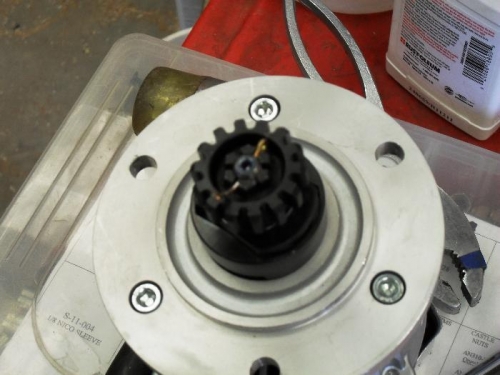
Assembly complete and cotter pinned
|
|
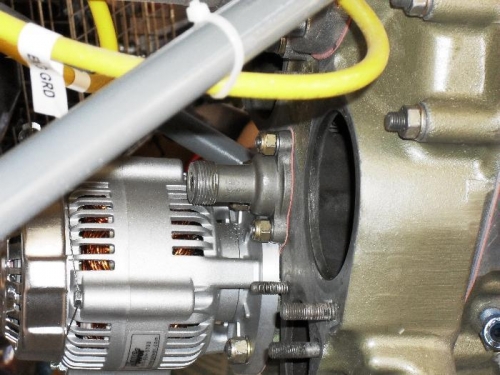
Alternator installed
|
|
|
|
|
|
|
|
|
Copyright © 2001-2024 Matronics. All Rights Reserved.
|