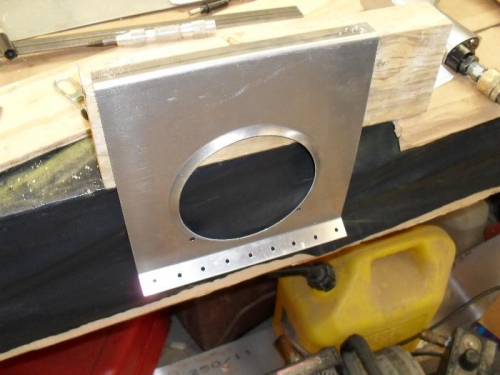
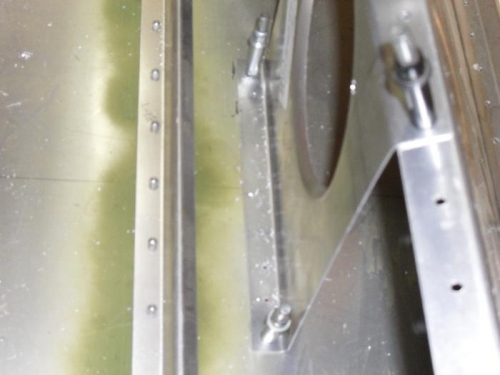
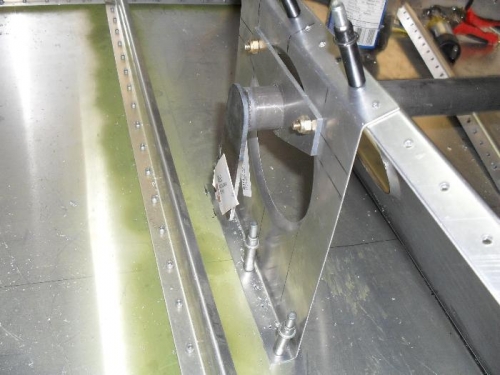
1. Fit checked 6B17-1. 2. Marked rivet line in bottom flange, and located end rivets. 3. Punched and drilled end rivets with #40 bit. 4. Using a rivet fan, marked intermediate rivets to pitch 20mm. 5. Punched and drilled intermediate rivets with #40 bit. 6. Removed 6B5-1 and associated stiffnersfrom aircraft. 7. Positioned 6B17-1 atop 6B5-1; clamped in place. 8. Back drilled exiting #20 holes into 6B17-1. 9. Marked location of 6B17-3, rear torque tube bearing on 6B17-1. 10. Back drilled 3/16 holes into 6B17-1. 11. Replaced 6B5-1 in aircraft, and associated stiffners. 12. Positioned bottom of 6B17-1 on aircraft floor, checking for 90 degrees between part and floor. 13. Back drilled #40 holes into aircraft floor through 6B17-1. 14. Clecoed in place. 12. Temporarily mounted 6B17-3 on 6B17-1 wtih two AN3-4A bolts and associated locak nuts.