This morning I realized that for some reason I thought yesterday was Friday, and I would have to wait until Tuesday due the holiday on Monday to sort out my fuel level sender. Well since it is Friday today and Van’s is open for business I gave them a call. Based on me telling them what the contact area looked like we think some resin from the solder process was on there. Van’s suggested trying to clean it up with gas or acetone. I did not want to use acetone since there is a lot of plastic on the area so I used white camp fuel. It took off the residue so I hooked up the sender to the fuel gauge and all worked fine. I called Dynon about the roll servo bracket holes as well and they are sending me a new one. With that out of the way I got to work.
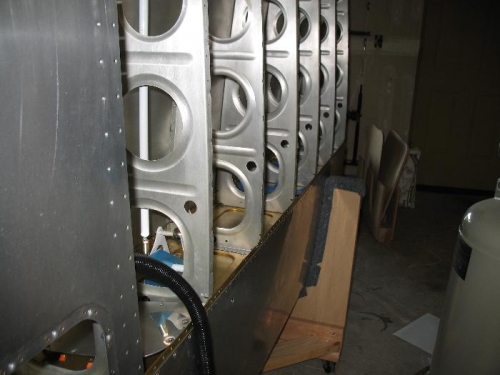
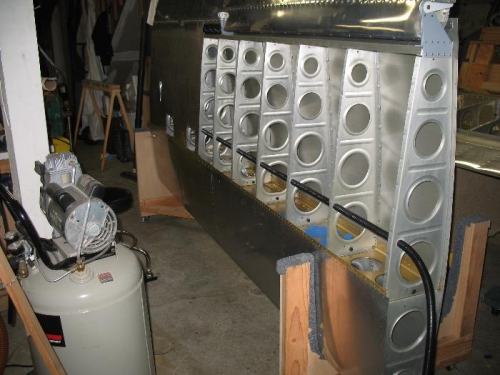
I moved on to something I have been putting off which is the conduit for the wing electrical wiring. I finally decided to use the Van’s corrugated stuff; you just can’t beat the light weight of the stuff. I had some long extensions so drilling the holes in the wing ribs was very easy. The difficult part was installing the conduit. The outside diameter of the conduit is larger than ¾” but the valleys are, this makes for a nice snug immovable installation. However with the QB wing I had a heck of t time getting it though the 3 inboard ribs due to the tight spacing and the face the bottom skin is on over these ribs. The other areas I could pull both ends of the tube, thereby making the tube smaller and easily pull it though the hole. The inboard ribs are so closely spaced that I could not do this. I think for the left wing I will make these holes slightly larger than ¾” so I can pull the conduit through more easily, then use some RTV to keep the conduit from moving.
I started basically in the middle right where the inboard bottom skin starts. It took me an hour to install the inboard end of the conduit with much cursing; it only took a half hour to complete the outboard end. I still need to RTV the conduit to the ribs just to prevent any chaffing due t