I have created a separate category for the installation of the Dynon autopilot pitch servo since it may help others. Dynon made the brackets based on the older non matched hole kits. In those kits the bell crank brackets were riveted to the baggage floor ribs, the Dynon brackets are substitutes for those brackets. In the newer kits the bell crank mount is formed into the baggage floor rib so that it is all one piece (see Photo 1 and 2). There is some work involved to get the Dynon bracket to work with the new kits. This write up will illustrate how I accomplished the task there may be other ways but I hope my explanation helps.
My plan of attack is to fit the Dynon brackets so that they will nest into the existing bell crank mounts. First I cut the forward end of the brackets since the length interfered with the rivets that hold a support bracket that goes between the two floor ribs. You can see this support and the rivets in Photo 3. This photo was taken after I had already match drilled the brackets to the ribs.
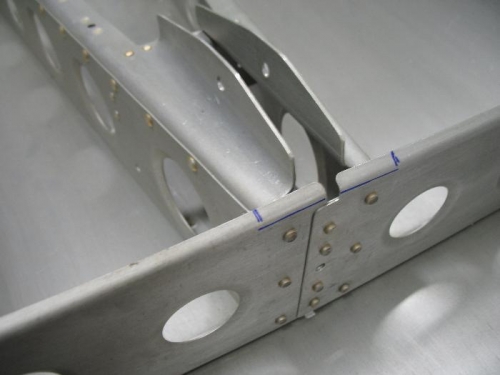
The aft end of the Dynon brackets will extend past the F808 bulkhead. The bulkhead is higher than the level that the bracket will sit so I had to trim some of the F808 Bulkhead away. You can see the pen marks in Photo 2 that outlines the area to be removed. Before I did this I called Van’s to get there thoughts on doing this and they felt there should not be any issues with this but with the caveat with the fact that they have not seen the Dynon servo brackets before. I feel totally confident that this will in no way weaken the structure but each builder must make their own decisions. Continued on next log entry.......
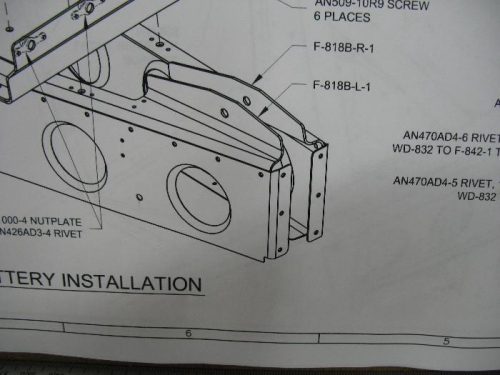
Blueprint of formed rib/bracket
Note bell crank bracket formed into floor ribs. You can see area I had to cut out to fit brackets
Note support rib rivets on left side of photo, left is forward.