
|

|
|
|
Mikes Web Site
|
Date: 12-28-2015
|
Number of Hours: 6.00
|
Manual Reference:
|
Brief Description: Horizontal Stabilizer
|
|
On to the next piece! First I laid all the parts out, checked them off against the list at the beginning of the chapter. Then all pieces were cleocoed together to verify correct fit, which is good since I had two different pieces backwards! It's hard to tell from the manual which longeron is left and which is right, but all the parts will only go one way so... after a few tries every thing went together very well. This time my son who is home from college for Christmas break was my helper. As I pulled out the temporay clecoes, he followed me with the rivet gun, pulling all the parts together in a tight and compact package. I have found the best approach for me is to clecoe everything together, verify fit, then dissassemble while marking which seams go together. I'll then remove the ID tags, write the number with a Sharpee in place that won't get painted over, then treat all joints with the supplied black ICP paint, then reassemble with clecoes, verify, then rivet for final form. Next, I paint entire frame with green zinc-phosphate, then clecoe all skins on, then rivet skins for final closure... works well so far, probably overkill on anti-corrision but seems like a great return for a minimal investment. Best advice? Take the time to clecoe every hole when placing skins, it really helps the holes line up as intended. Also, the references to right and left are from the airplane's perspective, as if you are sitting in the pilot's seat...
More rivets, more partners, more memories....
|
|
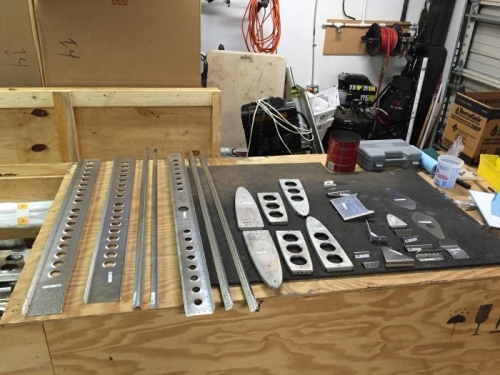
Parts layout
|
|
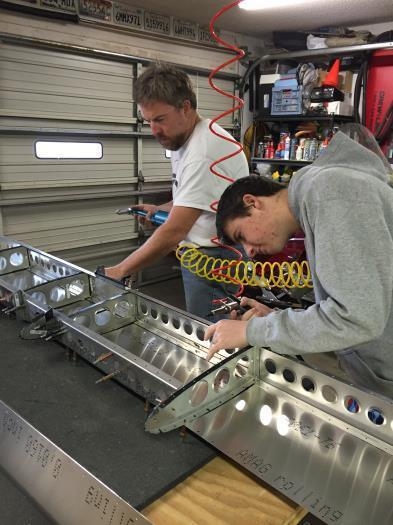
Assembly
|
|
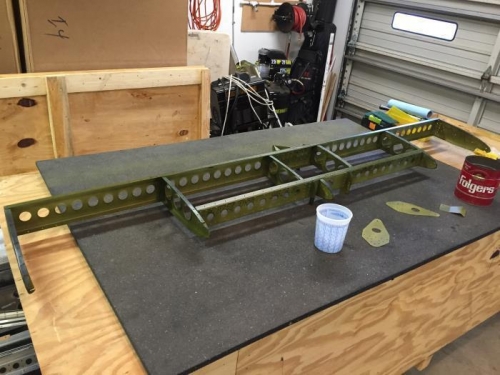
Ready to cover
|
|
|
|
|
|
|
|
|
Copyright © 2001-2024 Matronics. All Rights Reserved.
|