Brief Description: Painting an aileron and a flap - first final paint
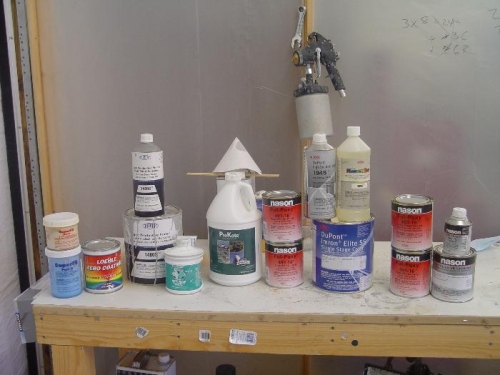
I was unable to get the primer I had orginally planned to use (Dupont 1380S). According to the charts it seemed to be a good selection with some filling properties. Then it occurred to me that I really didn't need any fill on the aluminum. In fact, I didn't want to sand at all. So I decided to use the Dupong nason Ful-Poxy for all my priming. It is a 2 part epoxy gray primer. It's thin and only needs sanding if cured over 24 hours for adhesion of next coat.
So the plan for the aluminum is, within a 24 hour period: 1) wash it - Tide-free detergent 2) PreKote - has to be easierthan etch and alodine. No toxicity 3) nason primer - singlel coat 4) Imron Elite single stage - single cross coat All done - no sanding, no polishing
So, I started with an aileron and a flap. The easiest way to rig for paint would be to hang them vertically. But painting this thick stuff in a single coat can be challenging in terms of runs. Shooting horizontally makes it so you can just lay it on thick. If fact, that's the trick to completely eliminating orange peel. I expect to get some orange peel (I notice most new cars have a bit of it) but expect a relatively smooth finish and high gloss.
Built jigs to hold the pieces horizontally and a strap to enable flipping the large flap during the spray session
The complete product line
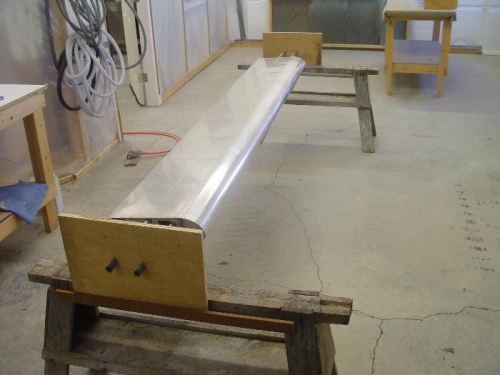
Flap in jig using 1/2" conduit
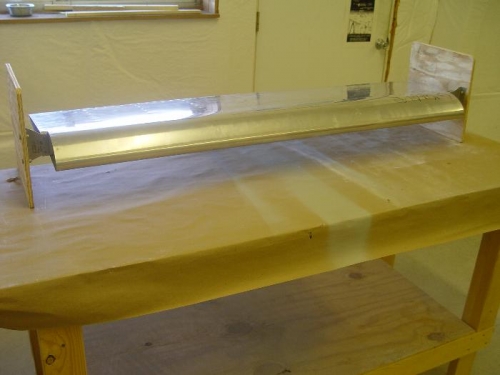
ailron in jig with simple brackets cleco'd in place