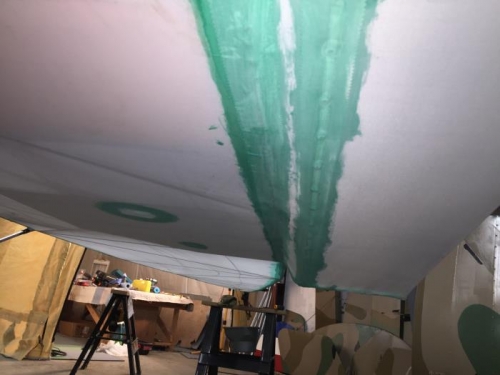
Brief Description: Rivet Stitched Bottom of Left Wing Stub
Ironed the left wing stub at 250 degrees with the large iron over the top and front of the structure. Taped up the bottom wing rib and using a soldering iron melted each of the rivet holes. Install a large headed pop rivet in each of the rib stitch holes. Added two inch tape over the line of rivets and glued in place. Added a second tape along the fuselage seam to the end of the wing stub. The tape will be continued to the rudder post at a later time. Used the soldering iron to melt out a opening over the position light plug and removed the material over the left aileron pulley. Added a doublers patch over the beacon light mounting and the VHF antenna mount area.
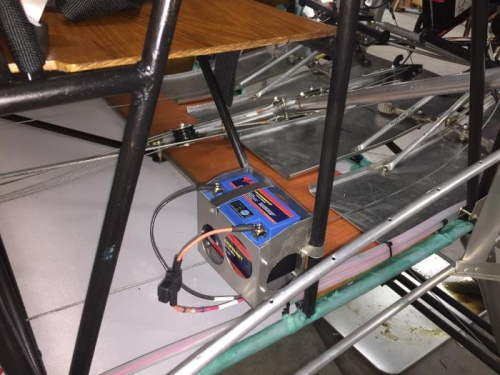
Removed the battery box temporarily and drilled lighting holes in all sides and bottom. Installed the battery box back under the seat on the right side and secured it with two 1/8 inch pop rivets. Placed two spacer pads in the bottom of the box to bring the battery up to near the top of the battery box. Sanded down the front of the sides to provide better clearance for the wires. Cut a 5/8 inch slit in the back of the box 1/3 in from the left side. Installed a #6 clip nut on the front of the battery box in line with the slot in the back. Fabricated a strap to fit into the slot and be bolted to the clip nut. Installed a crimp terminal on the ground wire at the same length as the positive wire and secured it with a heat shrink tube. Screwed the battery wires in place on the battery starting with the ground wire and then the positive wire.