Brief Description: Finished Center Wing Section Installed Access Hole
Used the soldering iron to melt the center from the lift inside access hole. Check the alignment of the strut that is to fit at that location. Marked the penetration point of the strut on the fabric. Sighted the drag cable and marked it penetration point on the fabric. Cut a L shaped patch which will cover both penetration points and glued it in place. Left it to dry.
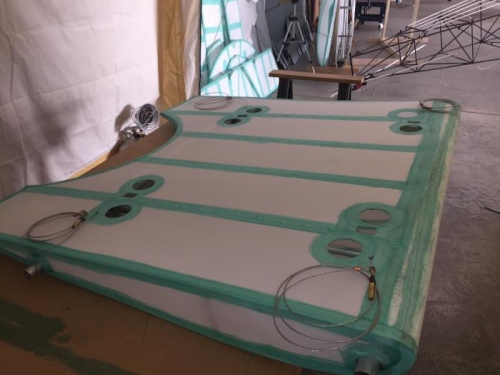
Positioned the right access ring 2 1/4 inches from the wing rib. Glued it in place. Marked the area around the ring where the cover patch will lay. Applied glue over the marked area and laid a patch centered over the ring. Glued the patch in place and wiped the excess glue from the patch with a shop towel.
Rechecked the position of the left front strut on the fabric and marked a square access area for the strut to pass through. Melted a 1/2 inch hole at the marked point for the drag cable to penetrate the fabric. Pulled the cables through the access hole and sorted them out leaving the aft cable lying in the access hole. Routed the front cable through the penetration point and rolled the cable and secured it together. Melted the square hole in the fabric for the front strut and check it for fit. Positioned the outer access ring so it is clear of the penetration points of the strut and drag cable and glued it in place. Glued a patch over the ring and wiped the access glue with a shop towel.
Repeated the process of installing the access holes, penetration points and strut access for the other three locations on the bottom of the center wing section.
This finished the center wing section covering. The next step is the priming paint.