Brief Description: Prep of Lower Right Wing for Covering
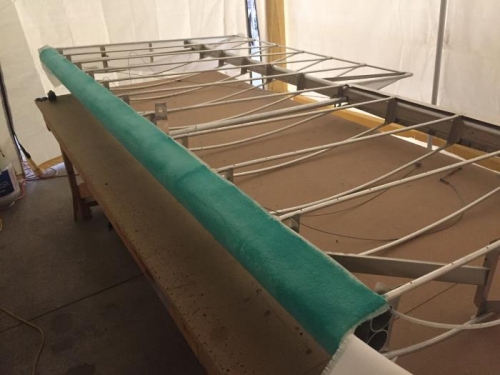
Turned the wing over on the work table and marked the bottom ribs every 4 inches, Drilled a 1/8 inch hole at each mark for the pop rivet stitching of the fabric. Used a shop towel with acetone to clean all of the marks from the bottom of the wing. Turned the wing back over so the top side is up on the table. Sprayed the leading edge with contact cement. Applied a strip of felt over the leading edge smoothing it down into the cement. Trimmed the excess felt from the end of the leading edge and set the material aside. Turned the wing over and applied a layer of contact cement along the bottom of the leading edge. Smoothed the felt over the bottom part of the leading edge. Again turned the wing over so the top side is up. Applied a layer of glue to the leading edge felt. Turned the wing over and applied glue to the bottom of the leading edge of the wing. Applied a light coat of glue around the outside of the wing.
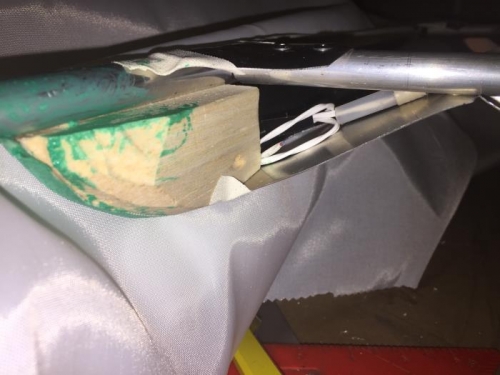
Installed the wiring for the wing tip light by threading it through the wire guide from the lower front spar to the light bracket. Coiled up the wire at the wing tip and taped it together then stored it within the wing tip bracket.
Applied a small piece of material to the edge of the wing next to the aileron. Set it in place with the small iron and trimmed away the excess material. Pulled a layer of fabric over the bottom of the wing and measured the material to cover the end of the wing. Cut this length of material from the roll and tacked it in place. Checked the fabric covering the bottom of the wing and cut it to fit. End of day.