Brief Description: Control Cable Paths Through the Horizontal Stabili
Ironed the top left aileron at 350 degrees with the large iron on both sides. Set it aside as completed.
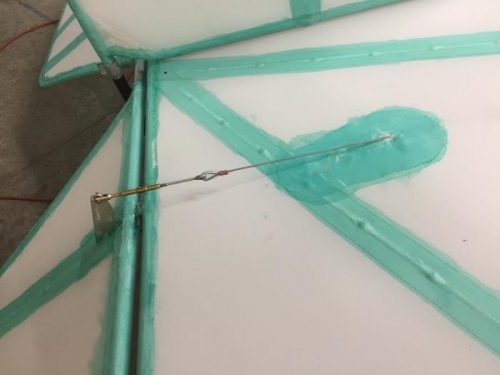
Connected the right elevator cable to the end of a fiberglass rod with electrical tape. Pulled the cable through the horizontal stabilizer at the cut points and connected it to the stabilizer. Used the soldering iron to melt the fabric clear of the cable at the top and bottom. Cut a patch to fit over the top of the stabilizer where the cable penetrated the fabric. Fitted the patch over the control cable and marked its outline on the fabric. Applied glue to the outline and then glued the patch in place. Wiped the excess glue from the patch with a shop towel.
Repeated the process for the left side control cable.
Mounted the rudder on the post and lined up the control cable routing for the right side of the rudder. Used the fiberglass rod to estimate the penetration points of the cable. Cut slits at these points and treaded the control rod through the horizontal stabilizer. Taped the control cable to the end of the rod and pulled it back to connect to the rudder horn. Enlarged the slits to clear the control cable on both the top and bottom of the stabilizer.
Repeated the process for the left side of the rudder. End of day.