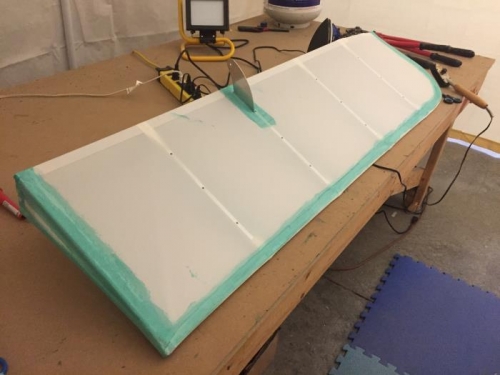
Ironed the bottom fabric at 250 degrees. Applied tape to the right edge of the aileron. Applied a line of glue centered along the front of the aileron. Lightly applied a 1/2 inch line of glue along the trailing edge of the bottom of the aileron. Laid the top fabric alone the glue line and secured it in place with the small iron. Put the aileron into the sawhorse with the trailing edge down. Pulled the top fabric tight and marked the lines for horn and top aileron attachment point. Cut slits at each marked location and secured the fabric along the front of the aileron. Rechecked the tension of the top fabric and reset the fabric as necessary for a smooth finish. Trimmed the right side of the top fabric to 3/4 inch beyond the end of the aileron. Secured the right end with the small iron. Worked the left end of the aileron's fabric around the curve with the small iron carefully shrinking excess fabric to the curve. Trimmed the excess fabric from the curve and smooth the edge with the small iron. Measured the right side of the aileron and cut a tape to length. Marked the center line on the tape and glued it to the right edge.
Cut a segment of tape to fit over the horn and attachment point on the top of the aileron. Marked the area around the tape and applied glue to the marked area. Laid the tape over the glued area and applied glue over the tape. Wiped away the excess with a shop towel. Ironed the top fabric at 250 degrees with the large iron. Applied the 1/2 inch fiber tape to each rib over the stitch holes. Used the soldering iron to melt the stitch holes clear. Installed a pop rivet in each of the stitch holes on the aileron top. Applied a tape over each of the four ribs covering the pop rivets. Turned the aileron over to the bottom and applied fiber tape over each rib. Melted each stitch hole clear with the soldering iron.
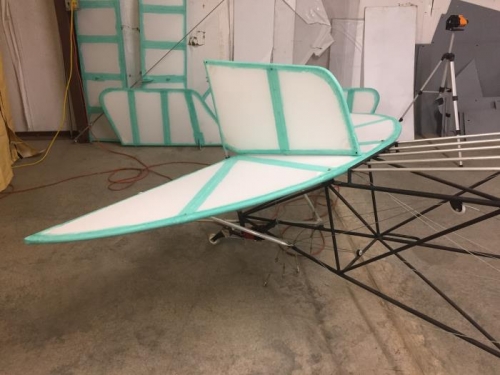
Mounted the horizontal stabilizer on the fuselage. Placed the vertical stabilizer on the fuselage. This is in preparation to determine the control cable paths th