Brief Description: Continuing Covering of Lower Right Aileron
Laid out fabric for the top of the aileron and marked its dimensions. Used the pinking shears and cut the fabric as marked. Applied a line of glue around the bottom fabric along the frame. Turned the aileron over and ironed the fabric around the frame again for a tight fit. Laid the fabric out on the table and placed the aileron on top with the top side down. Laid the trailing edge over the glued area and ironed it in place. Turned the aileron top up and creased the fabric where the aileron horn and hinge would come through the fabric. Marked the crease at the beginning and ending points for the hinge and horn. Cut slits for the horn and hinge. Pulled the fabric tight over the front of the aileron and marked the cut line along the front. Cut the excess fabric from the front and set it aside. Carefully pulled the fabric tight and ironed it in place along the front of the aileron. Ironed the edges to ensure a secure bonding. Ironed the top side of the aileron at 250 degrees starting in the middle and moving back and forth across the aileron.
Cut a reinforcing tape for the top aileron horn and hinge. Folded the tape in half and marked the center line. Laid out the tape and marked the locations for the horn and hinge slits. Cut the slits and did a test fitting. Adjusted the cuts and marked the outline of the tape on the fabric. Applied glue to the outline and then placed the tape over the glued area. Applied glue to the tape and then wiped the excess with a shop towel.
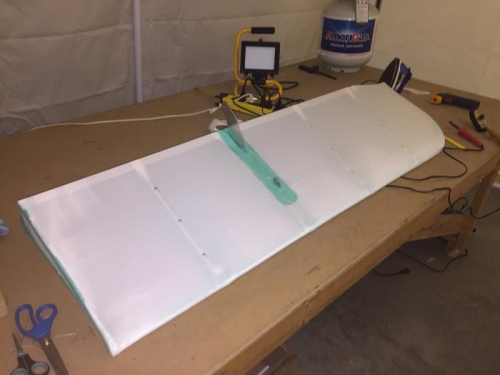
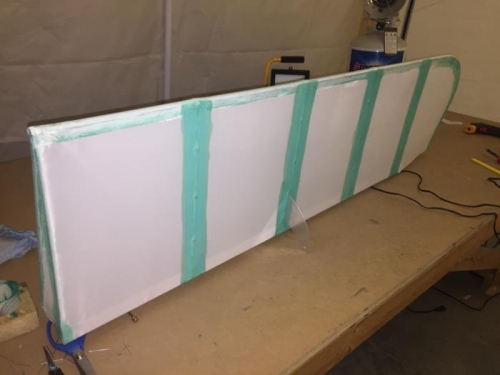
Turned the aileron to the back side and applied fiber tape to each set of stitch holes on the four ribs of the aileron. Using the soldering iron melted each of the stitch holes open on the back of the aileron. Applied a pop rivet to each of the holes. Marked the tape line over the rivets. Cut a length of tape to cover each rivet line. Glued the tape over each rivet line and wiped the excess glue with a shop towel.
Turned the aileron back to the top side and applied fiber tape to each rib line. Melted each stitch hole